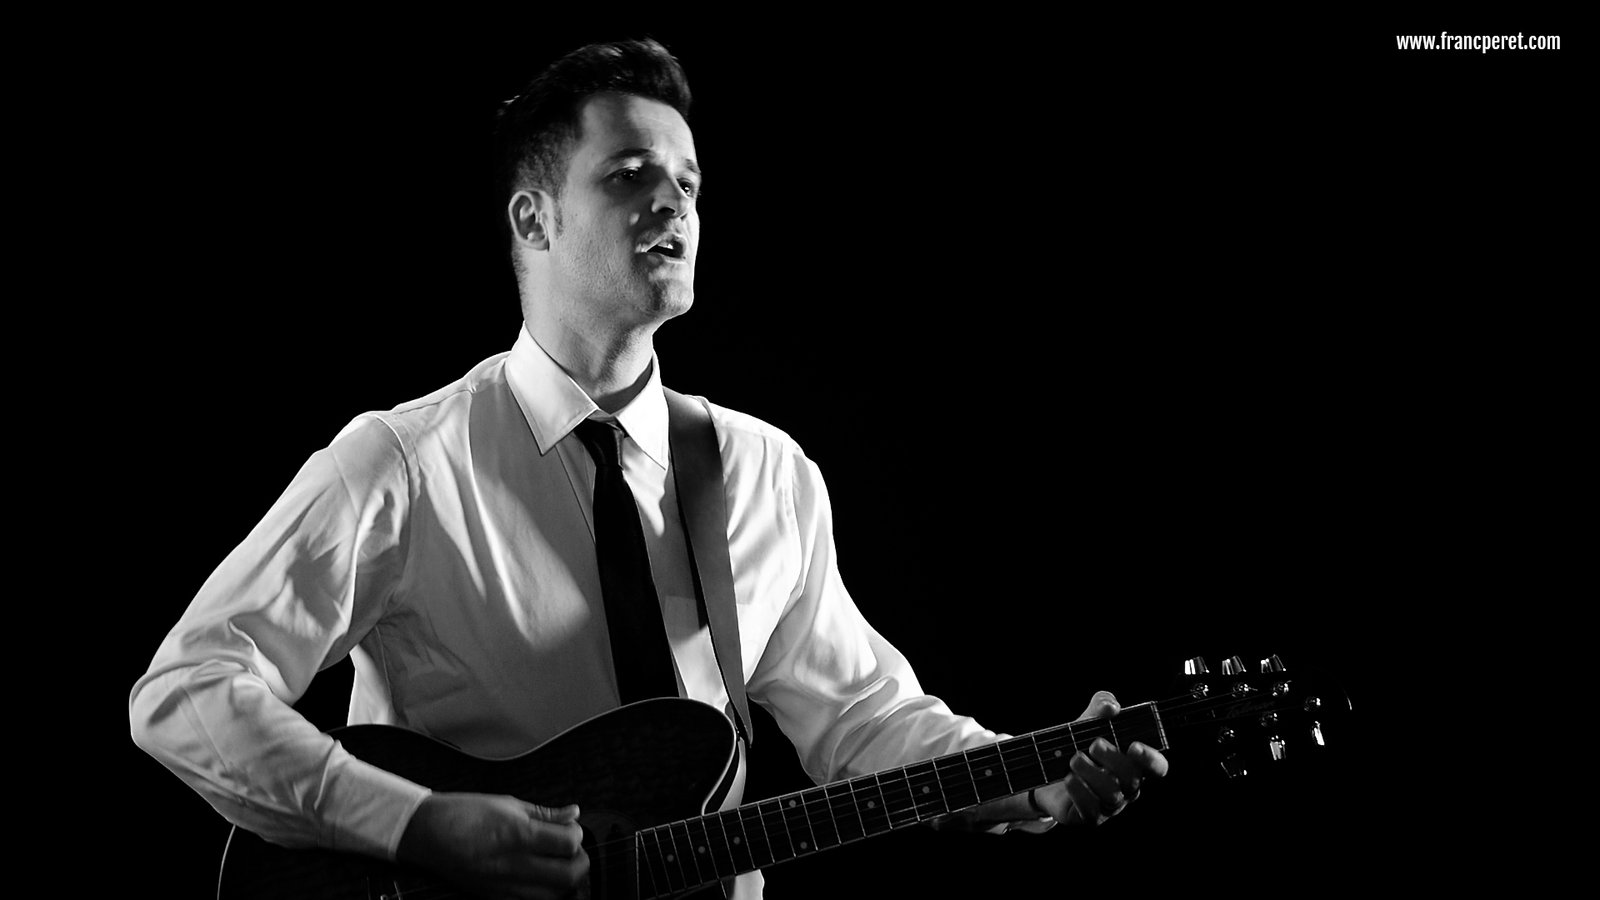
This is the first music video ever done in Bretagne (Brittany) with a French singer (Dantes), singing his own song in Chinese.
By Franc Peret
Singer: Dantes 戴亮
Song: J’aime la Bretagne (I love Brittany) 我爱布列塔尼 – WO AI BULIETANI.
Music: Inophis
Video Production: Franc Peret (Directing, shooting, Editing)
Camera: JVC LS-300 + Panasonic G85 + Panasonic GH4. Shot on 4K with Lumix and Voigtlander (17.5 mm f/0.95 + 25 mm f/0.95) lenses.
Edited by Premiere CC.
Shot in May 2016 and edited in June/July 2016.
School BoatBird’s IslandBretagne TraditionDantes and Dancing troupHarborInophis and DantesWild flowersTimelapsFishermen harborLively traditionSailing
Here are the 10 most asked question for shooting fireworks, and I am answering to all of them!
By Franc Peret
During my Essential Photography course, which duration is only 25 hours, I cannot cover every aspect of photography in detail.
Light and Colors
However, anytime, I am having specific question from a student, I do take the time to explain the in and out of any special use of the camera.
Nikon D750 = Manual Mode = ISO400 1/3s -0.3 EV with 35 mm f/1.4 @ f/5.6Panasonic GM5 = Manual Mode = ISO200 0.6 s + 25 mm f/1.4 @ f/2.5
One of the topic that often come to the discussion is firework. And it is easy to understand its attraction to photography students.
3 Good reasons to give it a try
First, for a person dedicated to light and colors, a firework show is just magnificent to watch.
Second, This is happening at night, when most of the time people do not take their camera out and this is a very special experience to try.
Third, this subject seems very challenging to shoot as the illumination, which is hard to anticipate, does not last long.
Overall, there is plenty of reasons to give it a try for a photographer, but how to make it a successful experience?
Here are the most often asked question, answered with my tips and the way I am dealing with this subject.
1 – Do I need a tripod?
Yes and no. Tripod can be useful if you are shooting the firework AND the environment (such as a enlighten city landscape). Then, it is important to keep the camera steady as you want to get the background sharp as well.
However, if the main source of light of the location is the firework itself, you can shoot handheld, even with a long pose, as the explosion behave like a flash and the environment is going to be light up only a very short fraction of second and not during your complete shutter time.
2 – Do I need to shoot in manual mode?
If you get a bright background, It is possible to shoot in semi-auto mode (Aperture priority) with some exposure compensation to force the image to get darker(such as -2 or so), however I personally use manual mode, playing around the Aperture and the shutter speed to grab all the color of the firework and to create some special effect with long pause.
3 – Do I need a fast lens?
You do not need a lens with a big Aperture (such as f/1.8 or so) as you are shooting a very bright source of light and by using a wide Aperture, you will take the risk to overexpose the image and therefore, you will get no colors to see. Most of the time, my lens is set to f/4 or f/8 which is a good news as any average zoom will get that Aperture.
4 – Do I need a fast Shutter speed?
All depends what you want to achieve, Get a very sharp view of the explosion or to give time to the fire and colors to spread around to fill up more of the sky. Best is to constantly play around with shutter speed from 1/30s to more than 3s.
Nikon D750 = Manual Mode = ISO200 1/5s -0.3 EV with 35 mm f/1.4 @ f/8
5 – Do I need to increase the ISO a lot?
Best is to keep the ISO low as raising it will bring more noise to the shot, especially in the dark part of the shot (the sky). Also, a higher ISO means less details, less dynamic range and less colors. I usually try to stay as low as ISO 200 or ISO 800.
6 – Do I need to be perfectly stable?
No, as firework is a very good subject to paint with light and by combining a long shutter pause with some camera shake, you can achieve very subliminal results.
7 – What lens should I use?
Best is to start with your usual zoom as one problem with firework is to know where exactly things are going to happen. By starting with the wide side of the zoom, you get more chance to grab the show and after you are more confident to guess where the following blow of light will occur, you can zoom in more and more to get some interesting close up.
8 – Should I use manual focus or auto-focus?
You cannot rely on your auto-focus if you point your camera straight to the sky as there is nothing to focus on.
Best, is to pick up something as near as possible to the explosion (such as a tree or a building) and to preset your focus there with auto-focus. You can lock this by half-pressing the shutter button while waiting for the explosion or you can switch your camera to manual mode.
If you do so, be very sure to NOT turn the focus ring after as your focus point will not be well preset anymore.
Some camera gets a back button you can use to force your camera to focus and lock it as soon as you stop to press this button. This feature can be useful here, as you need to preset your focus and keep it as is.
9 – When should I press the shutter button?
As often as possible, even you are seeing nothing coming yet. When the sound of the firework is coming to your hear or when your eyes are seeing the light, it is almost too late to shoot. You have to be ready, and listen to the starting explosion which is launching the rocket in the sky.
Also, by using a long pause (slow shutter speed), you get much more chance to grab something as your sensor is open to the show for a longer period of time.
Nikon D750 ISO200 1/5s -0.3 EV with 35 mm f/1.4 @ f/5.6
10 – Where should I position myself?
First try to be out of the crowd to not get pushed around. Second, find a higher position to not get other people head, hands or smartphone in your framing. Sometime, it is good to insert some viewers in the shot to give a sense of scale and to create an atmosphere, but for a first experiment, better to keep it simple…
I hope all of this was useful.
If you are having more questions or if you are in need of more explanation, drop me an email.
I am used to divide my Essential Photography course in three steps. First, providing essential technical knowledge. Second, explaining essential composition rules. Last but not least, developing student’s conceptual mind. Here is how it works. By Franc Peret
Taking successful pictures is both a simple task and a complicated one.
Simple, because the process involved is almost always the same and quit easy to explain and remember, step by step:
1 – Set the right exposure
2 – Focus on the subject.
3 – Be ready to grab the right moment (positioning or facial expression for example)
4 – Concentrate on your personal creative decision in term of framing, assembling elements (composition), and depth of field.
“Yammi” (Lumix G85 ISO 100 1/100s + 14-140 mm f/3.5-5.6 @ 17 mm f/4.5) Being patient and steady while waiting for the right moment to shoot help to become discreet and out of sight of the subject, even you are next to her.“Ice on lips” (Lumix G85 ISO 400 1/40s + 25mm f/1.4 @ f/1.4) Once the essential set up of the camera is done right, most important is to not miss the moment!
Not that simple
The fact that you often have to solve those 4 steps in less than a second is the complicated part of photography.
Getting the picture right, as often as possible, is possible with training…
More you are going to shoot, better the chance to make the right decision on time.
“Reflective street” (Lumix G85 ISO 100 1/80s -0.7 + 14-140 mm f/3.5-5.6 @ 14 mm f/8) Searching for interesting lighting and reflective surface is a good start to get out of routine.“Square everywhere” (Nikon D750 ISO 800 1/180s + 24-120 mm f/4 @ 120 mm f/4.8) Step by step you should switch from funny street snapshot to more personal subject and sophisticated composition
Developing a vision
Once you are used to get good results, you have to challenge yourself a little more to add meanings, drama, sparks or personality to your shots.
How to get this?
While pressing the shutter button, you should already get a clear concept in mind, a vision or a directive line to be able to bring together a meaningful series of shots to tell a complete story (journalistic approach) or to express a specific mood (“artistic” approach).
“Quiet Butterfly” (Lumix G85 ISO 200 1/400s + 14-140 mm f/3.5-5.6 @ 140 mm f/5.6) … While others needs quicker reaction before they are gone…“Lion Cloud”. (Nikon D750 ISO 100 1/80s +28 mm f/3.5 @ f/8) Some subjects allow several minutes to be detected and shot…
Fine tuning
This conceptual mind will also, later on, help you to process your image on computer in the right direction , the one you had initially chosen.
“Followed by her shadow” (Lumix G85 ISO 100 1/200s + 14-140 mm f/3.5-5.6 @ 14 mm f/6.7) Under such a hard source of light, he choice was obvious here, composing the shot with the subject and her shadow for a more 3D visual.“Like a mirror” (Lumix G85 ISO 100 1/200s + 14-140 mm f/3.5-5.6 @ 30 mm f/5.6) My little girl is already a little lady, looking at herself in any reflective surface. I was ready for this one!
Some camera brand (such as Olympus or Fujifilm), with great color science, are better than others to delivery very satisfying results out of the box (jpg file), but most of the time, you will be able to improve the result by working on raw files.
All depends on the final use of the picture, such as quick share on social network (jpg are enough) or print for exhibition (better to go raw).
“Electric Birds 2” (Lumix G85 ISO 200 1/1320s + 14-140 mm f/3.5-5.6 @ 14 mm f/6.7). This approach brings in more options and feed imagination but also challenge the original concept behind any creative choice. It is important to never go “too far” and the limit is a personal choice.“Electric Birds” (Lumix G85 ISO 200 1/160s + 14-140 mm f/3.5-5.6 @ 102 mm f/6.3). The exact same subject can be shot with so many different point of view and post treatment, such as vintage look or dramatic B&W.
No faking here!
“Electric Birds 3” (Lumix G85 ISO 200 1/400s + 14-140 mm f/3.5-5.6 @ 140 mm f/6.3) Later in the day, when the sky is all blue and the source of light is not behind the subject anymore, best is to keep it in color.
The aim of Post production (“Photoshoping”) is indispensable to extract the optimum “juice” out of your work:
To get back the details you had seen with your eyes that seems gone on the jpg, to reproduce the right colors, to emphasize some parts of the shot or to improve the visibility of important elements by fine tuning the exposure of your raw image.
Post processing extra value
Of course, processing on computer is time consuming, and a potential painful experience for novices, but it is a very useful way to progress and to keep progressing forever.
Processing the image is a way to think of and judge what you had done with each subject, to discover some mistakes or imprecision, some stuff you should had done better or different to get a better result or more options out of the box.
“Cat rest” (Lumix G85 ISO 200 1/1500s + 14-140 mm f/3.5-5.6 @ 177 mm f/6.3) When, the light is great and an interesting subject is there waiting for you to shoot, there is not much things to think about prior to press the trigger.
Lasting passion
It also helps to emphasize a conceptual approach of photography, the best way to never get bored of it.
I am shooting for a living since 1986 and I am still not tired of it.
“Pollen Hunt” (Lumix GM5 ISO200 1/1600s + 150mm f/2.8 @ f/4) Lens choice matters on some specific subject needing both speed and short minimal focus distance.“From the Past” (Lumix G85 ISO 100 1/800s + 14-140 mm f/3.5-5.6 @ 140 mm f/8) Longer lenses compress the perspective, extract details from the environment and keep lines straights.
More I know about photography, more I am excited about it, as I can measure the progress I still have to do to reach fulfillment.
Visual Samples
To illustrate my words, find here a series of personal shots (no job assignment here) with detailed captions on the three parts: essential settings, composition choices and conceptualization.
” Too young for her first ride” (Lumix G85 ISO 200 1/1000s + 14-140 mm f/3.5-5.6 @ 21 mm f/5.6) For most of the lively shots of kids, it is important to quickly find a point of view with the less disturbing background to keep viewer attention to the main action.“Blue Crown″ (Lumix G85 ISO 200 1/1640s + 14-140 mm f/3.5-5.6 @ 24 mm f/5.6) Color combination is a basic of composition to associate a subject to an interesting background.
I hope that all of this will be useful to my readers.
If you are having questions or if you are in need of explanation, do not hesitate to drop me an email!
“Ice on lips” (Lumix G85 ISO 400 1/40s + 25mm f/1.4 @ f/1.4) Once the essential set up of the camera is done right, most important is to not miss the moment!“Lion Cloud”. (Nikon D750 ISO 100 1/80s +28 mm f/3.5 @ f/8) Some subjects allow several minutes to be detected and shot…“Followed by her shadow” (Lumix G85 ISO 100 1/200s + 14-140 mm f/3.5-5.6 @ 14 mm f/6.7) Under such a hard source of light, he choice was obvious here, composing the shot with the subject and her shadow for a more 3D visual.“Electric Birds 2” (Lumix G85 ISO 200 1/1320s + 14-140 mm f/3.5-5.6 @ 14 mm f/6.7). This approach brings in more options and feed imagination but also challenge the original concept behind any creative choice. It is important to never go “too far” and the limit is a personal choice.“Electric Birds” (Lumix G85 ISO 200 1/160s + 14-140 mm f/3.5-5.6 @ 102 mm f/6.3). The exact same subject can be shot with so many different point of view and post treatment, such as vintage look or dramatic B&W.“From the Past” (Lumix G85 ISO 100 1/800s + 14-140 mm f/3.5-5.6 @ 140 mm f/8) Longer lenses compress the perspective, extract details from the environment and keep lines straights.“Reflective street” (Lumix G85 ISO 100 1/80s -0.7 + 14-140 mm f/3.5-5.6 @ 14 mm f/8) Searching for interesting lighting and reflective surface is a good start to get out of routine.
The concept of this workshop is to turn students into different characters, by building a scene with a certain mood, posture, and situation. Then, we take a shot which looks like a frame extracted from a movie.
By Franc Peret and his Advanced Students
The mood is created by the location, the actor’s position, and facial expression, the props (accessories) but most importantly by the lighting which is a key feature in term of storytelling.
“The Serial Killer” / Lighting and scene set up: Franc / Concept: Dean , Franc and Fabrice / Model: Fabrice, Nils and Qiong / Shot: Franc with Sony A7M2 + Nikon AI AUTO 50 mm F/1.4 (old Manual focus lens)
Sometimes complex, sometimes simpler, the set up is dedicated to the story and often involve 4 lights: Key, Kick (or hair), Background and Ambiance (or eyes) light.
“The Serial Killer ” Extrem Close up and head chopped off to hide the identity of the madman.“The Serial Killer” (Close Up): 5600K Key light with some red gel + kick light + ambient light + eyes light.
Accessories, if well balanced, can complete the illusion, as well as makeup, costume, and hairstyle.
“Flower power…” Lighting Set up: Yellow key light, Ambient light with red gel, white kick light.
I am used to setting challenging lighting for filmmaking and It is much more interesting to work on this type of project in an average location (Apartment Hotel) than to do modeling or beauty shot in an immaculate and dedicated (and somehow boring) photography studio.
“Nouvelle Vague” Lighting: Franc / Concept and scene set up: Nils, Qiong, Fabrice and Franc / Model: Fabrice and Nils / Shot: Franc with Sony A7M2 + Nikon AI AUTO 50 mm F/1.4“Nouvelle Vague” light set up: 2 opposite key lights and a bit of ambient light.
None of those pictures would ever exist without the character (acting) and the lighting.
The photographer is the least important part of the equation. None of those shots belong to the person who had pressed the shutter button.
“Lonely Beauty after the party” Lighting Set up and Concept: Franc / Model: Novita / Shot: Monja with Canon 5D IV and 50 mm f/1.4
Forgetting to mention the teamwork in the credit of the photography would be completely dishonest from the photographer.
“Hitchcock movie’s character” Lighting Set up and Concept: Franc / Model: Monja / Shot: Franc with Panasonic Lumix G85 and Leica 25mm f/1.4
Every shot has to be linked to a team of an Art director (concept), actor, Director of photography (light) and Photographer…
“1950’s James Bond Girl from the North” Lighting Set up: Franc / Concept and Model: Magdalena / Shot through a curtain: Franc with Panasonic Lumix G85 and 42.5mm f/1.7
Filmmaking is a very important addition to anyone Photography experience, as working alone is not helping much personal improvement, while shooting a movie is a teamwork of added values and there is always so much to learn from others…
Franc Peret
MAKING OF SHOTS:
Novita performing in front of Monja, Magdalena and Kerstin.Monja’s concentration through her Canon 5D Mark IV viewfinder. Shot by Franc with a Panasonic G85 and Leica 25mm f/1.4
Shots with my advanced students: Dean, Fabrice, Nils, Qiong, Matteo, Jonathan, Monja, Kerstin, Novita and Magdalena.
Magdalena pointing her Canon 5D MarkIV toward a 1920’s character performed by Kerstin. Lighting and Concept: Franc / Model: Kerstin / Shot by Franc with a Panasonic G85 and a Leica 25mm f/1.4.
Which course to choose? Advanced or Essential class?
I am often receiving this question when time comes to enroll to one of my photography program. Here is the answer.
Franc Peret
I am offering 2 different Photography courses: Advanced and Essential and despite the detailed description on my website, it can be difficult to choose.
Essential vs Advanced
To make it simple, the Essential Class is what it is: “Essential”.
Everything you should know, think about and do, to get better pictures, a higher success rate (to capture the moment) and very pleasing result (technically and artistically).
Everyone should consider Essential
This class is the best value for money as everything you are learning there will be immediately useful in any kind of situation you can meet daily in the street, during an event or a trip. It covers essential photography in portrait, landscape, sports, macro, night shooting… analyzing the difficulties in those practice and offering a very efficient and practical “what to do” case by case solution.
It is a down to earth class adapted to both complete beginners and people with experience who knows things here or there but who cannot yet connect everything in a logical understanding and order.
Experimental and conceptual
The Advanced class is something very different.
This program is a series of workshops for you to discover how far you can go with your camera.
Also, more important, this experience will help you to understand that what is happening (what you organize and set) in front of the lens is finally much more important than the camera itself.
Pushing Boundaries
Somehow it teach you how to become a director/art director/orchestra conductor handling an overall project and not simply a photographer trying to grab a picture.
It is more oriented toward personal creativity, using the camera in many unusual ways: very higher shutter speed, very long pose, shooting several shot from same position, post processing for special effects and so on.
Take it all!
Somehow, to get a complete overview about photography, you should take both lessons, but I would say, the essential class is the most useful one if you are a street photographer type of person, somebody who like to shoot people in documentary style, bringing back travel or family pictures, shoot landscape or products…
If you are more into design, painting, graphic work and virtual world, the advanced class will match as soon as you know how and why to set up your camera or choose a lens.
I hope all of this will be helpful ot pick up the right class for you, but if anything is not clear yet, do not hesitate to contact me!
Another “making of” of a shot for you to learn from my motivations behind my decision making in term of technical set up and creativity. This time Apolline on the Chair, in the mood for thoughts.
By Franc Peret
1 – CAMERA SETTINGS:
Shot under natural light with Panasonic Lumix GM-5 ISO100 1/250s with prime lens Panasonic 25mm f/1.4@ f/1.4
2 – LIGHT:
The source of light is a big window behind the mini model. Shot on early morning (at least for me).
Another shot, same time, another pose. Apolline is turning her face to the opposite side. You can notice that the reflected light is stronger from there.
3 – ACCESSORIES:
As I am shooting against the source of light, I set one white board on both side of the model. The board on her left side is actually bouncing light to the board on her right side which finally light up her face. This board serves my purpose as she actually try to reach it, a move that created her pose.
4 – CAMERA AND LENS:
I am using my favorite tiny camera and a great Panasonic 25mm f/1.4.
On my sensor, this lens offer the same field of view than a 50mm on a full frame camera (or 35mm on a DX/APS-C camera), which means human eyes vision.
5 – ISO:
Light was enough to keep ISO 100 as I was working with a very bright lens. Due to the quietness of the mini model 1/250s was very safe and I could work at 1/125s if I needed to close down the Aperture one stop.
Brainstorming, Apolline on the position as the first shot. ISO100 1/160s with prime Olympus 45mm f/1.8 @ f/2.2.Another mood for thoughts. Apolline is facing the main source of light this time and still receive the reflectors addition. ISO200 1/320s with zoom Lumix 12-32mm f/3.5-5.6 @ 12mm f/4.
6 – APERTURE:
I open up my Aperture maximum to reduce depth of field, as I wanted to treat this composition as a portrait with thin Depth of field.
I usually do not open that much for close up baby shots as they are always moving and therefore easily leaving the thin “in focus” zone.
For APS-C, I would suggest, at least, f/2.8 – f/4 and for Full frame camera f/4 – f/5.6 for close up and baby portrait to be sure to get both eyes in focus.
As you can see, I set up a safety belt around her body so that she would not fell down from the chair. This belt is limiting her movement, so f/1.4 was an option.
On this shot, her left eyes is not as sharp as her right eyes, where the focus is done. f/2 would have been a safer set up on my camera, but as I pull back, I thought the depth of field would be enough at f/1.4. Remember Depth of field increase with distance to subject.
My little one kept her pose just for this shot so I didn’t have another chance. I usually always do several shots with different Aperture or slight focus change as this is the most critical choice for baby shots without forgetting shutter speed.
But as I explained in the ISO chapter, with the light available and my reflectors, I had room to close down my aperture 1 stop (f/2 instead of f/1.4).
Cool Attitude: I could add a cigarette in her right hand with some smoke going out from her mouth. ISO200 1/250s with zoom Lumix 12-32mm f/3.5-5.6 @ 21mm f/4.7I called this couple of shot “Fighting Spirit, due to her attitude.Panasonic GM5 ISO200 1/200s with zoom Lumix 12-32mm f/3.5-5.6 @ 12mm f/4.5
7 – POINT OF VIEW and COMPOSITION
I wanted to be as close as possible to her level as she was turning her head and eyes down. I wanted to grab her facial expression and I lower myself as much as I could to do so.
My limit was the window behind her as I didn’t want it to enter my shot to be too disturbing or to create flares in my lens as the source of light might enter directly into my lens if I sat lower.
As a reminder I post here the original shot again. Shot with Panasonic Lumix GM-5 ISO100 1/250s with prime lens Panasonic 25mm f/1.4@ f/1.4
8 – POTENTIAL IMPROVEMENT
Does the cropped foot on the right side of the shot is important?
Not at all as this is a snap shot took before it is gone.
It is what I am used to call an emergency shot.
Also, the complete movement and point of attraction of the picture is on the right side of the image.
Apolline who just wake up was still wearing her “sleeping bag” which as not a definite shape and i am sure many viewer didn’t notice the foot on the right side of the shot.
In a word, it is not important…
Tweaking images had always been part of photography, long before the existence of digital file and Photoshop type of software. There is nothing wrong about it, as soon as you exactly know what you are doing. Thus, you need a clear vision of your concept from model, background, accessories, lighting and shooting style.
By Franc Peret
Experimenting with cameras, lenses, point of view, composition, flash, lighting, natural light, structure, model or actors always feed my interest in film making and photography.
Last but not least, post processing is the ultimate touch I can add to finalize my original concept.
I am using my 2 favorite software to do so: Photoshop (for pictures and video) and Premiere (for video).
And the tough version with more details and preservation of the background details.Two identical shot with 2 different post treatment: the smooth one with glow.
I am working with no more than 10% of their capabilities, but they already allow me to to get closer to my initial ideas, to push even further my interpretation or to create an unexpected result.
Timing is the main difficulty for shooting a kid, as she is always looking for discovery.Sometime, a cute attitude occurs for a very short time. Better to get flashes quick to recharge.
Most Important before using a post processing software is to get a concept in mind.
For this series of vintage shot of my little one, I had an idea in mind and this drives most of my choices: background, clothe and accessories, point of view, lens choice and lighting.
Lighting is a bit specific as shooting a little kid is not the same as shooting an adult. You have to be prepared to get her face turning around and therefore to light up the scene from both direction to get a pleasing result wherever the little model is looking.
Difficulties in post processing is options. They are endless and sometime a break is welcome to leave the creative process for a while and to come back few hours later with a fresher mind a more critic eyes.The first treatment is softer with a frame to get a “coming from the past” feel, while this one is having more details and higher contrast. Hard to decide which one is working the best…
Key light and fill light should not exceed a 1:2 contrast ratio with the kick light in the same range to detach her silhouette from the background without burning the reflected highlight on her skin.
Sometime, I prefer to keep the color version, all depends on the composition and the facial expression.Black and White is logically associated to the concept of vintage, but colors matter a lot as a starting point as they do not translate in the same shade of grey compare to the skin.
To achieve such a smooth light set up, I used 3 flashes:
The key light was bouncing inside a huge soft umbrella which behave like a 1.5 meter wide beauty dish (positioned on her left side, next to my right shoulder).
The fill light (which was also used to light up the background) was bouncing in the opposite corner of the room (facing her high, on her right side, over my shoulder).
The kick light was bouncing against the white wall behind her (high, on the right side of her back).
The sun is usually my best friend to shoot Apolline discovering her new world. Panasonic GM5 1/2500s ISO100 and OLYMPUS 45mm f/1.8 @ f/1.8To tell the truth, I much more used to shoot pictures of my little one in natural light, on the fly, when magic happens. I had to force myself a bit to start that “studio series”, but I finally enjoyed the experience very much and I will redo it again. Panasonic GM5 1/800s ISO100 and OLYMPUS 45mm f/1.8 @ f/2.2
Final touch, she was surrounded by white reflector panel to not get colored shadow form the wood furniture around.
I forgot to say that this set up was done in my bedroom and not a studio and my bedroom is quit small…
For that “studio session”, I used my Nikon D750 (ISO100) and a great old zoom lens (AF-S f/3.5-f/4.5 28-105mm D) set at f/8.
With such a cute model and good pictures to start with, it was very inspiring to play around with different photo treatment in post processing, to achieve the vintage look I was after.
A little girl is just an amazing subject to shoot with so many different expression waiting to be recorded. Panasonic GM5 1/500s ISO100, LEICA DG NOCTICRON 42.5mm f/1.2 @ f/1.2After shooting that studio session, I got used to treat my image different ways according the facial expression, my mood and type of lighting falling on her. Panasonic GM5 1/320s ISO100, LEICA DG NOCTICRON 42.5mm f/1.2 @ f/1.2
From start to end, I had something in my mind and I just made it come alive by adjusting every steps of the process in the same direction.
I took the opportunity of a corporate training to shoot this Music video for Dantes.
A black and White treatment for one of his latest title: “Zhong Guo de Fa Guo Ren” (Frenchman from China).
By Franc Peret
A famous video game company hired me to train 2 of their communication team employees in both video and photography shooting for them to be able to cover any event organized by their company to promote their working style and products.
This is a 8 classes private course and while teaching to those Chinese students how to light up a scene with mood, I took the opportunity to shoot a 4 minutes music video for a French performer, Dantes Dai Liang, singing his own song written in Chinese.
3 cameras were recording the performance from 3 different angles. Here is the point of view from the Panasonic AF103
For his song “Zhong Guo de Fa Guo Ren” (Frenchman from China) The idea was to get a classy look with the possibility to insert other images and light effect, later on, in the black background surrounding him.
It is always challenging to set up a lighting with someone dressed in white, as key light, fill light and kick light are behaving very differently according camera angle. And it is an exciting game to set up such a lighting without burning highlights.
This lighting set up and multi cameras shooting was shot in one day in my home/office.
Here are some making of pictures and some frame grab form my different cameras…
The shooting set up with multi cameras. GH4 is on the foreground.
You can get some more technical information in that post: Shooting Flat
Here is my first shot of the year, in the bathroom mirror, while holding my no-cooperative little one with one hand and shooting with the other, using my newly purchased “vintage” digital camera.
By Franc Peret
For this shot, I am using a Nikon D90, a 2008 technology camra, bought new for 1800 RMB (= 275 USD) + a Nikkor 35mm f/2D (a vintage lens too) and a Yongnuo YN568EX Flash (Cheap and great Chinese Brand).
Why did I buy such an “outdated” camera? More about this in another post, later on…
SET UP EXPLAINED:
– Manual Mode = The only mode I can use to get my camera working with my flash at high synchro speed.
– Autofocus = AF single, multi point selection. This was the most efficient way to get in focus as our heads are in the foreground and, holding the camera that way, I am not able to perfectly set the more precise single focus point on one of our face.
– ISO200 = Base ISO for the D90, best possible quality picture with contrast, color depth and dynamic range.
– f/5.6 = to get enough Depth of field as we are close to the mirror and Apolline is moving back and forth so that she is never on the same plan as me. I could close down a bit more to be safer, but my flash batteries were not freshly charged and bouncing the flash is more demanding in term of power use and recycling time. I wanted to be able to shoot more frequently and at f/5.6 the flash was recycling much faster than at f/8.
– 1/500s (no need to be that fast, but I wanted to test the high speed synchro capability of he Yongnuo flash with the D90 and it works great!).
– Result: Soft light and no motion blur. At that set of value, 100% lighting is coming from the bounced flash directed straight to the ceiling which became the main source of light reflected by the surrounding white wall (and sink!) and the mirror itself.
– Black and White treatment: I felt that it worked very well to give more importance to the camera, as much as Apolline and myself in that shot. It is a matter of visual balance to communicate my feeling: My mind is split in 2 opposite directions that are, sometime, getting along very well:
My daughter VS Photography (and film making!)…
This Colorful chalk on blackboard exhibit in Shanghai street looks like Some wishes for 2016 by a local street artist.
By Franc Peret
A real art piece as it is invaluable, nobody can buy it and it is going to be erased within a month…
Actually, those who are living in China know about those black boards present everywhere in traditional areas. Someone from the local community is writing and drawing on it for all their neighbors to remember the basic rules of good social behaviors as well as some advises related to education, health and safety.
It looks dated, in term of communication tool, but it is quit efficient and it should be considered as a real street art form.