Tag Archives: Light

Friends Holding branches

Winter is the perfect season to shoot trees against the sky, as a graphical and structural silhouette. You just need to find the right subject and the right setting.
By Franc Peret

This picture was shot in Burgundy, at the end of the day with a Sony A7M2 + adapter + 25 years old Nikon AIS 20 mm f/2.8 (Manual focus).
As usual in outdoor shots, I set my camera in Aperture priority mode and pointed it toward the subject without any exposure compensation (+/- @ 0).

Note:
Often I am having questions about sunset shot settings…
Answer: Just point and shoot and deal with the foreground as a silhouette.

1 – COMPOSITION
The idea was to fill up the frame with the branches net complexity and pattern of those trees while getting the sun partially hidden behind one of them. I adjusted my position accordingly to be at the right distance to get the complete scene and avoiding disturbing elements.

2 – CAMERA SET UP
– ISO 100:
Best quality and facing the sun with the right exposure of the sky, shutter speed is always fast enough.

– Aperture: f/8.
I a closing the aperture a lot, even I do not need that much depth of field for 3 reasons: 1 – interesting trees are on the same line (same distance from me). 2 – I am using a very wide lens and wider the lens, deeper is the depth of field by default. 3 – I am far from the trees (about 20 meters) and focusing away already deliver more depth of field. Somehow, at f/4 I would have enough DOF.
However, I closed down much more my aperture to get the best sharpness possible on the complete frame (corner to corner) out of my lens and this happens around f/8 or f/11 (for that generation of lenses).
More modern lenses are able to deliver full-frame sharpness earlier, but diffraction tends to come earlier too.
Never take the risk, shot this type of picture with a different aperture (f/5.6 – f/8 – f/11.) if you are not sure of the best one on the field.

– Related shutter speed: 1/160s.
As soon as there is no wind and you are stable, 1/30s would have been enough if the sun was lower because nothing is moving and I am using a wide lens (which tends less transmitting my potential move to the picture).

Former photo journalist, Film maker and ELC Shanghai Photography teacher, Franc Peret is teaching Essential Photography Classes, Advanced Photography Workshop and Film Making Classes in Shanghai, for the last 13 years.
If you wish to contact Franc, just drop an email to francperet@hotmail.com

CINEMATIC PORTRAIT

The concept of this workshop is to turn students into different characters, by building a scene with a certain mood, posture, and situation. Then, we take a shot which looks like a frame extracted from a movie.
By Franc Peret and his Advanced Students

The mood is created by the location, the actor’s position, and facial expression, the props (accessories) but most importantly by the lighting which is a key feature in term of storytelling.

The Serial Killer
“The Serial Killer” / Lighting and scene set up: Franc / Concept: Dean , Franc and Fabrice / Model: Fabrice, Nils and Qiong / Shot: Franc with Sony A7M2 + Nikon AI AUTO 50 mm F/1.4 (old Manual focus lens)

Sometimes complex, sometimes simpler, the set up is dedicated to the story and often involve 4 lights: Key, Kick (or hair), Background and Ambiance (or eyes) light.

"The Serial Killer " Close up.
“The Serial Killer ” Extrem Close up and head chopped off to hide the identity of the madman.
The Serial Killer (Close Up)
“The Serial Killer” (Close Up): 5600K Key light with some red gel + kick light + ambient light + eyes light.

Accessories, if well balanced, can complete the illusion, as well as makeup, costume, and hairstyle.

Flower power... Lighting Set up: Yellow key light, Ambient light with red gel, white kick light.
“Flower power…” Lighting Set up: Yellow key light, Ambient light with red gel, white kick light.

I am used to setting challenging lighting for filmmaking and It is much more interesting to work on this type of project in an average location (Apartment Hotel) than to do modeling or beauty shot in an immaculate and dedicated (and somehow boring) photography studio.

"Nouvelle Vague"
“Nouvelle Vague” Lighting: Franc / Concept and scene set up: Nils, Qiong, Fabrice and Franc /
Model: Fabrice and Nils / Shot: Franc with Sony A7M2 + Nikon AI AUTO 50 mm F/1.4
"Nouvelle Vague" light set up: 2 opposite key lights and a bit of ambient light.
“Nouvelle Vague” light set up: 2 opposite key lights and a bit of ambient light.

None of those pictures would ever exist without the character (acting) and the lighting.
The photographer is the least important part of the equation. None of those shots belong to the person who had pressed the shutter button.

"Lonely Beauty after the party" Lighting Set up and Concept: Franc / Model: Novita / Shot: Monja with Canon 5D IV  and  50 mm f/1.4
“Lonely Beauty after the party” Lighting Set up and Concept: Franc / Model: Novita /
Shot: Monja with Canon 5D IV and 50 mm f/1.4

Forgetting to mention the teamwork in the credit of the photography would be completely dishonest from the photographer.

"Hitchcock film's character" Lighting Set up and Concept: Franc / Model: Monja / Shot: Franc with Panasonic Lumix G85 and Leica 25mm f/1.4
“Hitchcock movie’s character” Lighting Set up and Concept: Franc / Model: Monja /
Shot: Franc with Panasonic Lumix G85 and Leica 25mm f/1.4

Every shot has to be linked to a team of an Art director (concept), actor, Director of photography (light) and Photographer…

"1950's James Bond Girl from the North" Lighting Set up: Franc / Concept and Model: Magdalena / Shot: Franc with Panasonic Lumix G85 and 42.5mm f/1.7
“1950’s James Bond Girl from the North” Lighting Set up: Franc / Concept and Model: Magdalena / Shot through a curtain: Franc with Panasonic Lumix G85 and 42.5mm f/1.7

Filmmaking is a very important addition to anyone Photography experience, as working alone is not helping much personal improvement, while shooting a movie is a teamwork of added values and there is always so much to learn from others…
Franc Peret

MAKING OF SHOTS:

Novita performing in front of Monja, Magdalena and Kerstin.
Monja's concentration through her Canon 5D Mark IV viewfinder. Shot by Franc with a Panasonic G85 and Leica 25mm f/1.4
Monja’s concentration through her Canon 5D Mark IV viewfinder. Shot by Franc with a Panasonic G85 and Leica 25mm f/1.4

Shots with my advanced students: Dean, Fabrice, Nils, Qiong, Matteo, Jonathan, Monja, Kerstin, Novita and Magdalena.

Magdalena pointing her Canon 5D MarkIV  toward a 1920's character performed by Kerstin. Lighting and Concept: Franc / Model: Kerstin / Shot by Franc with a Panasonic G85 and a Leica 25mm f/1.4.
Magdalena pointing her Canon 5D MarkIV toward a 1920’s character performed by Kerstin. Lighting and Concept: Franc / Model: Kerstin / Shot by Franc with a Panasonic G85 and a Leica 25mm f/1.4.

Former photo journalist, Film maker and ELC Shanghai Photography teacher, Franc Peret is teaching Essential Photography Classes, Advanced Photography Workshop and Film Making Classes in Shanghai, for the last 11 years.
If you wish to contact Franc, just drop an email to francperet@hotmail.com

In the Mood for Thoughts

Another “making of” of a shot for you to learn from my motivations behind my decision making in term of technical set up and creativity. This time Apolline on the Chair, in the mood for thoughts.
By Franc Peret

1 – CAMERA SETTINGS:
Shot under natural light with Panasonic Lumix GM-5 ISO100 1/250s with prime lens Panasonic 25mm f/1.4@ f/1.4

2 – LIGHT:
The source of light is a big window behind the mini model. Shot on early morning (at least for me).

Another shot, same time, another pose. Apolline is turning her face to the opposite side. You can notice that the reflected light is stronger from there.

3 – ACCESSORIES:
As I am shooting against the source of light, I set one white board on both side of the model. The board on her left side is actually bouncing light to the board on her right side which finally light up her face. This board serves my purpose as she actually try to reach it, a move that created her pose.

4 – CAMERA AND LENS:
I am using my favorite tiny camera and a great Panasonic 25mm f/1.4.
On my sensor, this lens offer the same field of view than a 50mm on a full frame camera (or 35mm on a DX/APS-C camera), which means human eyes vision.

5 – ISO:
Light was enough to keep ISO 100 as I was working with a very bright lens. Due to the quietness of the mini model 1/250s was very safe and I could work at 1/125s if I needed to close down the Aperture one stop.

Brainstorming, Apolline on the position as the first shot. ISO100 1/160s with prime Olympus 45mm f/1.8 @ f/2.2.
Another mood for thoughts. Apolline is facing the main source of light this time and still receive the reflectors addition. ISO200 1/320s with zoom Lumix 12-32mm f/3.5-5.6 @ 12mm f/4.

6 – APERTURE:
I open up my Aperture maximum to reduce depth of field, as I wanted to treat this composition as a portrait with thin Depth of field.
I usually do not open that much for close up baby shots as they are always moving and therefore easily leaving the thin “in focus” zone.
For APS-C, I would suggest, at least, f/2.8 – f/4 and for Full frame camera f/4 – f/5.6 for close up and baby portrait to be sure to get both eyes in focus.
As you can see, I set up a safety belt around her body so that she would not fell down from the chair. This belt is limiting her movement, so f/1.4 was an option.
On this shot, her left eyes is not as sharp as her right eyes, where the focus is done. f/2 would have been a safer set up on my camera, but as I pull back, I thought the depth of field would be enough at f/1.4. Remember Depth of field increase with distance to subject.
My little one kept her pose just for this shot so I didn’t have another chance. I usually always do several shots with different Aperture or slight focus change as this is the most critical choice for baby shots without forgetting shutter speed.
But as I explained in the ISO chapter, with the light available and my reflectors, I had room to close down my aperture 1 stop (f/2 instead of f/1.4).

Cool Attitude: I could add a cigarette in her right hand with some smoke going out from her mouth. ISO200 1/250s with zoom Lumix 12-32mm f/3.5-5.6 @ 21mm f/4.7
I called this couple of shot "Fighting Spirit, due to her attitude.Panasonic GM5 ISO200 1/200s with zoom Lumix 12-32mm f/3.5-5.6 @ 12mm f/4.5
I called this couple of shot “Fighting Spirit, due to her attitude.Panasonic GM5 ISO200 1/200s with zoom Lumix 12-32mm f/3.5-5.6 @ 12mm f/4.5

7 – POINT OF VIEW and COMPOSITION
I wanted to be as close as possible to her level as she was turning her head and eyes down. I wanted to grab her facial expression and I lower myself as much as I could to do so.
My limit was the window behind her as I didn’t want it to enter my shot to be too disturbing or to create flares in my lens as the source of light might enter directly into my lens if I sat lower.

Shot under natural light with Panasonic Lumix GM-5 ISO100 1/250s with prime lens Panasonic 25mm f/1.4@ f/1.4
As a reminder I post here the original shot again. Shot with Panasonic Lumix GM-5 ISO100 1/250s with prime lens Panasonic 25mm f/1.4@ f/1.4

8 – POTENTIAL IMPROVEMENT
Does the cropped foot on the right side of the shot is important?
Not at all as this is a snap shot took before it is gone.
It is what I am used to call an emergency shot.
Also, the complete movement and point of attraction of the picture is on the right side of the image.
Apolline who just wake up was still wearing her “sleeping bag” which as not a definite shape and i am sure many viewer didn’t notice the foot on the right side of the shot.
In a word, it is not important…

Former photo journalist, Film maker and ELC Shanghai Photography teacher, Franc Peret is teaching Essential Photography Classes, Advanced Photography Workshop and Film Making Classes in Shanghai, for the last 11 years.
If you wish to contact Franc, just drop an email to francperet@hotmail.com

Achieving a vintage feel

Tweaking images had always been part of photography, long before the existence of digital file and Photoshop type of software. There is nothing wrong about it, as soon as you exactly know what you are doing. Thus, you need a clear vision of your concept from model, background, accessories, lighting and shooting style.
By Franc Peret

Experimenting with cameras, lenses, point of view, composition, flash, lighting, natural light, structure, model or actors always feed my interest in film making and photography.
Last but not least, post processing is the ultimate touch I can add to finalize my original concept.
I am using my 2 favorite software to do so: Photoshop (for pictures and video) and Premiere (for video).

And the tough version with more details and preservation of the background details.
Two identical shot with 2 different post treatment: the smooth one with glow.

I am working with no more than 10% of their capabilities, but they already allow me to to get closer to my initial ideas, to push even further my interpretation or to create an unexpected result.

Timing is the main difficulty for shooting a kid, as she is always looking for discovery.
Sometime, a cute attitude occur for a very short time. Better to get flashes quick to recharge.
Sometime, a cute attitude occurs for a very short time. Better to get flashes quick to recharge.

Most Important before using a post processing software is to get a concept in mind.

For this series of vintage shot of my little one, I had an idea in mind and this drives most of my choices: background, clothe and accessories, point of view, lens choice and lighting.

Lighting is a bit specific as shooting a little kid is not the same as shooting an adult. You have to be prepared to get her face turning around and therefore to light up the scene from both direction to get a pleasing result wherever the little model is looking.

Difficulties in post processing is options. They are endless and sometime a break is welcome to leave the creative process for a while to come back with a fresh mind.
Difficulties in post processing is options. They are endless and sometime a break is welcome to leave the creative process for a while and to come back few hours later with a fresher mind a more critic eyes.
The first treatment is softer with a frame to get a "coming from the past" feel, while this one is having more details and higher contrast. Hard to decide which one is working the best...
The first treatment is softer with a frame to get a “coming from the past” feel, while this one is having more details and higher contrast. Hard to decide which one is working the best…

Key light and fill light should not exceed a 1:2 contrast ratio with the kick light in the same range to detach her silhouette from the background without burning the reflected highlight on her skin.

Sometime, I prefer to keep the color version all depends on the composition and the facial expression.
Sometime, I prefer to keep the color version, all depends on the composition and the facial expression.
Black and White is logically associated to the concept of vintage, but colors matter a lot as a starting point as they do not translate in the same shade of grey compare to the skin.

To achieve such a smooth light set up, I used 3 flashes:
The key light was bouncing inside a huge soft umbrella which behave like a 1.5 meter wide beauty dish (positioned on her left side, next to my right shoulder).
The fill light (which was also used to light up the background) was bouncing in the opposite corner of the room (facing her high, on her right side, over my shoulder).
The kick light was bouncing against the white wall behind her (high, on the right side of her back).

The sun is usually my best friend to shoot Apolline discovering her new world.
The sun is usually my best friend to shoot Apolline discovering her new world. Panasonic GM5 1/2500s ISO100 and OLYMPUS 45mm f/1.8 @ f/1.8
To tell the truth, I am much more used to shoot pictures of my little one in natural light, on the fly, when magic happens. I had to force myself a bit to start that "studio series", but I finally liked the experience very much.
To tell the truth, I much more used to shoot pictures of my little one in natural light, on the fly, when magic happens. I had to force myself a bit to start that “studio series”, but I finally enjoyed the experience very much and I will redo it again. Panasonic GM5 1/800s ISO100 and OLYMPUS 45mm f/1.8 @ f/2.2

Final touch, she was surrounded by white reflector panel to not get colored shadow form the wood furniture around.
I forgot to say that this set up was done in my bedroom and not a studio and my bedroom is quit small…

For that “studio session”, I used my Nikon D750 (ISO100) and a great old zoom lens (AF-S f/3.5-f/4.5 28-105mm D) set at f/8.

With such a cute model and good pictures to start with, it was very inspiring to play around with different photo treatment in post processing, to achieve the vintage look I was after.

A little girl is just an amazing subject to shoot with so many different expression waiting to be recorded
A little girl is just an amazing subject to shoot with so many different expression waiting to be recorded. Panasonic GM5 1/500s ISO100, LEICA DG NOCTICRON 42.5mm f/1.2 @ f/1.2
After shooting that studio session, I got used to treat my image different ways according the facial expression, my mood and type of lighting falling on her.
After shooting that studio session, I got used to treat my image different ways according the facial expression, my mood and type of lighting falling on her. Panasonic GM5 1/320s ISO100, LEICA DG NOCTICRON 42.5mm f/1.2 @ f/1.2

From start to end, I had something in my mind and I just made it come alive by adjusting every steps of the process in the same direction.

FP

Former photo journalist, Film maker and ELC Shanghai Photography teacher, Franc Peret is teaching Essential Photography Classes, Advanced Photography Workshop and Film Making Classes in Shanghai, for the last 11 years.
If you wish to contact Franc, just drop an email to francperet@hotmail.com

12th Floor

[vimeo clip_id=82657475 ]

This film is the final result of the Autumn 2013 ELC Shanghai Filmmaking class. I designed this class 4 years ago and I am still teaching it in a very challenging way.

By Franc Peret

Shooting was done in 12 hours only, from a written script done after I first met the students.

Toilet lighting was a real challenge to be able to shoot wide and close-up without loosing too much time on resetting or repositionning lights (Photo: Sarah)
Martina was an amazing performer for her first movie ever. She was a joy to work with (Photo: Sarah)

The complete program last 25 hours only (we added a bonus class this time, so total teaching duration was 27 hours and 30 minutes).

Film Course >>

Course is split in 6 to 7 weeks with 2 x 2h30mn dedicated to the introduction of story telling, lighting and equipment. Then come 3 classes of 5 hours dedicated to shooting.

Outdor shot of the environment with camera move and unbalanced angle. (Photo: Sarah)
External shot scene from another point of view (Photo: Diarmuid Sheehan)

Adapting schedule

Actually we did a second filming this term (will be soon uploaded), 5 hours shooting for a 20 minutes lecture shot with 4 cameras.
2 final 2h30mn classes conclude the course to speak about sound and editing work.

Toilet location is easily crowded (Photo: Sarah)
Some students immediately get it to give a help on set up (Photo: Sarah)

The “12th Floor’ short story was shot in 10 hours with 2 hours added for sound recording (foley and voices).
I edited the project on my private time between the classes as schedule was so tight.

Close up shot of the reward scene: giving the 12th floor keys. (Photo: Sarah)
Party scene with crowd of students: 4 of them.(Photo: Sarah)

As usual, I was just amazed how everything went well with the 7 students, all of them taking part to the shooting in different ways, 4 of them having to play characters in the story.

The idea behind the story 

Story is about a Toilet lady who is living in Black and white but who is dreaming to get the chance to take the lift to reach the 12th floor and a colorful world, a world she can just imagine from a picture stick on top of the lift main door.

Martina acting with the right tone and mood despite the load of laugh from the assistance. (Photo: Diarmuid Sheehan)

Every morning, her colleague are taking the lift but not her as she is in charge of the toilet on the first floor. Her ultimate ambition is to to take care of the toilet on the 12th floor, the top of the building she is working in, to get a vaster view on a more colorful world (“Close to heaven”, as advertised).
This wish is also a way for her to move up in society’s hierarchy.

Main gate set up for the lift scene was a difficult place to light due to reflection on lift door. (Photo: Diarmuid Sheehan)
Set up in the main entrance for the lift entrance scne (Photo: Sarah)

This story is about ambition, which always depends on the position person are starting from, and one achievement can be perceived in a total different way, according everyone experience, lifestyle, habit and taste.
The world describe in this film is purposely absurd, with train lift, reservation needed to go to toilet, to add more disturbance to the story.

Challenging Location

Technically, the most difficult part was camera positioning and scene lighting as we shot in location and toilet were far too narrow and too reflective (wall).
We also had to rush on shooting to complete the story, to get the 55 cuts done in only 12 hours.

Corridor scene in tight environment. (Photo: Sarah)
Suicide scene with the close up of pipe from another room. (Photo: Sarah)

Therefore, I decided to design a lighting much flatter than I was looking for to be able to quickly shoot from different angle without getting bothered by shadows and flare.

Equipment

The 2 Main cameras were Panasonic AF100 and GH3 with voigtlander and Nikon lenses. Lighting was a mix of 4x low consumption Bulbs, 1 x LED panel, 1 x LED Fresnel light, 1 x LED torch with battery (for the lift), 2 x 650W and 2 x 300W tungsten Fresnel, and 2 x 150W HMI.

An external monitor helped everyone to follow the progress of the shoot and to judge the performance of the actors (Photo: Sarah)

Film Course >>

Former ELC Photography teacher, Franc Peret is teaching Essential Photography Classes, Advanced Photography Workshop and Film Making Classes in Shanghai, for the last 10 years.

shaping objects with light

Light and composition are more important than the subject itself. There is nothing more true to illustrate this concept I am teaching to my Photography Class Students, than product shot.

By Franc Peret

Product shots are usually done for commercial purpose, and pictures have to be more attractive than the object its self to be considered as successful.

Playing with Light and Shadows

The Magic of light shaping

By learning how to use Light sources, a professional photographer is going to achieve that result, but each object will represent a different challenge according its shape, its reflection, its purpose and the target mood.

Playing with Light and Shadows

Case by Case study

A slice of pizza is not light up and shot the same way than a camera, a jewel or a shower head (which is actually the most difficult). Only the understanding of quality of light, family of angle, masking with shadow and post processing can make a good shot possible.

New set menu shot in The Apartment
Sample Menu Shot in The Apartment

Franc Peret is teaching Essential Photography Classes, Advanced Photography Workshop and Film Making Classes in Shanghai

Special Effects

Here are some sample of works done with my students during the Advanced Photography Workshop I am organizing in Shanghai. This time, Fun Special Effects was the main topic

By Franc Peret

Franc’s Advanced Photography Course is also designed for students to discover how to use set up, choreography lighting and Photoshop for imagining and creating specific effects, with different students staging as imaginary characters in strange situations.

Alexandra: Wlalking too fast
Regino: Impossible to sit, I lost my bottom.
Eugenio: Stretching time Tea time.

Lighting set up was done in “The Apartment”, Yong fu lu, Shanghai. A day and night creative space.

Liam: The Magic Broom

Here is a series of shots of different students in unusual posture.
With Eugenio Sandroni, Sarah Dashfield, Raimondo Pro, Alexandra, Jana, Liam, Regino and Harald. Dirk is missing again!

Harald and Ray: That was a big caliber.
Harald and Ray: Fighting scene.

Former ELC Photography teacher, Franc Peret is teaching Essential Photography Classes, Advanced Photography Workshop and Film Making Classes in Shanghai, for the last 10 years.

Portraits With Light

Here are some sample of works done with my students during the Advanced Photography Workshop I am organizing in Shanghai. This time, Portrait with movie light was the main topic

By Franc Peret

Franc’s Advanced Photography Course is also designed for students to discover how to use set up, lighting and their camera for creating specific atmosphere, with different students staging as imaginary characters.

Lighting set up was done in “The Apartment”, Yong fu lu, Shanghai. A day and night creative space.

Here is a series of shots of different students. Each one inspired me an idea with props, posture and lighting in mind.

With Eugenio Sandroni, Sarah Dashfield, Raimondo Pro, Alexandra, Jana, Liam, Regino and Harald. Dirk is missing!

DJ LIAM

Here is my shot of the Famous DJ Liam. His line could be: “Are you talking to me…?”
This picture could be used for a flyer or a CD cover.
Lighting set is: 1 x LED lights panel + 1 x LED Fresnel lens + Silver Reflector.
Camera set up: Nikon D800 + 85mm f1.4D. ISO400, f1.7, 1/125s.

Liam
Moody Liam

For those 2 shots, set up was a bit different for the lighting

Liam
Liam in B&W
Liam
Liam in Full colors

Harald, the Radio Repair Shop owner

This shot is mimicking a 1950’s commercial.
It was light up with 2 x LED lights panel + 1 x LED Fresnel lens + 1 x LED PAR64 (red spot) + 1 reflector.

First shot is done with Nikon D800 + 85mm f1.4D. ISO140 to ISO400, f1.7 to f2, 1/125s.

Harald
Harald shot with Nikon D800

For the second shot, I used a Panasonic GH4 = Speed Booster Adapter + Nikon Ais 55mm f1.2 @ f2. ISO200, f2, 1/125s

Harald
Harald shot with Panasonic GH4

Regino the CEO and Ray the Butcher

Ray is the Clumsy Butcher or The Ultimate Relation Therapist.
His line could be: “My wife had never been cooperative…”
Jean Pierre Jeunet “Delicatessen” movie inspired me for this set up.
2 x LED lights panel + 1 x LED Fresnel lens + 1 x LED PAR64.
Nikon D800 + 85mm f1.4D. ISO400, f2, 1/125s.

Regino, CEO style portrait with a touch of (photography) class.
His line could be: “Suits always shrink with time… Couldn’t close that f… button”
Will be used for Regino Linked in page.
2 x LED lights panel + 1 x LED Fresnel lens.
Nikon D800 + 85mm f1.4D. ISO140, f2, 1/125s.

Regino
Regino, the CEO
Ray
Ray, the Clumsy Butcher

For this shot, I worked with a Panasonic GH4 = Speed Booster Adapter + Nikon Ais 55mm f1.2 @ f2. ISO200, f2, 1/125s

Ray
Ray, the Ultimate Solution

Franc Peret is teaching Essential Photography Classes, Advanced Photography Workshop and Film Making Classes in Shanghai

Painting With Light

Here are some sample of works done with my students during the Advanced Photography Workshop I am organizing in Shanghai. This time, Painting with light was the main topic

By Franc Peret

Franc’s Advanced Photography Course is designed for student to discover how to use their camera at the extreme: long pause, high speed shot, special effects and other things like this.

No reason to feel scary, colorful ghosts are friendly ghosts!

Painting with light is one of the most interesting workshop as your camera can record things you cannot see with your eyes and brain.

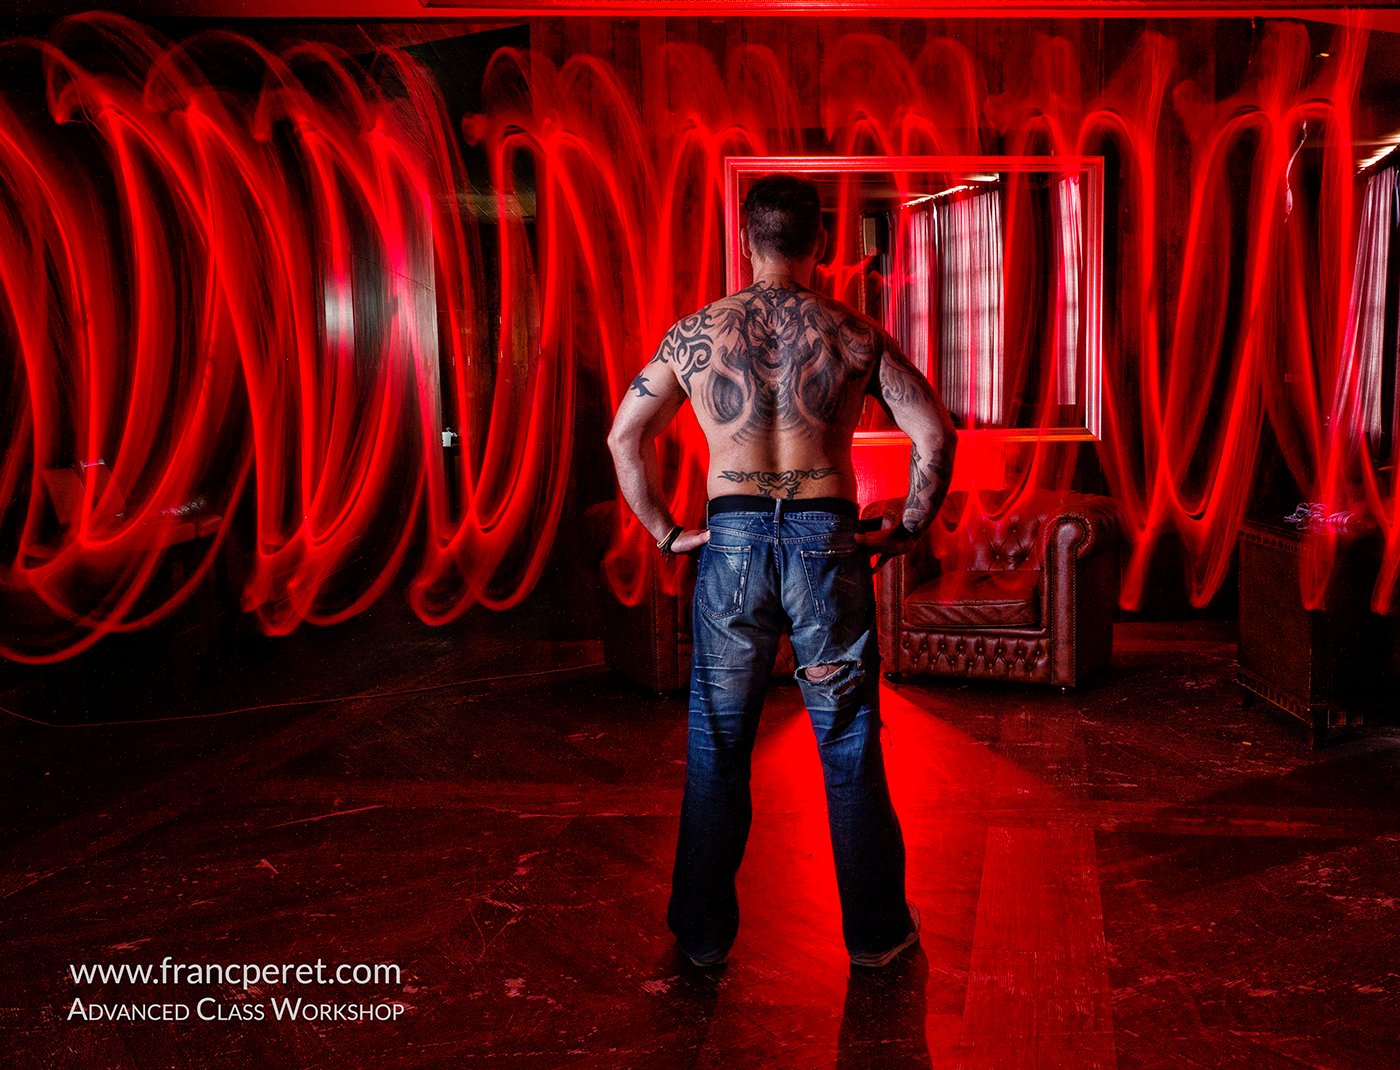
Using red for creating a mood for those tattoos (Liam's back)
Using red for creating a mood for those tattoos (Liam’s back)

Trick is simple and affordable as you just need a camera, an average lens (as you work with regular aperture f5.6 – f8), a tripod (a chair or a table work perfectly too), a long exposure, some cheap flash, a partner, some torch or lights, a dark room and your imagination.

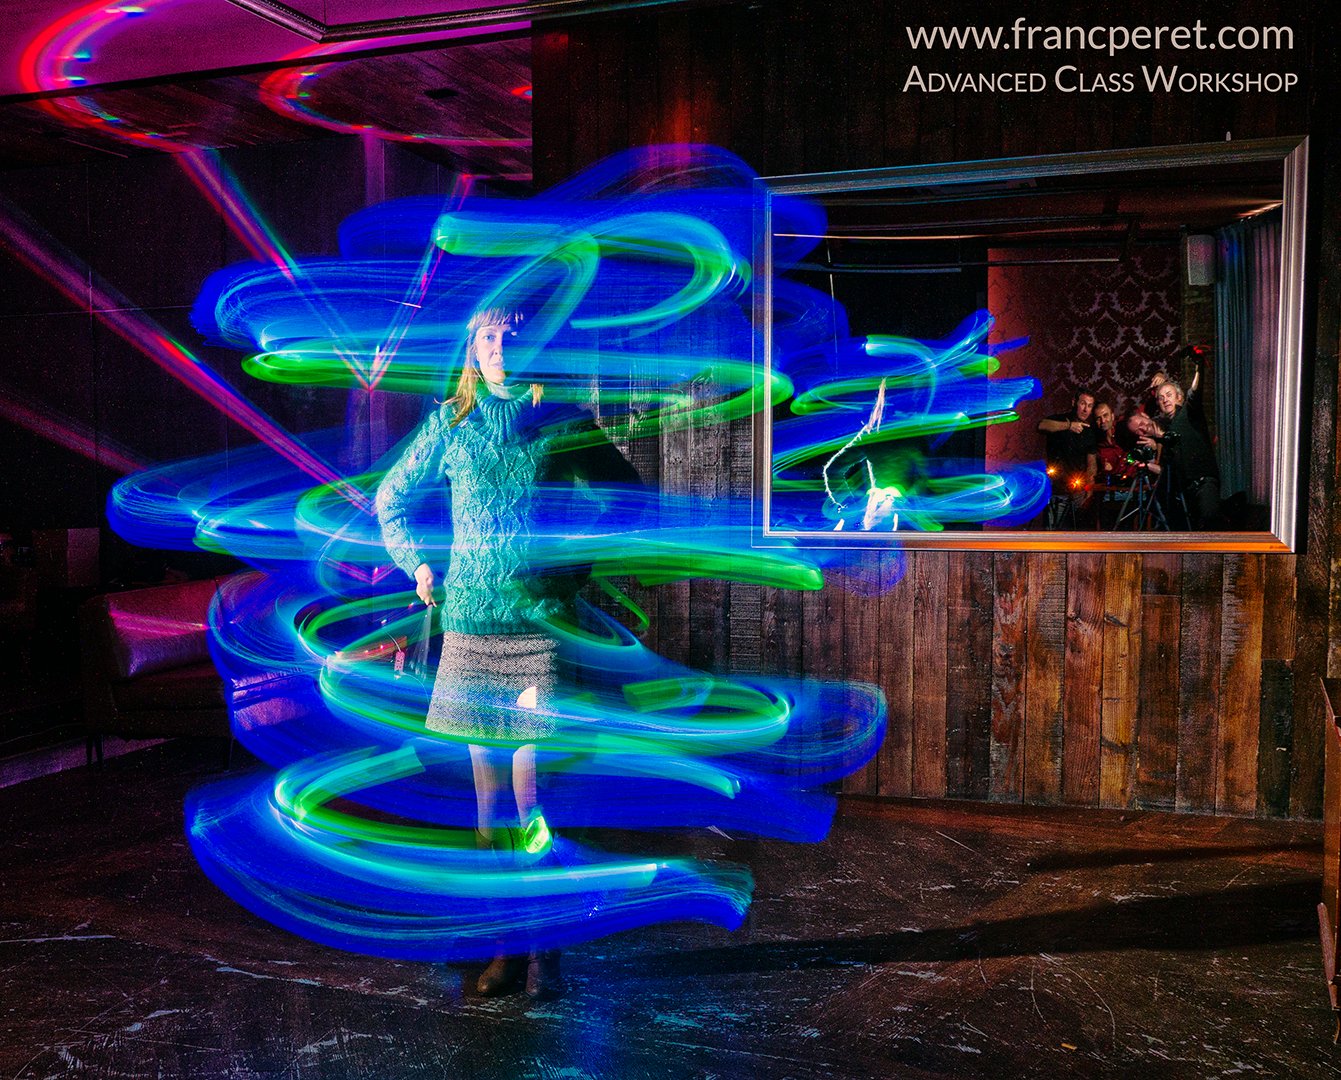
Traveling in time in a bubble of light.

This is a more advanced step in photography as the camera becomes completely secondary to the process.

Guess how Eugenio did this light move.

As soon as you set up well the camera with the right setting, you don’t think about it anymore and your focus you mind and imagination on the choreography you are going to organize in front of the lens.

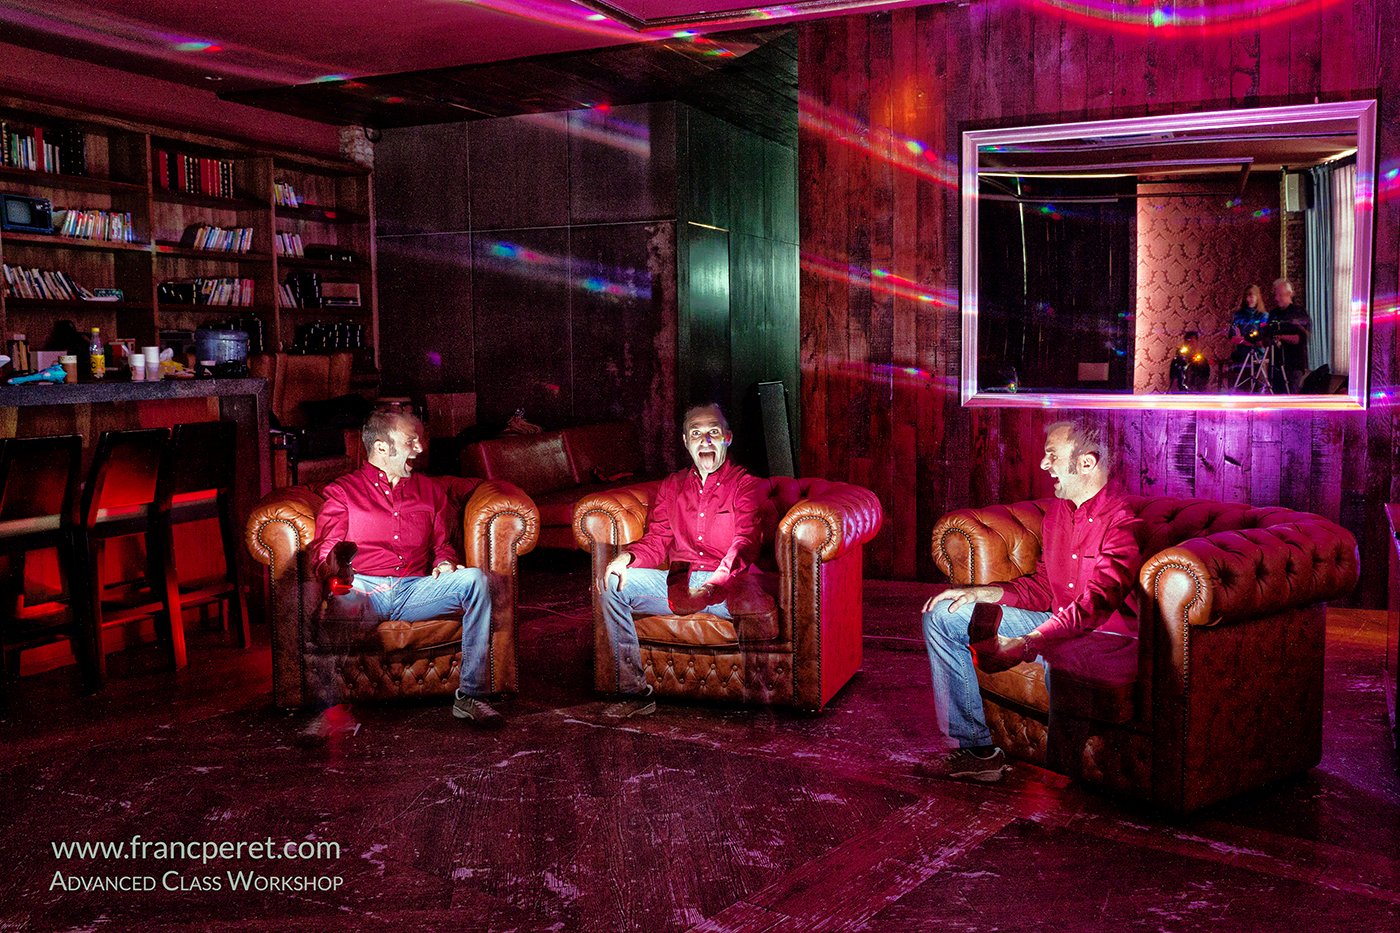
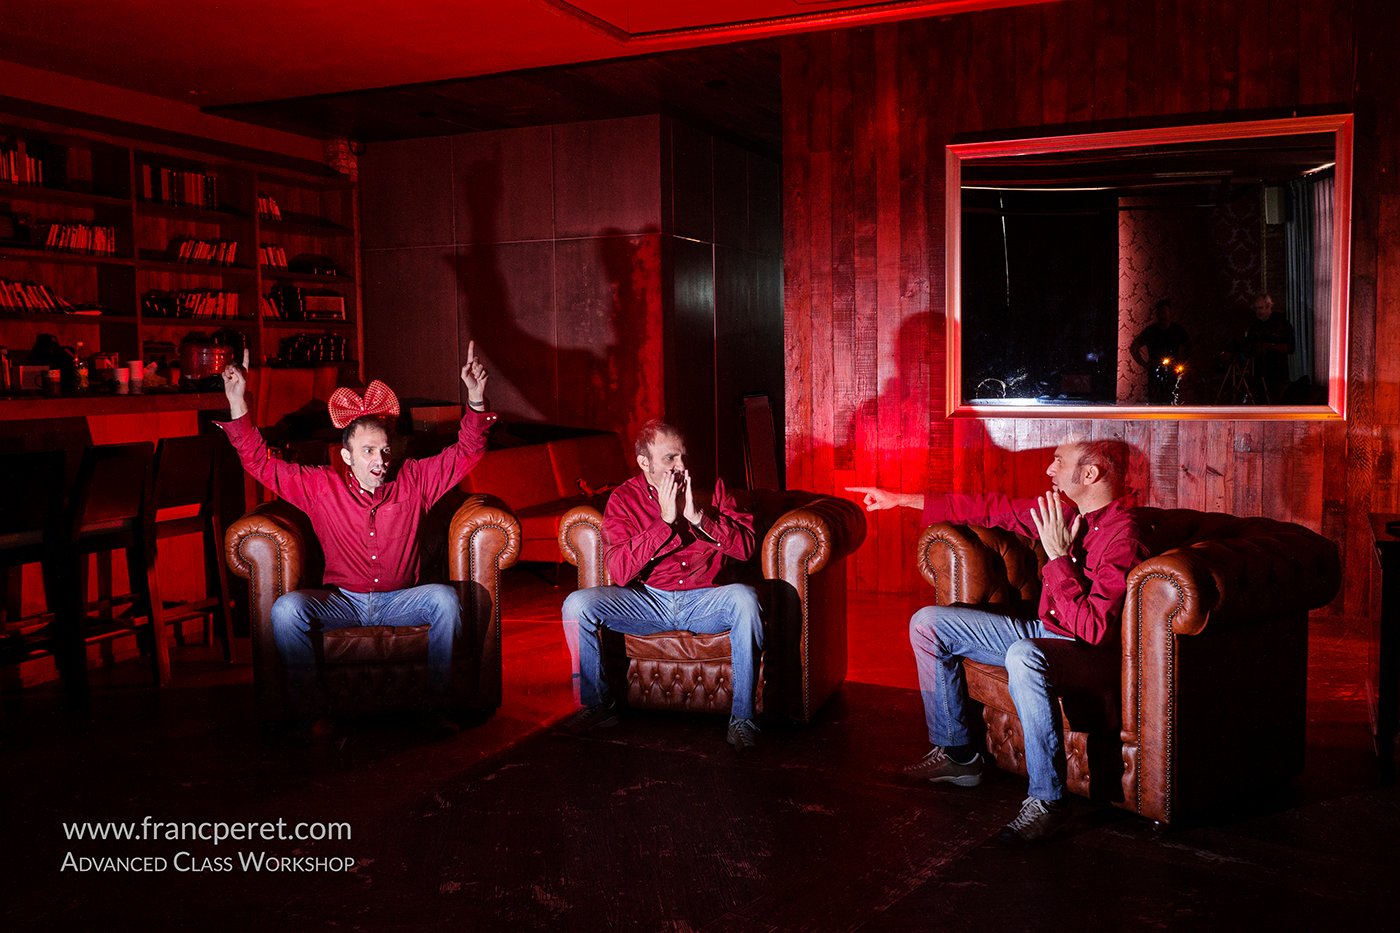
For triple exposure of the same person, we used 2 different techniques. Here Eugenio is holding a speed-light (narrow zoom position) he will flash 3 times.

It is a great exercise of anticipation, as with experience, you are able to imagine exactly what is going to happen and how it will look like.

For triple exposure of the same person, we used 2 different techniques. Here Eugenio is receiving the light form an external speed-light (narrow zoom position) that will be flashed 3 times, each time in a different direction.

Most of the time, I am still having good surprises and this make the overall process always interesting as you are challenging both your imagination and your technical ability to make it happen.

In real life, Ray looks even more weird! Light is helping him here!

This type of shooting session helps a lot my student to detach their attention to the camera and to the real life, to get more involved into the pure origin of photography which is “Painting with light”!

The idea of having the huge mirror in the background was to get some interesting reflection of the surrounding light, but we finally use it as a signature by flashing ourselves in the reflection.

And I am sure this workshop is useful to really understand what “exposure” means.

Franc Teacher: Franc Peret
Students on that session: Eugenio, Liam, Alexandra, Ray and Regino
Special guest: China Mei.

TECHNICAL CONSIDERATION
On a technical point of view, I always take benefit of my classes to test my newest cameras to see if they can answer to any type of my professional commitment.
All those pictures had been shot during my teaching session with Panasonic GH4 and 12-35 mm f2.8 lens set at f5.6 or f8 depending light work. Manual focus. Manual Exposure. ISO200 (Which is the base ISO on this camera).

Hot spots

Despite the base ISO, I noticed lots of hot pixels and color noise. I usually don’t have those parasites with my other camera (Nikon D800) when doing long pose (10 to 15 seconds).

Monitoring

Second problem I met with the GH4 is the lack of accuracy of the LCD screen. Image looks perfectly exposed on the screen, but histogram is telling the truth and I discovered that image could be under exposed 2 stops without having this result on my screen.
It seems that despite my screen luminosity NOT being set to auto, the GH4 is still compensating to render an acceptable image on screen, even the picture taken is truly underexposed.

Ergonomic

Out of those 2 points the GH4 is a joy to use with its fully articulated screen and its manual focus assistance features. Raw file are easy to work with, but exposure compensation often create noise in shadow area.

Franc Peret is teaching Essential Photography Classes, Advanced Photography Workshop and Film Making Classes in Shanghai

Studio Flash 1: Capoeira

Discover here some pictures of our Studio Flash shooting session we had during Franc’s Advanced Photography Workshop on Saturday November 1st. Here is the first part, action pause with Elisa and Diego.

By Franc Peret

For this Advanced Photography Class Workshop held in The Apartment (Yongfu lu, Shanghai), we had the chance to get 2 different topics.

You can discover some pictures here, done with a great pair of Copaeira dancers, Elisa and Diego from Italy, who are based in Shanghai.

In another post, you can check what we had done with our Model Isabelle during that same class.

1 – Acrobatic composition with Elisa and Diego, two Capoeira Teachers (http://capoeirashanghai.com).

Capoeira: girl hits boy
Capoeira: Sometime girl almost hits boy
This could be a logo
Capoeira: boy hits girl
Capoeira: Sometime boy almost hits girl

Some more solo and duo figures

2 hands
2 hands
1 hand
1 hand
Kicking
Kicking
Kicking 2
Kicking 2
Cropping
Cropping

This class was a great success, Thanks to Elisa and Diego’s enthusiasm, energy and professionalism.

Franc
Special Thanks to Nico to give us the chance to discover such great talents.