This story unveiled both magical and funny characters who seemed to start a day, like any other, in their living space, but in fact, all of the performance is part of a magical show.
By Franc Peret
This short Film was shot with my filmmaking students back in Fall 2014, but for multiple and unfortunate setbacks, I was able to finalize this editing in 2018 only.
It was tough, fun and exciting to accomplish this 3 minutes and 30 seconds pieces (written, prepared and shot) in about 15 hours shooting, parts of the 25 hours http://francperet.comclasses/film-courses/).
Shooting time lasts 3 afternoons, all in a very small 50 m2 flat I was living in at that time.
It was convenient for me to shoot there as all my equipment (lighting, rigs, cameras, and lenses) was stored there.
I saved lots of time in transportation and set up prior to the students’ arrival
Editing takes the longest part and is mainly done after the course.
5 students took part in the course and one of them, Charles Regaud, composed a specific soundtrack for it, tailor-made to the (almost) final edit.
Great memories indeed.
This is the first music video ever done in Bretagne (Brittany) with a French singer (Dantes), singing his own song in Chinese.
By Franc Peret
Singer: Dantes 戴亮
Song: J’aime la Bretagne (I love Brittany) 我爱布列塔尼 – WO AI BULIETANI.
Music: Inophis
Video Production: Franc Peret (Directing, shooting, Editing)
Camera: JVC LS-300 + Panasonic G85 + Panasonic GH4. Shot on 4K with Lumix and Voigtlander (17.5 mm f/0.95 + 25 mm f/0.95) lenses.
Edited by Premiere CC.
Shot in May 2016 and edited in June/July 2016.
School BoatBird’s IslandBretagne TraditionDantes and Dancing troupHarborInophis and DantesWild flowersTimelapsFishermen harborLively traditionSailing
Many amateur photographer think that to achieve a black and white picture they just need to get rid of the color of a regular shot. Nothing could be more wrong than this belief. Here is why…
By Franc Peret
In my teaching, I always say to my students that Black and White pictures are “dangerous”, Which means something potentially going against their progress.
Why?
THE WRONG B&W TRICK
Because many people are using that trick to make their “so so” pictures in color, suddenly look more “artistic” in Black and White, as B&W print is vastly associated, in many people’s mind, as artwork.
Shooting black and white means seeing things that might be not attractive in colors but appealing in shade of grey with lines, shape and structure.High contrast scene are the way to go to start to work in B&W, as the strong shape of the shadows are going to compensate the lack of colors.
And some easily pleased people are enjoying the trick very much, without knowing they are going against their own progress in general photography that way.
Using B&W as a cure to compensate a weak composition in color is not the best way to face the problem, finding the solution and improving framing skills.
By using a Yellow filter in my B&W post processing, I did a double action: brightening up the barrier while darkening the sky a lot. I also reinforced the contrast to give more strength to the shadows in the foreground.The diverse structures (barrier, steps, wall, stadium…) the strong shadow and the presence of the 2 opposite colors (yellow and blue) attracted my B&W vision.
Also, with that misunderstanding in mind, those photographer are certainly not going to learn how to shoot interesting Black and White pictures, as well. This is a dead end for creativity.
FILM TIME
Somehow, Black and White is too attractive.
For many people, B&W looks more “cool” than color.
Street vendors in Winter shot against the light to emphasize the separation between elements and to fill up empty space with shadows. Panasonic GM-5 ISO200 1/320s, 12-32mm f/3.5-f/5.6 @ 13mm f5.6
This is due to the fact that, back to film time, Black & White negative film was the unique post processing accessible to everyone, technically and economically, especially to independent artists.
A laboratory was easily set in the bathroom or the kitchen with few key equipment, accessories and chemicals.
On the B&W shot, human presence becomes more unique and important as the rest of the image is filled with common element, rectilinear structures which are not differentiated by their colors anymore. It is like pure life (a mother with her baby) versus a globally dehumanized environment.Another example where color and B&W are working fine but in a different way. The color shot emphasize the separation of the image in 3 layers surrounding the main subject: the black shadow, the yellow fence and the white building with the blue sky.
This was far to be the case with color film, and back to 1986, I had only one friend, a famous wedding photographer near Paris, who had his professional color lab at home.
It was a huge and very costly installation, needing bunch of preset, test, set up and maintenance to deliver the right result. And, worst of all, the chemical’s smell was constantly allover the place…
Hard light creates sharp shadows, usually a difficult combination for portrait due to too strong contrast, but it suits B&W very well.
Color lab were scaled for commercial use, not for personal expression.
BEING AN ARTIST
Therefore, for decades, many photographers expressed themselves in Black and White as they could afford its treatment and manipulation.
On the color shot, blue is dominant as everything is “paint ” in that color.On the black and white version, lines and patterns with sharp contrast from the tree branches and the palissade are taking other as color is not part of the message anymore.
Exhibiting their printed work, they were able to make the difference compare to amateur by improving a lot the quality of their shot by working precisely in the darkroom, the ancestor of Photoshop.
In Black and white, structure and metallic feel is taking over life. For example, we notice more the wet ground and the straight patterns (doors, broom…). The lady seems to be part of the surrounding (absorbed) like a cosmonaut or a cyborg at the gate of her spaceship.This picture of the old lady sleeping in a garbage container is working very well in color too as red and blue are the only two main dominant colors related to the lady’s occupation (tools and apron). The color in the center of the image reinforce the cold and lifeless feel of her surrounding.
Brightness, darkness, contrast, grain, blurriness, re-framing, cropping, erasing element were all at hand for the artist to get much more dramatic and impressive shots than average Joe.
DIGITAL TIME
Nowadays, with digital pictures, too many photographer are taking it easy and consider B&W as an easy cure to their far to be perfect color shots.
Marion on the bike. The most important common point between B&W and color shot is quality of light. Good lighting means more potential for a good shot.
Instead of working harder and more efficiently on their composition, they prefer to get rid of colors when the diverse elements in their image get too confusing: with too many tints and shape badly mixed together.
Give me five. The alternance of highlight and shadows are reinforced by the B&W treatment. Important is to get the main subject under a good lighting.Shooting against a strong light with a frame filled with reflective surfaces and dark silhouette creates powerful structure which does not need color anymore.
And they wrongly think that the job is done that way.
Somehow, this statement sounds like it is easier to achieve a successful B&W shot than a color one.
Somehow it is true, as you do not need to worry about marrying colors together, but it is not that simple.
All depends on the skill of the photographer.
BACK TO BASIC OF COMPOSITION
Hanging clothes are also great subject for both B&W or color shots.Street Life in Shanghai are offering very nice opportunities to detect B&W subject, such as those reflective windows and electric.lines.
To build an interesting shot, a photographer needs to put elements together with a certain sens of harmony or conflict.
And color is an added value to light, shadow, contrast, shape, lines, patterns and motion.
Happy mom and her kid in before the fence. Recipe is the same for portrait in color or B&W. Best is to use the sun as a kick light and to get the subject standing on a reflective surface to fill up the shadow.Kids behind the fence. I was attracted by 2 common point: 1- the round face of the kid and the round shape of the air conditioner fan on top of him. 2 – His straight and symmetric posture compare to the straight lines (tube, pipe, fence, window, shadows) surrounding him.
If the photographer knows what he is doing, he is going to play a lot with colors to accentuate his subject, his mood or his concept.
A pure amateur without much technique is going to suffer with this overdose of elements and option, and being overwhelmed by it, he might be happy to get rid of colors to reduce his amount of decision making to achieve something going well together.
Playground on grass. Black and White composition needs details with loads of things in focus which imply a rigorous placement of every element in the frame.
This is a reductive approach which is not helping personal progress.
At the opposite, the professional photographer, while switching from color shooting to black and white shooting, might feel at first that something is missing in his usual creative arsenal: colors.
Written text and reflective surface are very interesting subject in B&W as well.Lines, shadows and reflection are very powerful creative tools.
Therefore, he is going to work harder on his composition to compensate the lack of colors with more intense contrast, details, lines, shape, patterns and motion.
SEEING EVERYTHING IN B&W
As you can understand, at this stage, I make it clear that creating a Black and white shot means SEEING black and white in your head and SHOOTING as you imagine it.
This B&W portrait in subway emphasize people connection by holding the same aluminium pole.Silhouette are working very well in B&W creating a cut out effect with very sharp details (hair style).
It means being able to see the scene in front of you not in colors but in shade of grey, from black to white.
With film camera and DSLR, this vision is quit difficult to achieve, as the viewfinder is showing the scene as it is, and lots of experience is needed to be able to predict what will be the B&W result out of the colorful scene you are framing.
Fisherman in Shanghai Century Park. Path way (dam), lake shape and man posture altogether create motion in the shot even nothing much is happening.
According the post processing (filtering), red, yellow, green and blue element in the shot are going to appear completely different (huge luminescence difference) in monochrome.
COMPOSITION TOOLS
Key point in Black and White shooting are still contrast (highlight and shadow), shape, lines, patterns and motion.
First of all, higher contrast scene are helping a lot as they emphasize all those elements, taking over any notion of color.
Motion can be physical movement, another way of creating powerful lines.A surveillance camera is spot on in focus while the pattern in the background provide a feel of space and perspective. People are secondary element under this oppressive structure.
The alternate of highlight and shadow helps to cut out the image, to split the different elements and to create a hierarchy among them.
An old bed spring used as a fence is a great source of patterns.Modern city landscape are filled with lines, shape and loads of interesting element in B&W.
Contrast becomes as powerful as focus point to determinate the main subject and most of the time, it is a very good idea to close down the Aperture to get more depth of field and to grab sharper details in a B&W shot.
Pigeon House in Shanghai Century Park. Some material such as leather, rusted iron and wood are gold mine for textured pictures.
Shape, lines and pattern are the other creative tools that you are looking for in a B&W shots to render a more dramatic (emotional) feel.
Facing a strong sun, the portrait works well in B&W especially with a wool hat which offers lots of texture and details.Under soft light, I still prefer color pictures, with a pastel feel to it. Skin is so beautifully rendered that way.
Motion is not only about physical movement (walking people, running kids, passing by bicycle…), it is also a feel of dynamic you create with pattern (repeated element such as square windows on a building or branches of a tree), swirling shape (such as cloud in the sky) and lines (often present in city or natural landscape).
Shanghai Century Park. Winter landscape are among the best topic for Black and white photography.
Actually, winter is the best season of the year to learn how to shoot in B&W as the nature is lifeless and colorless (full of lines as no leaves on branches) while the lower sun is offering plenty of contrast and very long shadows.
The Panasonic allows me to see the world in B&W with its electronic view finder and I can also switch lenses. Here I mounted my lightest portrait lens: Olympus 45mm f/1.8My favorite B&W shooting companion, the tiny Panasonic GM-5 next to my working tool (Nikon D750).
ELECTRONIC VIEWFINDER
Picnic in Century Park. Depth of field is a welcome addition to most of B&W shot to reinforce texture (mother shirt, grass and trees) an important element of composition.
Thanks to new technology, mirror-less cameras using electronic viewfinders offer the possibility to frame and see any scene in Black and White through the lens.
And this is amazingly valuable to get the shot as it should be in term of framing, composition and setting.
I personally do use different mirror-less cameras such as Nikon1, Panasonic GH4 and Panasonic GM-5.
I love those cameras, as they are compact and their lens line-up is very diverse and of great quality.
It is a very interesting addition to my usual Nikon DSLR System.
Anyway, pictures are telling more than words and I think I had wrote enough here.
To complete the subject, please, get a look at some of my Black and White samples, all fully explained with caption.
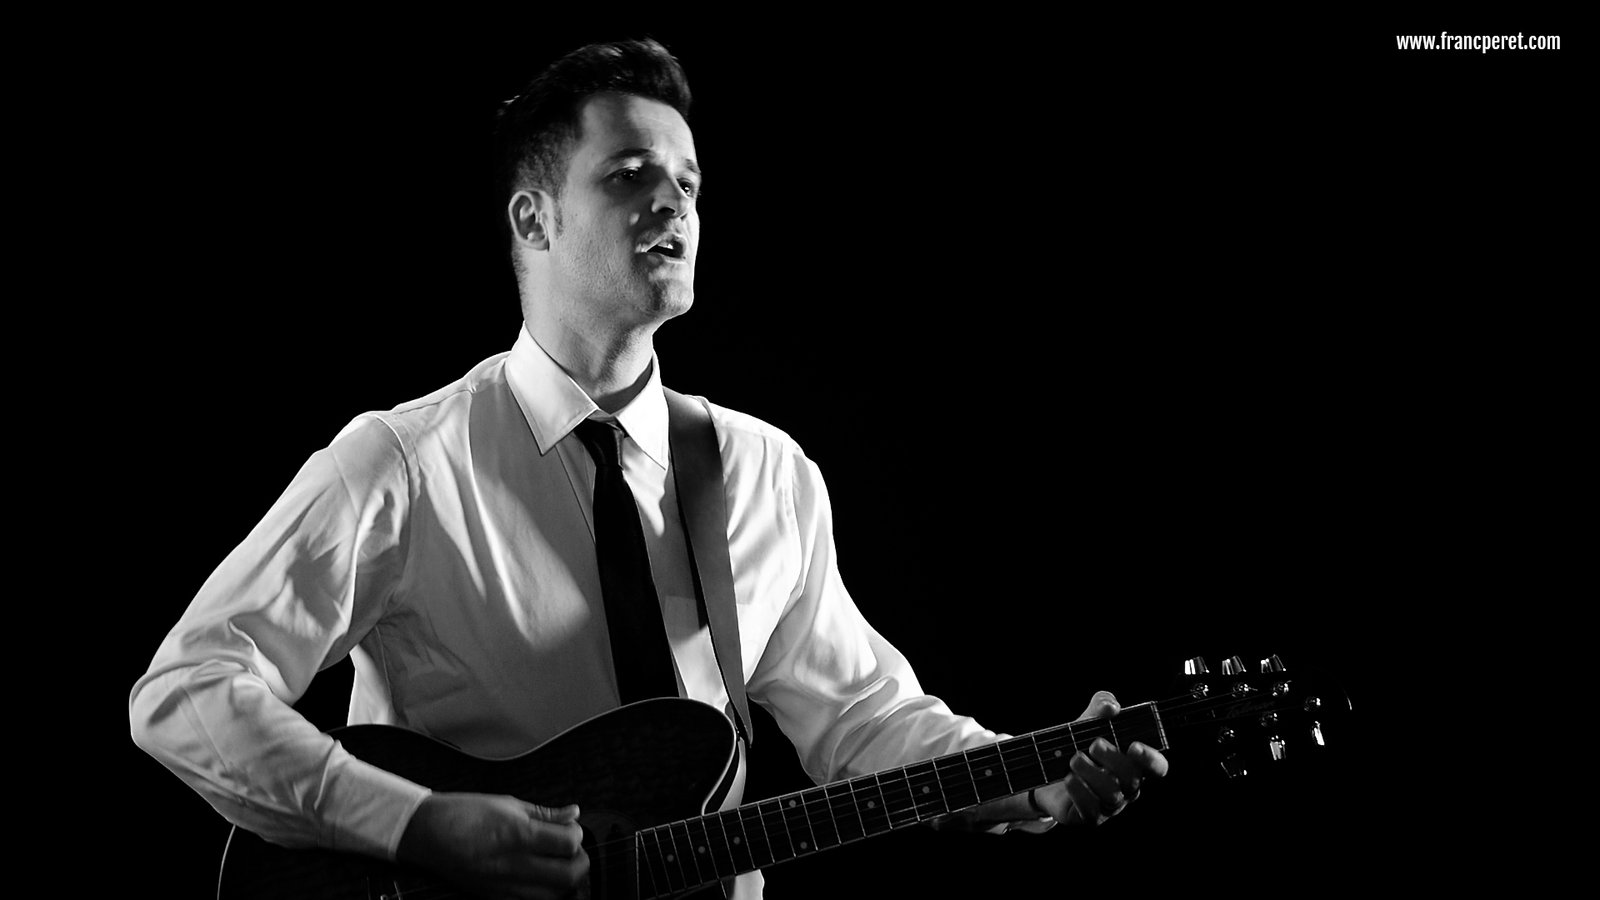
I took the opportunity of a corporate training to shoot this Music video for Dantes.
A black and White treatment for one of his latest title: “Zhong Guo de Fa Guo Ren” (Frenchman from China).
By Franc Peret
A famous video game company hired me to train 2 of their communication team employees in both video and photography shooting for them to be able to cover any event organized by their company to promote their working style and products.
This is a 8 classes private course and while teaching to those Chinese students how to light up a scene with mood, I took the opportunity to shoot a 4 minutes music video for a French performer, Dantes Dai Liang, singing his own song written in Chinese.
3 cameras were recording the performance from 3 different angles. Here is the point of view from the Panasonic AF103
For his song “Zhong Guo de Fa Guo Ren” (Frenchman from China) The idea was to get a classy look with the possibility to insert other images and light effect, later on, in the black background surrounding him.
It is always challenging to set up a lighting with someone dressed in white, as key light, fill light and kick light are behaving very differently according camera angle. And it is an exciting game to set up such a lighting without burning highlights.
This lighting set up and multi cameras shooting was shot in one day in my home/office.
Here are some making of pictures and some frame grab form my different cameras…
The shooting set up with multi cameras. GH4 is on the foreground.
You can get some more technical information in that post: Shooting Flat
V-Log and LUT offer new solution for video recording with a flat image at start which can be tweak in post processing to match the look you are after.
By Franc Peret
Shooting Video without an external recorder is like shooting jpg only in photography.
No raw file are available for post processing to extract all the recorded information by the sensor.
The shooting set up with multi cameras. GH4 is on the foreground.
Therefore, I avoid to record a saturated and contrasted image straight out of the camera while filming.
Having a flatter and almost lifeless image allows much more manipulation of the video in post production.
Same frame after post treatment.Original Frame out of the camera
Many photographer are not aware about this and it is true that the original image in V-log looks so bad on the camera screen that it is hard to believe that anything good can be extracted from it.
Another shot of singer Dantes after post treatment.
Here is a good example from my latest Music Video, with the original frame recorded with the flattest color profile from my Panasonic Lumix GH4 and the final result after 1 layer applied in Photoshop.
LUT and post processing are there to achieve a certain look, a certain mood and this has to be well thought form the early stage of writing a script and lighting the scene.
I can then export that treatment as a LUT file to correct the whole video in my edit line (Premiere Pro CC).
Impressive?
You can watch the final result (The Music Video) here: Shooting at Home
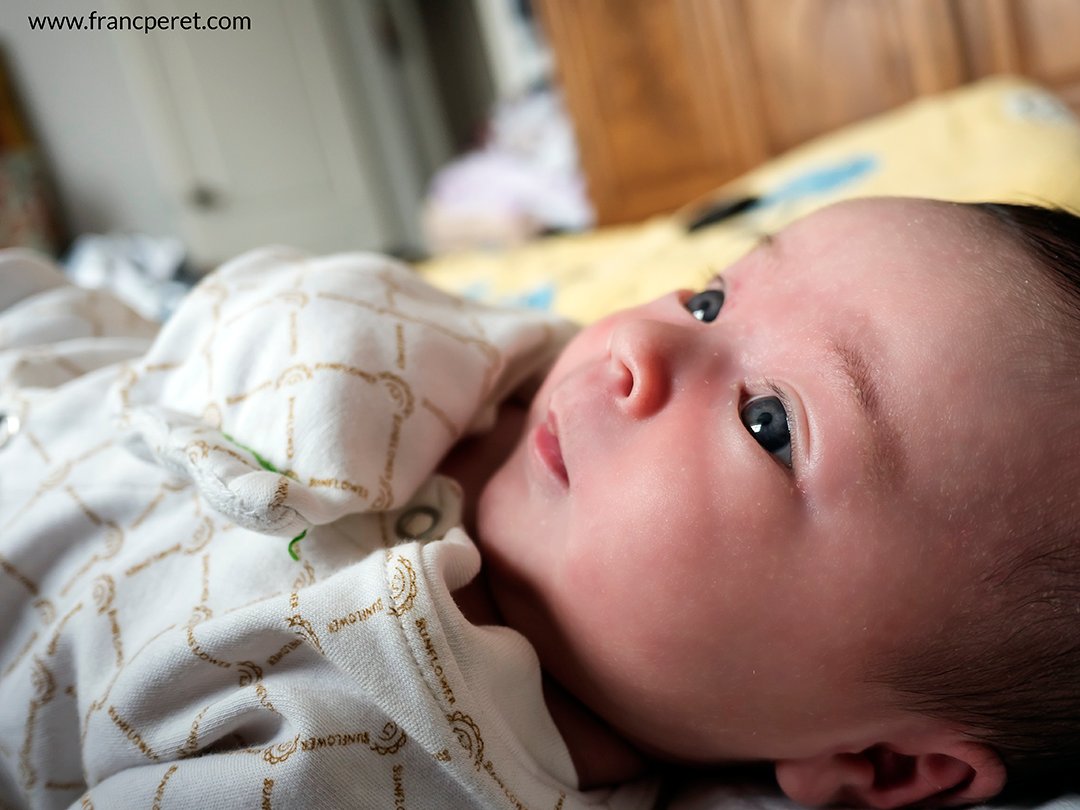
Taking care of my new born baby, I cannot resist shooting her daily, trying to capture her random facial and body expression while she is nestled in my arm. Shooting with one free hand only (often the wrong one), I am enjoying the great overall features of a camera, which became my favorite tool for self “holding Baby” Shots.
By Franc Peret
In my 28 years career, I had a chance to use a wide range of cameras from film to Digital, and since I am working in both photography, film making and video fields, I had to diversify even more my arsenal of shooting tools.
The Panasonic GH4 is quit generous in size for a M43 camera and the Nikon D750 is quit compact for a full frame camera. Overall the size difference between the two is not so huge, but weight is different and lenses are much bigger for the Nikon.
In the mood for choice
A Nikon1 V1 and classic lenses is one of my favorite combination for personal use, but it is not the best choice for “holding baby” shots due to its lack of external control, automatic features (such as autofocus with those lenses) and movable screen.
For my work assignment, I am using a traditional Nikon Full Frame DSLR camera (D800 and now D750) because I am accustomed to this reliable line up which is able to deliver great details images.
Also, to match any shooting situation (according client’s demand), I am owning a wide variety of Nikon lenses from 16mm to 500mm, an expensive collection I started 28 years ago: A good reason to keep faithful to a brand…
For my own time (street photography or traveling), I often pick up something funnier, lighter and more compact such as a Nikon1 V1 or any other compact alternative.
Panasonic for Pro Videography
Working also in Film Making and Corporate Video fields, I invested in the hybrid (photo + video) Panasonic Lumix line up (GH1, GH2, GH3 and GH4) as I always liked the image recorded by Professional Panasonic video camera (HVX200 or HPX500) I was using beforehand.
On Photography forums, many are debating about size sensors and number of pixels, but few post do care about ergonomic. I do. I want my camera to feel comfortable in my hand and I am looking for direct controls with the right touch and the best positioning. GH4 offers a more professional approach on that matter than the D750. Any extra feature which help me to work faster and more efficiently is greatly welcome and the swiveling screen of the GH4 is an amazing advantage compare to traditional DSLR. The D750 is the first Nikon FX camera with a tilting screen (up and down), but it is not sufficient to compete.
And the GH series are amazing tools for video production at a very reasonable cost. Thus, GH4 is capable of 4K video. With the mirror option, the POV “holding baby” shot will work with any camera. GH4 ISO200 1/25s and 25mm f1.4 @ f2
However, for professional photography, The Panasonic GH4 will not yet replace my Nikon bodies as there is still a difference in term of use and final quality output between the two.
Nikon for Pro Photography
Globally, Nikons are offering sturdier body, less shutter lag and more accurate continuous autofocus for sport photography, a second card slot for safety, more pixels for big prints, more accurate optical viewfinder for composition and better raw files to work with (more color information)…
Overall, I still feel that my traditional DSLR bodies are more suited to answer to any of my clients need.
Flexibility for Private use
My shooting style in private life is very different compare to what I am doing for work, and I do not mind to use a much more compact Panasonic system, as I like to feel freer not carrying too much weight.
Most of the time, creativity depends more on system flexibility (adaptability) than ultimate file quality.
This is the shot I achieved, despite my uncomfortable position. I had to correct the color cast on her face as the reflection of my orange tee-shirt tinted her skin in the shadow area. GH4 ISO200 1/160s and 25mm f1.4 @ f2.5.To achieve such a shot from my point of view (POV), it becomes sometime acrobatic as soon as my right arm is busy holding my daughter. Despite the appearance, I am composing the shot precisely, thanks to the swiveling screen open on the left side of the camera. (Shot by Sarah)
Self Baby Nestling Shooting
Recently, as I explained in the introduction, I am stuck at home for a good reason, and often need to take picture, by myself, of my little girl resting in my arm.
This is a difficult task as I am having only one hand free to select the focus point, to modify the setting and to press the shutter button.
Another moment and another angle from the same position. This time, I lowered my upper body to get that point of view. GH4 ISO200 1/50s and 25mm f1.4 @ f2.8.
Also, being so close to my subject, I often meet the minimum focus distance limit of my lens and I can hardly diversify my point of view. Actually, this last restrain is counterbalanced by the possibility to carry the subject under the source of light of my choice.
The GH4 is offering a touch sensitive swiveling screen, and a total freedom to set the focus point anywhere in the frame.
GH4 is made for it!
Actually, I am working around all those limitations by using my Panasonic GH4, thanks to its numerous interesting and adequate features:
1 – GH4’s fully articulated swiveling screen provide a perfect vision of the composition from any Point of View (POV) for me to shoot from any position and even in front of me for a self portrait of us, if needed.
2 – This screen is touch sensitive and it allows me to select the focus point with one finger on the exact part of the subject I want sharp after composing my shot. If I want, I can also take the shot by taping on this screen, just like a smartphone.
Silent shutter mode is a great option to NOT wake up the baby while shooting that close!
3 – The GH4 has focus points located everywhere on the frame (which is not the case on former DSLR which get their focus points spread around the center of the image) and I am free to put my subject wherever I want it in my composition, even next to a border of the frame.
4 – Thanks to a smaller sensor, the Lumix lenses are often sharper on the complete frame (from center to corner), even at full Aperture, while FX lenses often need to be closed down 2 stops to deliver an equivalent result. This means possibilities to use lower ISO on the Panasonic.
This also means another possibility to use lower ISO on the Panasonic.
5 – Also thanks to a smaller sensor, the depth of field is more important than on a Full frame camera (globally a f1.4 Aperture on the GH4 is equivalent to a f2.8 Aperture on my Nikon D750), so there is more things in focus under the same lighting condition (while using the base ISO on both cameras), which is an advantage at such short distance.
Deep sleep breath is one of the most wonderful moment holding a baby in your arm. Feeling safe and comfortable, she just let it softly go for a 2 hours sleep… GH4 ISO400 1/30s and 25mm f1.4 @ f2
6 – The generous size of the GH4’s body (for that type of camera) and its multiple display of physical buttons mean a great ergonomic. Therefore, with only one hand I can have direct control on ISO, White Balance, Exposure compensation, Aperture, focus point positioning and shutter trigger!
7 – Last but not least, the GH4 gets an electronic shutter function, which means (almost) complete silence shooting, which is a huge advantage to NOT wake up the baby who had so much difficulties to fall asleep!
Sharing moment, I am watching a movie on my computer screen while Apolline is doing her gym. GH4 ISO400 1/13s and 25mm f1.4 @ f1.6
GH4 better than a Smartphone?
Compare to all those advantages, my smartphone is quit limited. lacking a screen independent to the on-board camera and a physical shutter button. I am often missing great shots with my smartphone as, in certain position, I cannot efficiently reach and press the virtual shutter trigger located on the screen.
Another restrain is the deformation created by the wide lens, especially while shooting so close.
Me and my mini Me: Sometime, it is mission impossible to shoot on your own; While sleeping for example. Apolline’s right hand is not cut out in composition. As we cannot shorten her nails yet, we are keeping her hands inside very long sleeves to avoid scratches on her face. Sarah’s shot with Panasonic GH4 ISO500 1/20s with 25mm f1.4 @ f1.6.
Why holding the baby?
Another good reason to turn the camera a bit further away than my arm: Mama and Baby interaction. Panasonic GH4 ISO320 1/125s with 42.5mm f1.2@ f1.4.
Of course, there is some limitation and lack of variety by shooting while holding the baby, but there is something extremely motivating: straight interaction between her and me.
While nestled in my arm, my baby girl never stop to change her eyes, facial and body expressions.
She might be willing so much to communicate with me.
And I do not want to miss a chance to grab those fragments of early baby language, before articulated words come into our relationship.
Magical moments capture
Therefore, most important is to concentrate on some usual and unusual technical factors to capture those magical moments. Here are some:
1 – Being so close, lenses (especially wider ones) create distortions as soon as the subject is not centered. Best is to shoot with, minimum, a 25mm lens on a M43 camera, a 35mm on a APS-C (DX) Camera and 50mm on a FX Camera. I am using a wider lens sometime (14mm on M43 = 28mm on FX) to play with the distortion (to make the baby looks like a doll with big eyes on the foreground for example) or by carefully keeping the face of the baby close to the center while showing much more things in the background.
Using a wider lens very close to the subject (the subject being close to a border of the frame) may create some “cute” distortion. GH4 ISO400 1/125s and 14mm f2.5 @ f2.8By keeping the face closer to the center of the frame, a wider lens “behaves” normally and allow to add more information from the environment. GH4 ISO200 1/40s and 14mm f2.5 @ f3.2
2 – Being so close, the depth of field is extremely reduced and it is, more than ever, important to pick up the right part of the subject to focus on (Eyes, most of the time). Also, do not hesitate to close down the Aperture to get enough in focus.
For such close up, you have to set the focus point on the part of the face you think is the most important, especially while using a wide Aperture. This is a risky choice and better to close down the Aperture instead, if you feel you don’t get enough depth in focus. GH4 ISO200 1/160s and 25mm f1.4 @ f1.6.
3 – The way you dress will matter a lot on the final result. While holding the baby in your arm, close to your body, your shirt color (brought alive by the main source of light) is going to be reflected on the shadow area of the baby’s face. Best is to get a white shirt (for smoother contrast) or a black shirt (for more dramatic lighting style, with darker shadows) or a warm color tee shirt to “spring” up the atmosphere.
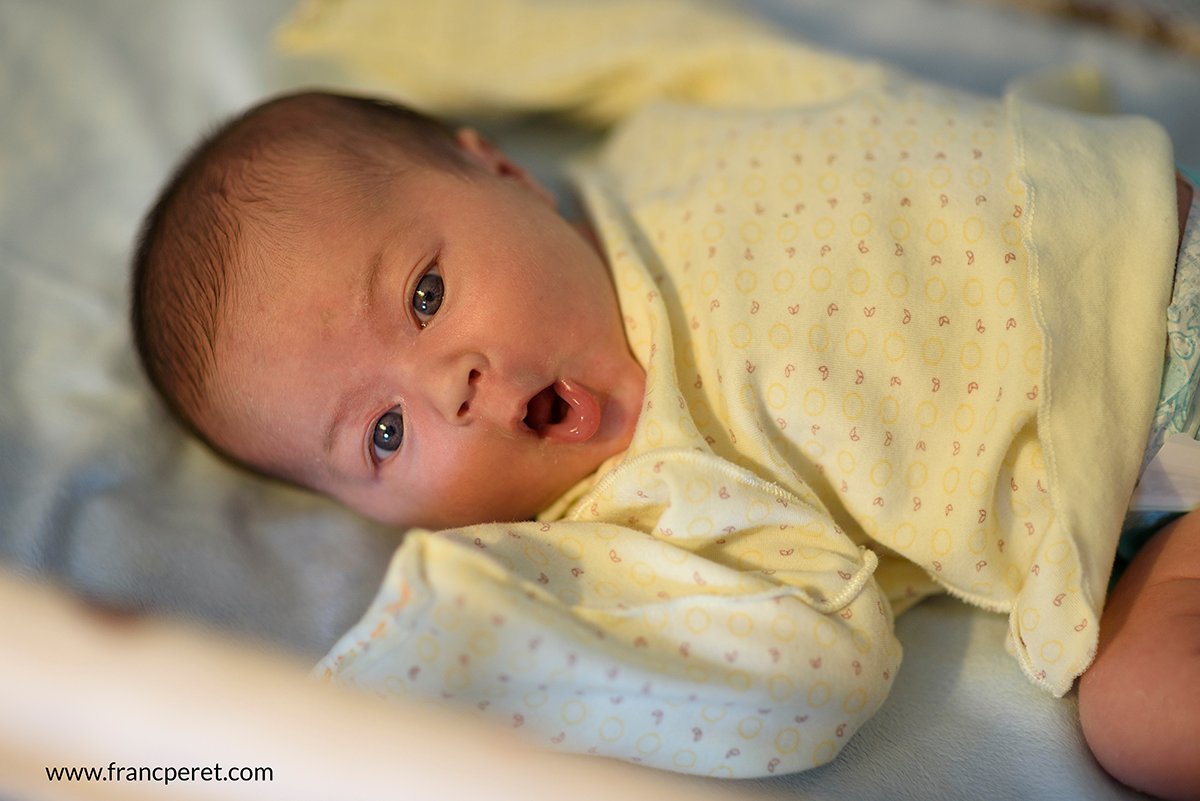
Each facial expression is giving her a different personality. Being serious, She looks like a little boy much older than her 3 weeks. This might also due to the Darker shadows provided by my black shirt. Panasonic GH4 ISO400 1/30s and 35mm f1.4 @ 1.4.
As you can see, by learning its restrain and gaining more experience on that shooting style, I am going to come up with more creative ideas by taking benefit of the limitation of the concept itself.
So do not be surprised if you see me wearing an aluminium suit one day!
As a conclusion, I would like to give a very important advise to those who are willing to give it a try with a baby, a pet, a pole dancer, a Chippendales or your grand’Ma: hold firmly your subject!
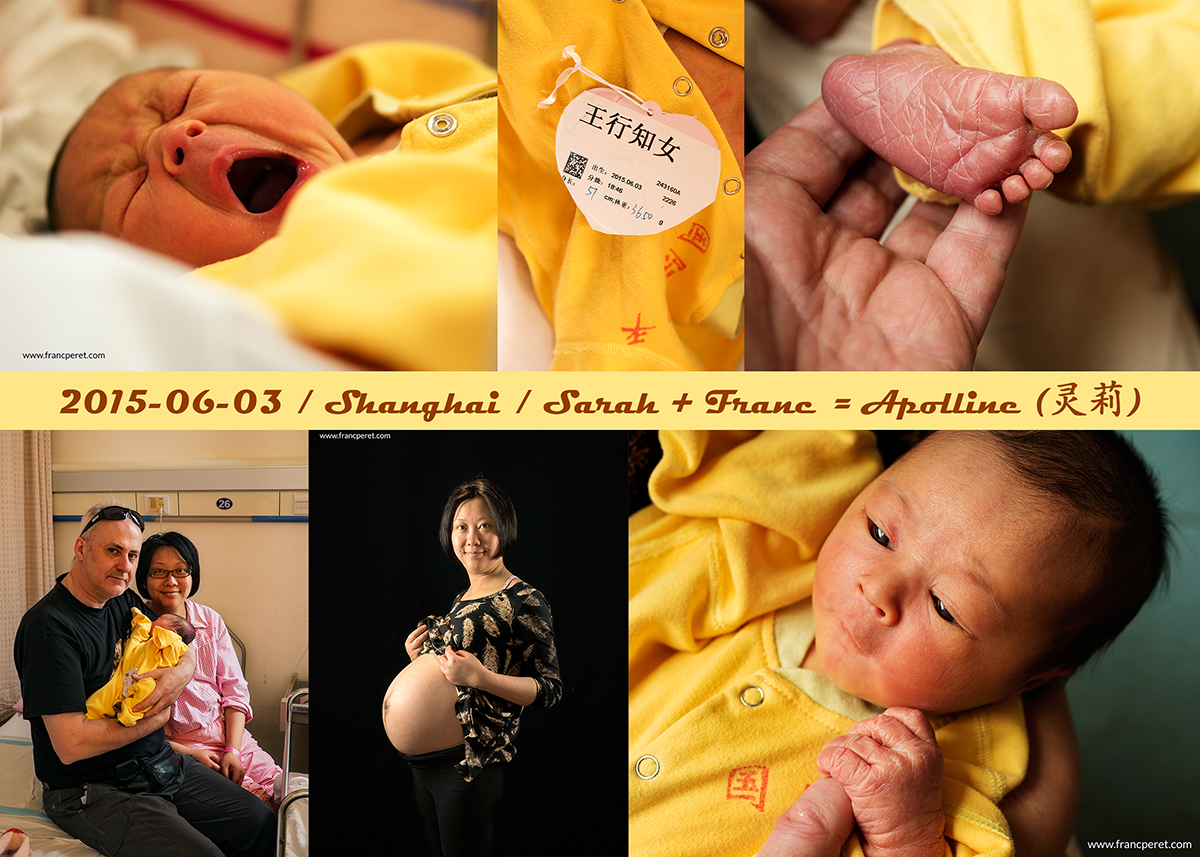
Apolline (Ling Li, 灵莉, in Chinese) was delivered on June 3rd, after 36 hours of tough efforts from her mother (and my beloved wife) Sarah. First mensuration: 51cm long and 3.65 Kg. I am taking advantage of this great personal event to offer some tips about taking pictures of babies.
By Franc Peret
Having a baby is the start of an emotional journey which is going to last until her adult life (at least).
Another earlier shot, less than 3 hours after birth. In China, a tag is attached to the body with the name of the mother and the sex of the baby. Majority of Chinese parents prefer boy than girl and some of them would not hesitate to switch a baby to get their wish fulfilled. Light was getting lower already, but my subject is not moving. I increased the ISO to be able to close down a bit the Aperture to be sure that the complete frame will be sharp. Panasonic GH4 ISO400 1/40s, 25mm f1.4 @ f2.One of my very first shot in the hospital, a couple of hours after Apolline birth in Shanghai. Artificial Light was real bad, but that does not matter in such circumstances, capturing immediate magic moments are more important than aesthetics improvement sometime. Panasonic GH4 ISO200 1/80s, 25mm f1.4 @ f1.8.
Most of the time, my students are having difficulties to take good pictures if they are too much in love with their subject, which is often the case with kids (hopefully!).
When emotions get on the way
With a camera in hand, they can hardly see their beloved ones with cold blood aesthetics and critical eyes for concentrating on key elements, which are somehow needed to achieve a successful composition and therefore a better shot.
A second “finger holding” picture with a different angle and much more light. Notice that on those 2 shots I am using a diagonal composition to fill up my frame with interesting information and to render a more dynamic feel: her finger grabbing seems to be in action, like it just happened. Panasonic GH4 ISO200 1/320s and 25mm f1.4 @ f2.8.First day with Apolline, I was amazed by her hands, especially compared to surrounded Chineses babies in the same room. Her fingers are so thin and so long. To give an idea of their size, I let her holding one of my finger and I focused on it to attract the attention of the viewer. Panasonic GH4 ISO200 1/60s and 25mm f1.4 @ f2.
Double personality
Due to my long professional career, I am used to split my personality in two as soon as I am grabbing a camera for shooting.
Massage time on Apolline’s little foot. While my right hand was busy, I succeeded to stabilize my camera with my left hand, setting up manually the focus on the nearest limit of the lens and just moving physically toward my subject until the foot gets in focus. I used a very bright lens to render that dreamy comfy look from the blanket and surrounding element. Panasonic GH4 ISO200 1/100s + Metabones Speed Booster + Nikon AIS 55mm f1.2 @ f1.2.A foot print was taken from our new born baby for Hospital record, I focused on the blue ink which is still visible. Important here was to press the shutter at the right timing, when feet were statics, to get the shot in low light and low ISO. Panasonic GH4 ISO200 1/250s and 25mm f1.4 @ f1.6.
As everyone else, I am using my heart for emotion and inspiration, but whatever happens, I am able to keep my brain concentrated on technical decision as soon as there is a view-finder between me and the scene.
Different Case Study
For example, in usual life, seeing blood flooding make me badly sick, but as a photographer, watching bloody scene through my lenses does not affect me at all.
Here, the composition challenge was to get both my hand and her feet in the shot and the rest of her body out of focus in the background. I turned the bed to soften a bit the contrast by getting the windows (main source of light) closer to my right shoulder. Here, depth of field was less important as only the foot is the main subject. Nikon1 V1 ISO200 1/50s with Angenieux 25mm f0.95 @ f2.I am addicted to my daughter’s feet which are quit slender for a 2 weeks old, half Chinese, baby girl. I position the bed to get that strong contrast lighting from the nearby window to help me to separate her feet and my hand by creating a shadow between the 2. I tried to be as symmetrical as possible to attract the attention on both subjects texture, shape and size. I Closed down the Aperture to get enough depth of field and more details (by reaching a sweet spot of my lens) to perfectly render the skin texture of both hand and foot. Nikon1 V1 ISO100 1/40s and Angenieux 25mm f0.95 @ f2.8.
In such shooting circumstances, I am only thinking of getting the best shots possible out of the scene, even the guy in front of me is bleeding like hell, as you can see here, in my 1994 Taiwan Qi Gung report.
Actually, I felt sick the first time I watched my pictures!
Sweet headline
To come back to my headline sweeter topic, shooting baby (especially yours) need that double personality split capacity and I am sure any of my student or reader can earn it.
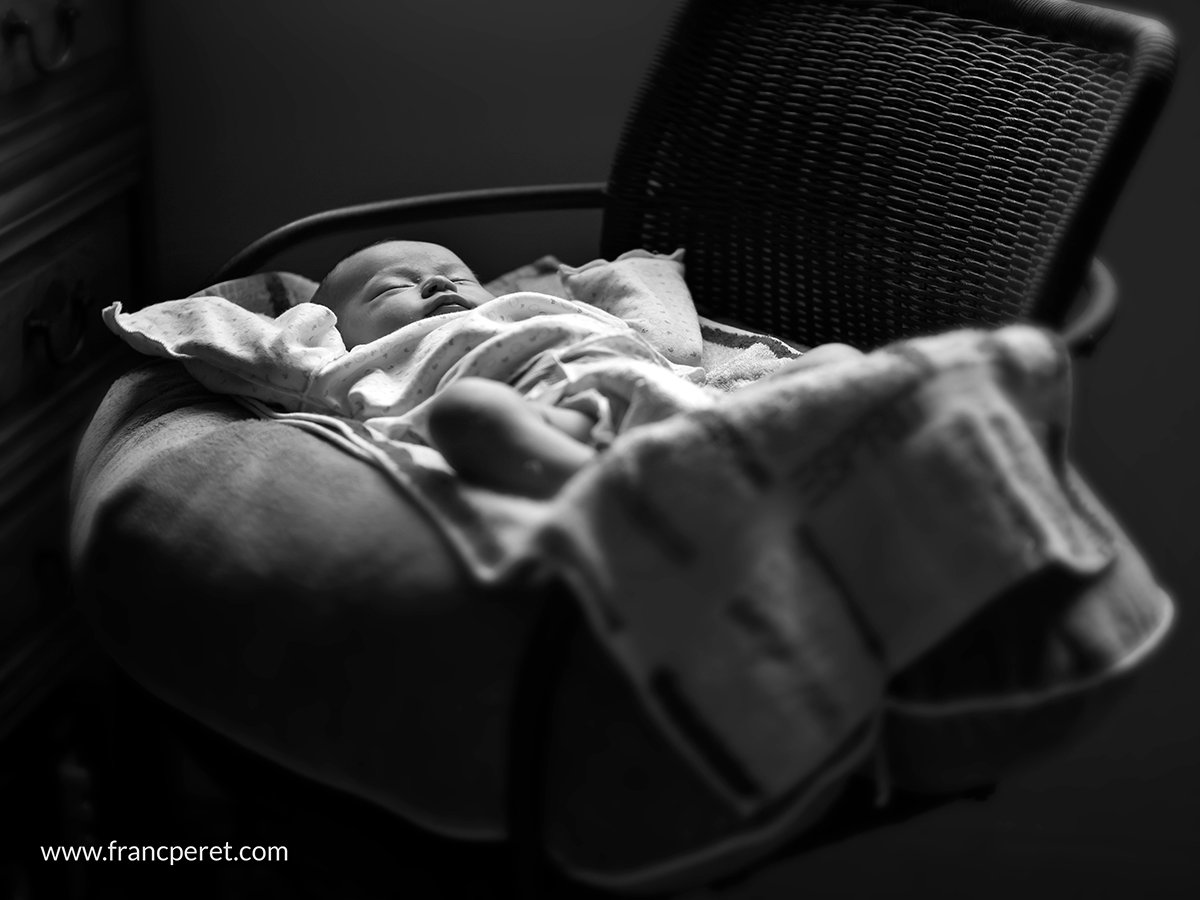
Wake up time. This is a difficult moment. Baby is moving randomly and it is best to pull back to get some headroom and “footroom”. In this shot, I didn’t anticipate enough the amplitude of her movement and her right foot is cropped a bit. I still like this picture because the blurry parts (legs are both out of focus and moving) translate the body tension accompanying the moaning session. My advice: Just get what you absolutely need in focus and do not mind the blurriness elsewhere as soon as it serves your intention (more dynamic and lively shot). Nikon D750 ISO 560 1/125s and AF-S 85mm f1.4D @ f2Sleeping time, nothing is moving, there is no excuse to get a blurry or grainy pictures, in those ideal conditions. I positioned the bed (a chair actually) next to a window to get the smooth light (overcast polluted day is perfect for that) falling on my baby. I can work quietly, stabilizing my camera and shooting at base ISO for best quality. I used a very bright lens and focused on her face. Panasonic GH4 ISO200 1/200s and 42.5mm f1.2 @ f1.2
To help them and you on that, I am delivering some simple tips related to baby shooting, something I am experimenting since 3 weeks at the time I am writing this article.
Auto portrait in the bathroom. First of all, light on as many (and good) lights as possible to get a better quality shot. Remember: Photography is painting with light! Second, position the focus point on something significant (such as a face), hold the camera firmly (and the baby too!) and try to keep it straight, horizontal and stable. Try to look friendly or smart and shoot. Nikon D750 ISO400 1/80s and 50mm f1.8 @ f2.8. I increased the ISO a bit to be able to close down the Aperture (to get more DOF) as I am using a Full Frame camera and as my face and baby’s face are not positioned at the exact same distance. Being stable enough to hold the camera and to not move, 1/80s was sufficient.Cleaning time. Mama is taking care of her baby girl who is moving a lot, except her head (one of the heaviest part of her body). Therefore, I was able to keep a reasonable ISO value as a lower shutter speed was sufficient to get both a sharp face while keeping hands movement blurry, to describe Apolline’s excitement. I focused on her eyes precisely as I am quit close with a fully open Aperture (less Depth of field overall). Panasonic GH4 ISO400 1/40s and 25mm f1.4 @ f1.4/.
TIPS FOR PASSPORT PICTURE
First thing first, I needed to shoot a passport picture to be sure to get it on time for a planed trip back to France during summer break.
Mission impossible?
This is not an easy task when baby is only 1 week old and can hardly:
My one week old daughter’s picture for her passport. Shot with a Panasonic GH4 ISO200 1/60s and 28mm f2.8 @ f4 (for more details and depth of field) under natural light (window and white wall).
– Stay awake with eyes opened under good lighting.
– Sit down
– Hold her head by herself.
5 steps for success
All of this sounds like Mission impossible, but I succeed to manage it following those steps:
1 – Stand next to a window to collect as much light as possible.
If weather is sunny, get a transparent curtain closed to soften the light.
Do not try to shoot it at night or under artificial lighting, the image has many chances to be grainy or blurry. Do not use flash! It is dangerous for baby’s eyes and can damage them, especially if you set a direct flash straight on her face.
2 – Mount a ‘portrait” lens on your camera: a 25mm or longer on a M43 camera, a 50 mm or longer on an APS-C (DX) camera or 85 mm or longer on a FX camera.
3 – In Aperture mode, set up your ISO and Aperture in advance, according your lighting situation, to reach a fast enough shutter speed (about 1/125s).
4 – Get your baby well dressed, in a good mood and fully wake up (daytime after feeding him/her).
5 – Someone has to hold her/him as straight as possible, facing the camera, with one hidden hand behind the neck for keeping him/her still.
One bad habit is to always shoot close up shots and to avoid too much the environment, as the changing facial expression of the little one is so attractive. Panasonic GH4 ISO400 1/60s and 25mm f1.4 @ f1.4.With a bit of discipline, you can try to force yourself to pull back and to include informative out of focus foreground and a wider background around your main And cute subject. Panasonic GH4 ISO400 1/100s and 25mm f1.4 @ f1.4.
Later on, I am going to add some more ideas and advises into this page, while adding more pictures.
Already, you are having plenty of tips by reading all posted picture’s captions.
Hope all of this will be useful…
Some technical remarks
I am using 3 different types of cameras with different size sensor. This matters a lot in term of Depth of field and field of view. I am used to switch and I am used to consider my lens choice and my Aperture settings accordingly.
Surprise! Nikon D750 ISO400 1/160s and AFS 85mm f1.4D @ f1.4.Do not hesitate to shoot a lot and often, as soon as you get a balanced composition, a good enough lighting and the right exposure. Facial expression is changing so quickly that every shot will be different. It was real hard to make a choice among so many cute facial expression. Nikon D750 ISO400 1/160s and AFS 85mm f1.4D @ f1.4.
To keep it simple (even it is not perfectly accurate), Nikon D750 (FX) Sensor’s Size = 2 x Panasonic GH4 Sensor’s Size (M43) and Nikon D750 (FX) Sensor’s Size = 2.7 x Nikon 1 V1 Sensor’s Size (CX).
Or Little Glamorous Asian Princess… Nikon D750 ISO400 1/160s and AFS 85mm f1.4D @ f1.4.Funny face… Nikon D750 ISO400 1/160s and AFS 85mm f1.4D @ f1.4.
In term of field of view:
A 25mm lens on a GH4 is equivalent to a 50mm lens on a Nikon D750.
A 25mm lens on a Nikon1 V1 is equivalent to a 68mm lens on a Nikon D750.
In term of Depth of field rendition:
a f1.4 Aperture on a GH4 is equivalent to a f2.8 Aperture on a Nikon D750
a f0.95 Aperture on a Nikon1 is equivalent to a f2.8 Aperture on a Nikon D750
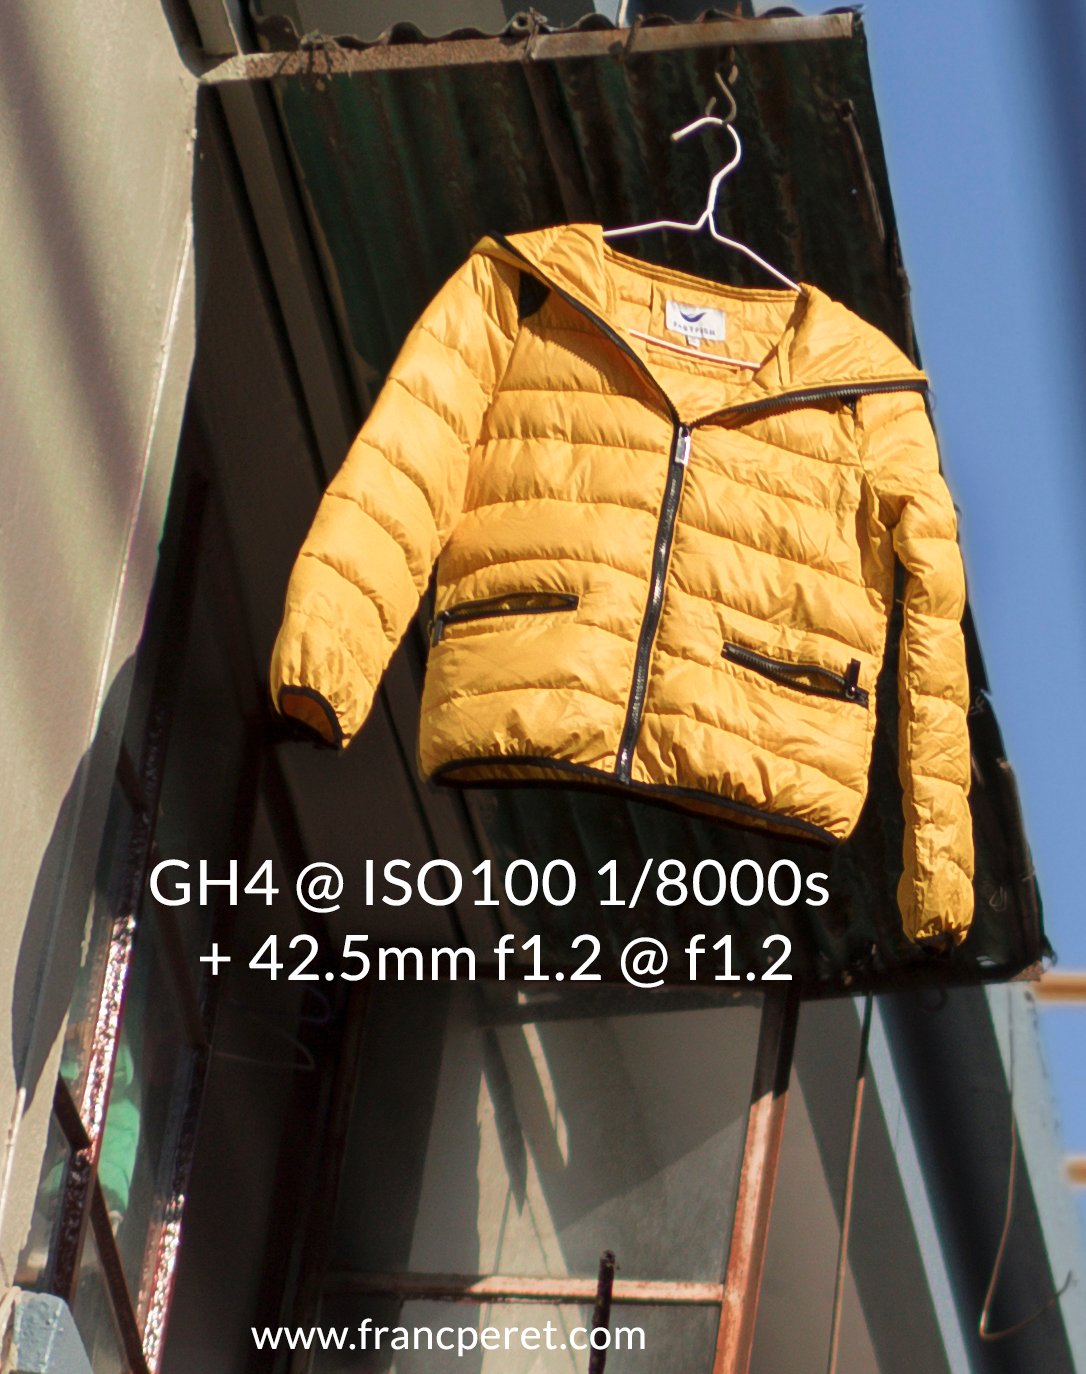
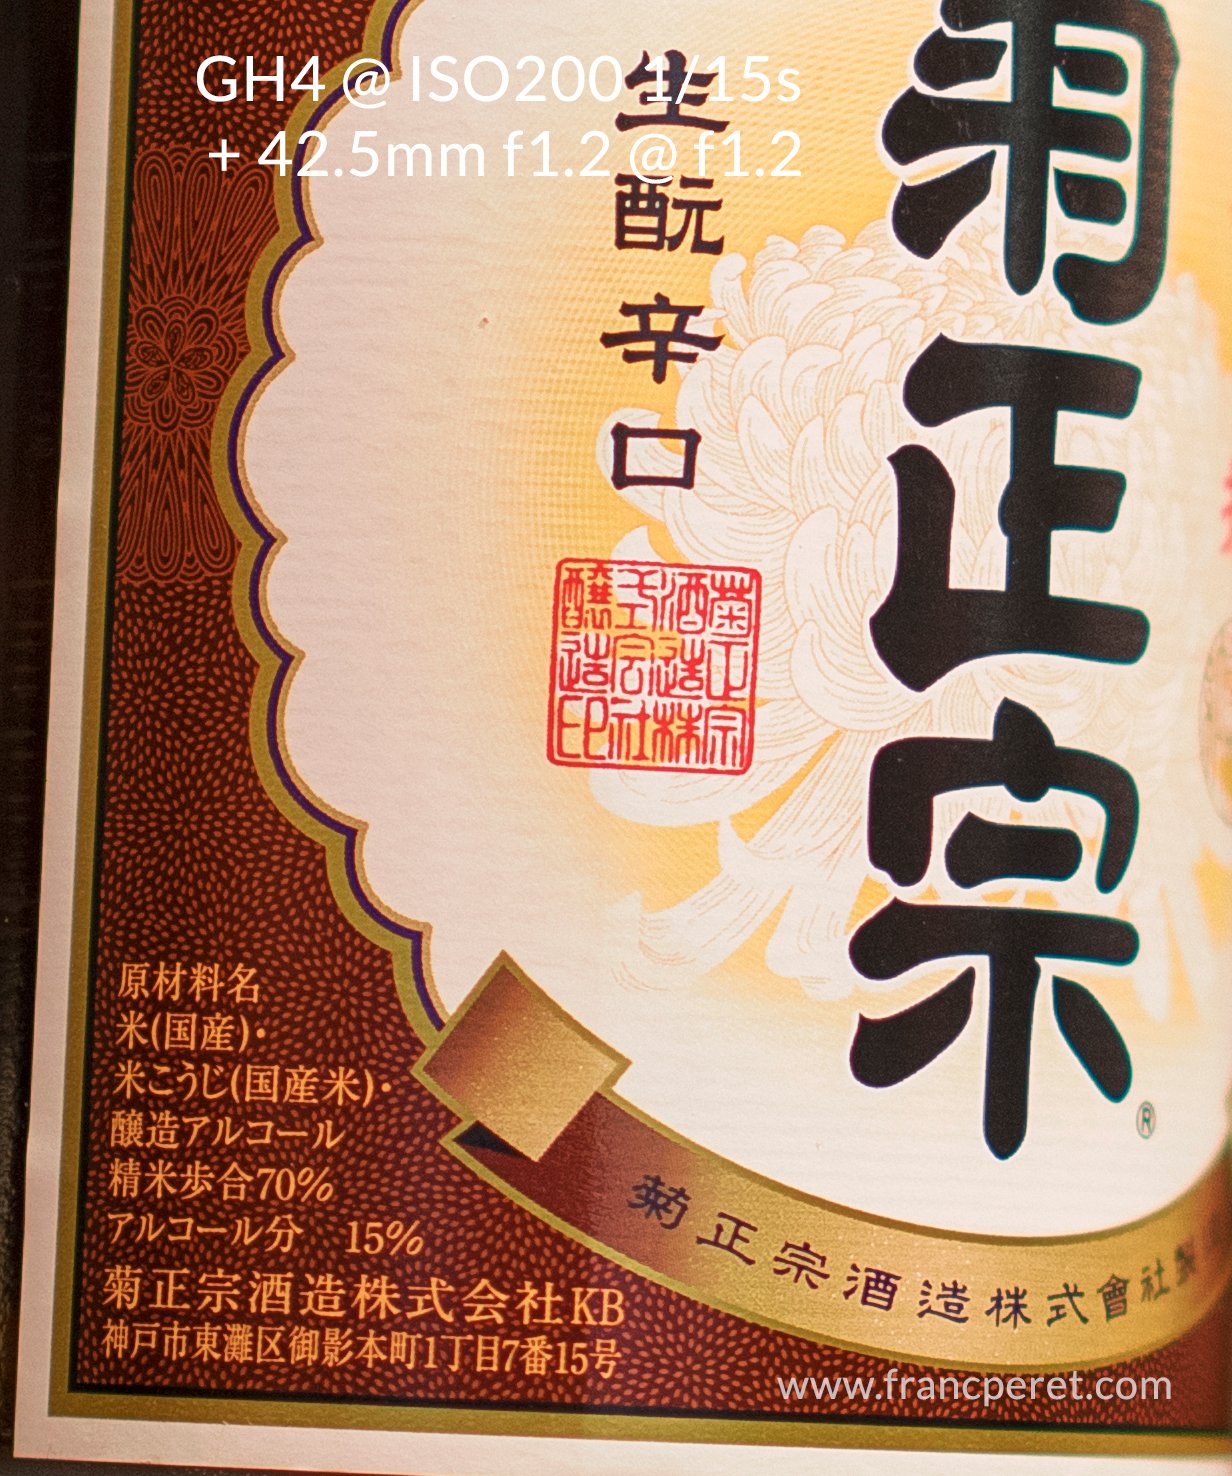
I had a chance to spend a couple of days with the Panasonic 42.5mm f1.2 and my GH4 and I tested it fully open, most the time to have an idea of its possibilities.
By Franc Peret
In China, this lens is less expensive than in the rest of the world.
A new official (1 year guarantee) copy is sold 7800 RMB, which is about 1250 USD.
GH4 and Panasonic Leica Noctiron 42.5mm f1.2
This price is still very expensive for a M4/3 lens, but all depends on what it had to offer.Here are some of my shots for you to get an idea.
GH4 and Panasonic Leica Noctiron 42.5mm f1.2
I worked on the raw file to create the jpg with a slight sharpening of 80/2/2 as the GH4 file are easy to get noise if they are pushed too much in that department.
With every full shot, there is a crop around the focus area mentioning the camera and lens datas.
All those picture were shot on 3:2 instead of 4:3 picture proportion so the maximum number of pixel is 12 millions instead of the 16 I would get on 4:3 (but I don’t like it much as I am use to 24×36)
I shot a lot with the lens fully open even it was not always the best option for the subject I was shooting (and the lighting condition) but I wanted to see what this lens offered at f1.2.
So far, I am not completely seduced and I do need to do more test may be with another camera, such as an Olympus Em-1 which render sharper images ( I know as I got both for a while).
Compare to my Nikon 85mm f1.4, used on a D800, I can notice different positive things:
– The Panasonic lens can be trully used wide open in any lighting situation (no chromatic aberration so far) mounted on the GH4.
– Focus is very fast and more accurate than on the Nikon combination. Autofocus system is different and the 42.5mm f1.2 still deliver much more depth of field than the Full frame 85mm f1.4 mounted on the D800.
– Weight and size are absolutely not a problem and the lens balance very well with the GH4. The Noctiron is lighter than the Nikon AIS 50mm f1.2, which is a classic manual focus lens without any stabilization system.
GH4 and Panasonic Leica Noctiron 42.5mm f1.2GH4 and Panasonic Leica Noctiron 42.5mm f1.2
– It seems that this lens is rendering sharper result in lower light (indoor) than in a bright environment (diffusion?).
I still didn’t get a “wow” result with this lens, but I had just few hours to try it, and my series of pictures is not interesting enough yet to deliver a valuable conclusion.
I am going to shoot more and to post more pictures and comments here, so keep in touch