Twice a year I was teaching a 7 weeks (25 hours) filmmaking course in Shanghai. For one of my term, I decided to help one of my friends, by shooting a music video for his new Album: Douce Chine (China Delight).
By Franc Péret
DOUCE CHINE is a Music Video shot with 5 different cameras: Leica M240 + Lumix GH2 + Lumix GH3 + Panasonic AF100 + Nikon D800. This was an interesting project for my students as well, as we had time to work on lighting set up and camera positioning.
Check my course here: http://francperet.comclasses/film-courses/
Song is about a guy who is used to travel from France to China, mixing up jet lag feeling with night life, good wine and wave of exciting emotion spicing up his life in China.
This 4 minutes video was integrally shot in 10 hours (2 afternoons) in our classroom which is only 25m2. That means we could only walk 5 steps max in the different directions of the room.
Why multi cameras shoot?
Out of my teaching work in photography and filmmaking, I am both a pro photographer and DP/cameraman. I am having lots of gears and this shooting was a good place to put all of my cameras at work for the good of the students; Nikon D800, Lumix GH2, Lumix GH3 and Panasonic AF100.
I hired one of my Photography students (Richard) to be my main assistant and he brought along his Leica M240 he had never tried in video mode so we decided to give it a try on that project.
Music video is the place for multi camera shooting as you cannot ask the singer to repeat the exact same performance many times in one afternoon. Despite the lack of space in our classroom, we managed to position the camera to cover as many angle as possible in our 3 different sets of background: Simple black back drop, (fake) Bed and Chinese curtain, Window with (fake) street light reflection.
There is no use to get many cameras in action if their position and angle of view are not both different and matching.
Image bank from extra cameras
On the image shot for the music video, I add a layer of images I shot in the previous years in France and China. They were shot with GH1 (night shots and on board shots) Panasonic HVX200 (club and slomo of people walking) and HVX200 with Letus Ultimate (Water shot, airplane, traditional places…).
I followed up with the HD evolution but all my HVX shots (720p 50fps) still looks real good even blew over scaled to 1080p. Great cams always existed and any day, I can still grab my HVX200 if it matches my need on a new project.
Which lenses?
I am having some great lenses and I used some of my favorite on that shooting; Voigtlander 25mm f0.95, Nikon AIS 50mm f1.2, Nikon 85mm f1.4 AFD, Computar 75mm f1.4 (a rare but cheap CCTV lens great for portrait).
Prior to the shoot, I bought a 35mm f1.8G (DX version) which is doing very well on the D800 even in FX mode as I knew I would add some vignette in post. I am always taking advantage of this type of experimental project to test new things without pressure.
The GH2 was hanged to the ceiling on top of the fan with the Voigtlander 25mm which was wide enough to get the establishment shot at once. The D800 shared the 35mm and 50mm at f2.
The GH3 always used a Speed Booster (great tool that I highly recommend) with the Nikon 85mm 1.4 which is an amazing lens (older AFD version half price than the new G version). The AF103 mainly used the Computar (200 USD lens). For the Leica, Richard brought along his 50mm f0.95, 35mm f1.4 and 90mm f2.
Those 3 lens costs more than my complete equipment, but they are already sharp fully open and get their own character which makes their full frame image looks more like Medium format camera.
Light and camera settings.
This is not a proper camera test as the aim was to complete the music video shooting. Therefore, we didn’t try different set up on camera or aperture on lenses to compare. Instead, we kept everything pretty much the same. I am used to set up a lighting to be able to shoot at f2 on all camera at ISO200 (base iso for GH2, GH3 and AF100).
This Aperture offers great sharpness on all my lenses and it also allows me to use lenses of any angle of view from 12mm to 180mm at f2(with speed booster) on M43 (which means 24mm to 320mm on FX).
I am also working at f2 most of the time as I know the combination of lights able to deliver this result which is time and budget saving. There is just some slight correction according camera position versus light position.
Playing a bit on the ISO or the aperture can handle that. On the other hand, Richard wanted to go shallow depth of field (f1.4) on the Leica and sets the ISO at 100.
Sometime, he went too much on that direction (while being close to the subject) and you can notice that some of Leica’s shots are a bit out of focus as depth of field is too limited. I guess that Richard went as far as f0.95 few times on the 50mm due to noticeable overexposure on some shots.
Ever since I discovered it in 1995, I’ve loved Hong Kong. It is a unique place in the world. Small in size but so huge in flavors, meanings and cultural diversity. I love this place and my only regret is that I never having lived there.
Franc Peret
TIPS :
1- Always click on the image to view the highest quality
2 – La version française suit la version anglaise.
Kowloon CoolieHKG Island historical street and restaurant
As you may know protests have been happening almost daily in HKG for months and while as a foreigner and especially as a Westerner (due to the colonial past of this area) I do not did not feel entitled to judge or intervene in these internal events.
Ferry from HKG to Kowloon
As a photographer, however, I hoped to witness and capture with my camera some of these incredible street protests that are part of contemporary history.
Never ending life
I have followed many similar events in France, such as the still current demonstrations of the yellow vests, and I found it both interesting to compare these photographic and human experiences and these popular protest movements.
The Unwitting Peacemaker
HKG fast & tasty food
Unfortunately for me, but fortunately for Hongkongers, because of the local elections, nothing happened for the 4 days I stayed there on an express round trip.
HKG is THE destination
So I focused on the city and its inhabitants to collect some “tourist” shots to my liking.
Strong memories of my favorite movie “Chungking Express”, and all my previous visits came back in the form of emotional tsunamis:
Blue Double deck
Memories of my 25 years of irregular liaisons with this extraordinary place come back to my face.
My many round trips from Taiwan to renew my visa, my meetings with Christopher Doyle (Wang Kar Wai DOP), my video shoots for Harley-Davidson, my friends who left and those who still live there…
FRENCH VERSION:
MON HOMMAGE A HONG KONG
Artistic visionReal Vision
Depuis que je l’ai découvert en 1995, j’ai adoré Hong Kong. C’est un endroit unique au monde. De petite taille mais tellement énorme en saveurs, en significations et en diversité culturelle. J’adore cet endroit et mon seul regret est de n’y avoir jamais habité.
Franc Peret
Comme vous le savez peut-être, des manifestations se sont produite presque quotidiennement à HKG, pendant des mois et si en tant qu’étranger et, plus surtout en tant qu’occidental (en raison du passé colonial de cette région), je ne me sentais pas en droit de juger ou d’intervenir dans ces événements internes.
Ferry Cruise at night
En tant que photographe, cependant, j’espérais être témoin et capturer avec mon appareil photo certaines de ces incroyables manifestations de rue qui appartiennent à l’histoire contemporaine.
Should I stay or should I go ?
J’ai suivi de nombreux événements similaires en France, tels que les manifestations toujours actuelles des gilets jaunes, et je trouvais cela à la fois intéressant de comparer ces expériences photographiques et humaines et ces mouvements populaires de protestation.
Night is a different show
Malheureusement pour moi, mais heureusement pour les Hongkongais, à cause des élections locales, rien ne s’est passé pendant les 4 jours où j’y suis resté lors d’un aller-retour express.
Just a normal day on the way to the market.
Je me suis donc concentré sur la ville et ses habitants pour récolter quelques clichés “touristiques” à mon goût.
Des souvenirs forts de mon film préféré “Chungking Express”, et toutes mes visites précédentes sont revenues sous forme de tsunamis émotionnels : Les memoires de mes 25 ans de liaisons irregulieres avec cet endroit extraordinaire me remontant en plaine face.
Female teams playing hockey
Mes nombreux allers-retours depuis Taïwan pour renouveler mon visa, mes rencontres avec Christopher Doyle (Wang Kar Wai DOP), mes tournages de vidéos pour Harley-Davidson, mes amis partis et ceux qui y vivent encore…
This story unveiled both magical and funny characters who seemed to start a day, like any other, in their living space, but in fact, all of the performance is part of a magical show.
By Franc Peret
This short Film was shot with my filmmaking students back in Fall 2014, but for multiple and unfortunate setbacks, I was able to finalize this editing in 2018 only.
It was tough, fun and exciting to accomplish this 3 minutes and 30 seconds pieces (written, prepared and shot) in about 15 hours shooting, parts of the 25 hours http://francperet.comclasses/film-courses/).
Shooting time lasts 3 afternoons, all in a very small 50 m2 flat I was living in at that time.
It was convenient for me to shoot there as all my equipment (lighting, rigs, cameras, and lenses) was stored there.
I saved lots of time in transportation and set up prior to the students’ arrival
Editing takes the longest part and is mainly done after the course.
5 students took part in the course and one of them, Charles Regaud, composed a specific soundtrack for it, tailor-made to the (almost) final edit.
Great memories indeed.
This is the first music video ever done in Bretagne (Brittany) with a French singer (Dantes), singing his own song in Chinese.
By Franc Peret
Singer: Dantes 戴亮
Song: J’aime la Bretagne (I love Brittany) 我爱布列塔尼 – WO AI BULIETANI.
Music: Inophis
Video Production: Franc Peret (Directing, shooting, Editing)
Camera: JVC LS-300 + Panasonic G85 + Panasonic GH4. Shot on 4K with Lumix and Voigtlander (17.5 mm f/0.95 + 25 mm f/0.95) lenses.
Edited by Premiere CC.
Shot in May 2016 and edited in June/July 2016.
School BoatBird’s IslandBretagne TraditionDantes and Dancing troupHarborInophis and DantesWild flowersTimelapsFishermen harborLively traditionSailing
The concept of this workshop is to turn students into different characters, by building a scene with a certain mood, posture, and situation. Then, we take a shot which looks like a frame extracted from a movie.
By Franc Peret and his Advanced Students
The mood is created by the location, the actor’s position, and facial expression, the props (accessories) but most importantly by the lighting which is a key feature in term of storytelling.
“The Serial Killer” / Lighting and scene set up: Franc / Concept: Dean , Franc and Fabrice / Model: Fabrice, Nils and Qiong / Shot: Franc with Sony A7M2 + Nikon AI AUTO 50 mm F/1.4 (old Manual focus lens)
Sometimes complex, sometimes simpler, the set up is dedicated to the story and often involve 4 lights: Key, Kick (or hair), Background and Ambiance (or eyes) light.
“The Serial Killer ” Extrem Close up and head chopped off to hide the identity of the madman.“The Serial Killer” (Close Up): 5600K Key light with some red gel + kick light + ambient light + eyes light.
Accessories, if well balanced, can complete the illusion, as well as makeup, costume, and hairstyle.
“Flower power…” Lighting Set up: Yellow key light, Ambient light with red gel, white kick light.
I am used to setting challenging lighting for filmmaking and It is much more interesting to work on this type of project in an average location (Apartment Hotel) than to do modeling or beauty shot in an immaculate and dedicated (and somehow boring) photography studio.
“Nouvelle Vague” Lighting: Franc / Concept and scene set up: Nils, Qiong, Fabrice and Franc / Model: Fabrice and Nils / Shot: Franc with Sony A7M2 + Nikon AI AUTO 50 mm F/1.4“Nouvelle Vague” light set up: 2 opposite key lights and a bit of ambient light.
None of those pictures would ever exist without the character (acting) and the lighting.
The photographer is the least important part of the equation. None of those shots belong to the person who had pressed the shutter button.
“Lonely Beauty after the party” Lighting Set up and Concept: Franc / Model: Novita / Shot: Monja with Canon 5D IV and 50 mm f/1.4
Forgetting to mention the teamwork in the credit of the photography would be completely dishonest from the photographer.
“Hitchcock movie’s character” Lighting Set up and Concept: Franc / Model: Monja / Shot: Franc with Panasonic Lumix G85 and Leica 25mm f/1.4
Every shot has to be linked to a team of an Art director (concept), actor, Director of photography (light) and Photographer…
“1950’s James Bond Girl from the North” Lighting Set up: Franc / Concept and Model: Magdalena / Shot through a curtain: Franc with Panasonic Lumix G85 and 42.5mm f/1.7
Filmmaking is a very important addition to anyone Photography experience, as working alone is not helping much personal improvement, while shooting a movie is a teamwork of added values and there is always so much to learn from others…
Franc Peret
MAKING OF SHOTS:
Novita performing in front of Monja, Magdalena and Kerstin.Monja’s concentration through her Canon 5D Mark IV viewfinder. Shot by Franc with a Panasonic G85 and Leica 25mm f/1.4
Shots with my advanced students: Dean, Fabrice, Nils, Qiong, Matteo, Jonathan, Monja, Kerstin, Novita and Magdalena.
Magdalena pointing her Canon 5D MarkIV toward a 1920’s character performed by Kerstin. Lighting and Concept: Franc / Model: Kerstin / Shot by Franc with a Panasonic G85 and a Leica 25mm f/1.4.
By expressing their satisfaction through their testimonial, my formner students are delivering the best award I can dream of.
By Franc Péret
When I created the content of my Photography Course, 12 years ago, I had a very personal (and genuine) concept in mind.
I have no need to explain it to you as my students are explaining it very clearly through their testimonial.
The Class is a creative melting pot: Students are from allover the world sharing different experiences and point of view.
Those comments represents a double happiness to me:
– My students enjoyed the experience and their satisfaction is my first reward.
– Second, Their in depth description of the specificity of the Course perfectly match my original concept.
The way I am transmitting my knowledge is well understood by all of my students, despite their wide range of origins, personality and experience.
Discovering new points of interest is also promoted for freeing imagination.During the course, students are welcome to try new tricks to answer their needs
This means, I designed the right course for the right people and this is the main reason of its lasting popularity and success.
To understand more about the mood and the content of the course, check this series of recent testimonials:
After the Course, students are seeing things that they had never notice before.
1 – Chiara (Italy)
“Franc’s fun and approachable style makes even a rookie photographer feel comfortable and motivated. He breaks all the concepts down into easy to digest and to apply notions, using clear examples to explain himself. He really puts his students first, in the classroom and during photo walks. Your understanding is his main priority. The end of the course feels like just the beginning of a relationship with Franc and fellow students.”
Dean in full action.
2 – Dean (UK)
“Eyes wide open!
The day of my first class I had to clean the dust off my camera! 10 weeks later after doing Franc’s beginner course, my camera is now firmly by my side.
Franc has an amazing talent to condense so much knowledge and experience into a short course, in an entertaining way. He cleverly pitched the lessons to everyone’s needs by always making the content personal and relevant to our own interests.
He inspired me to open my eyes and notice beauty in even the smallest of subjects. During our photography walk, we visited a street I’ve quickly walked past hundreds of times without really “seeing”. Franc helped me to rediscover this amazing city from a new perspective!
Friends and family have noticed a massive improvement in my shots, thanks to Franc’s expertise and advice! I know how to create better shots and if something goes wrong, or it doesn’t turn out right, I know how to fix it!
Looking ahead to the advanced classes!”
3 – Fabrice (France)
“A few months ago, I decided to join a photography class because I had this DSLR camera I had bought myself and I had no clue what to do with it. My pics looked as “good” as with my iPhone. Today, I’m so glad I took this course: I finally understood what a camera can (and cannot do), what most of the buttons and settings are & the basics of different types of photography. I’m glad I joined Franc’s classes: he demystifies a lot about photography, keeps the lessons very practical, gives plenty of useful tips you can use right away and make a difference. He also makes the classes lively and fun. I can’t wait to join the Advanced Classes next time he is in Shanghai. Thanks Franc!!”
Night shooting with my students to learn the magic of painting with light.whatever topic students want to hear of will be discussed in Class, such as long pose photography
4 – Jonathan (UK)
“If you want to learn more about photography, then I would highly recommend this course! I can honestly say that I enjoyed every session and I learnt a huge amount about all aspects of photography. Franc is extremely knowledgeable, friendly and has a good sense of humor! He delivers a course that is well explained and easy to follow – there are no stupid questions! Classes sizes are small so if you need help you get it quickly. The photography walks are fun and you learn a lot. I look forward to doing the advanced class!!”
5 – Amelia (China)
“ Franc makes photography FUN. His charming personality and quick wit makes every class always a joy. During the course, I learnt photography 101 – in a way that was simple and digestible for somebody who is really quite horrid at numbers ( still trying to wrap my head around the shutter speed/aptitude/IOS… ). Another highlight : Franc gave me a new perspective on looking at the world. Painting with light – one of my key takeaway! Cameras show you a world that’s invisible to the naked eye. I am thankful to Franc for giving me the tools to use the lens and see the magic. Yay! Thank you!!!! “
6 – Anna (Italy)
I wanted to thank you because your classes were brilliant (your jokes as well) and I feel much more confident now with my camera. Still a long way to go but if I have one tenth of your passion I can only improve from there.
I hope we can be in touch and I can bother you in the future for questions and tips. Keep me posted regarding your future projects.
Shanghai is a great place for street photography, an enjoyable activity with a small group.
7 – Lucica (Romania)
“It’s difficult to express my appreciation for everything I learned from you through words…
I start my class with Franc without knowing anything about photography, but after two months of enjoyable time I learned how to make my memories unforgettable.
Franc taught me how to use my camera and made me want to be a better photographer.
Thanks for everything, Franc!”
Night shooting with Nils and his classmate to learn the magic of painting with light.
8 – Nils (Germany)
I wanted to get into photography for a long time but so far have been held back by the cost of a real camera and the unavailability of suitable photo classes. However, this year I decided to make the first step with Franc’s photography class for beginners and it was definitely the right decision.
Not knowing what I was getting into, I was concerned that the photography class would be very theoretical and dry and similar to how engineering classes used to be in college You can imagine how delighted I was when I found out that Franc’s class is quite the opposite. His teaching style is very hands-on and mostly based on experience which makes it easy for someone who is new to the topic to follow and understand.
Franc himself learned most of his photo skill by practicing and many years of professional and personal experience which means that he understands the point of view of a beginner. Of course it is important to understand the basic theoretical foundation of photography and Franc is able to explain the different variables and settings with clear examples and easy concepts. Also part of the class are photo walk sessions in which you and your group go out into the streets of Shanghai to try out all things you’ve learned in class.
These sessions are guided by Franc and he will show you his way of taking pictures but it is also highly encouraged to be a rebel and find your own way. These walks as well as your personal picture taking will give you many ideas and questions which you can bring back to the class room to discuss them with Franc and your group. This way is an open and relaxed exchange of ideas and a fun way to learn a new hobby. Franc is really passionate about photography and if you are interested in this topic, you soon will feel the passion too.
My only complaint is that I wished the class would go on longer since I still have many questions and many things to learn.
I really want the thank you Franc. Your photography class was so much fun and I made cool new friends that are also interested in the topic. I feel like I have learned a lot and now I have the urge to go outside and take pictures whenever possible. Walking through the streets or travelling through China, I often see things which I want to capture in a picture. It is like I have a different view to whats happening around me. Unfortunately I don’t have my camera with me all the time and often the picture looks different than what I had in my mind, but I want to keep on practicing to get better. I really don’t have any complaints about you or the class but I just wish I had more time and ease to explore everything about photography.”
9 – Miranda (Nederland)
“I did Franc’s Essential Photography class. Franc is a wonderfull and kind teacher. He has humor, which is pleasant, especially during the technical part of the course. I’m amazed by his dedication. After the classes are finished, students can still ask questions or share their work to get feedback. We stay in touch to learn more about photography every day. I’m thankfull for being part of this nice class and getting to know Franc and my fellow students. I’m definately going to attend the advanced photography class.”
10 – Laurence (France)
“It was a real pleasure to attend Franc’s classes. I learnt a lot in a short period of time. Franc manages to create a focused yet fun and pleasant atmosphere that makes me want to come back. I definitely recommend!”
11 – Simone (Germany)
Oh Franc…you are THE ONE AND ONLY…I really enjoyed your course…I learned a lot and now I learn to handle my new camera and want to realize all your tips and tricks that I’m prepared for your next course in October”
Which course to choose? Advanced or Essential class?
I am often receiving this question when time comes to enroll to one of my photography program. Here is the answer.
Franc Peret
I am offering 2 different Photography courses: Advanced and Essential and despite the detailed description on my website, it can be difficult to choose.
Essential vs Advanced
To make it simple, the Essential Class is what it is: “Essential”.
Everything you should know, think about and do, to get better pictures, a higher success rate (to capture the moment) and very pleasing result (technically and artistically).
Everyone should consider Essential
This class is the best value for money as everything you are learning there will be immediately useful in any kind of situation you can meet daily in the street, during an event or a trip. It covers essential photography in portrait, landscape, sports, macro, night shooting… analyzing the difficulties in those practice and offering a very efficient and practical “what to do” case by case solution.
It is a down to earth class adapted to both complete beginners and people with experience who knows things here or there but who cannot yet connect everything in a logical understanding and order.
Experimental and conceptual
The Advanced class is something very different.
This program is a series of workshops for you to discover how far you can go with your camera.
Also, more important, this experience will help you to understand that what is happening (what you organize and set) in front of the lens is finally much more important than the camera itself.
Pushing Boundaries
Somehow it teach you how to become a director/art director/orchestra conductor handling an overall project and not simply a photographer trying to grab a picture.
It is more oriented toward personal creativity, using the camera in many unusual ways: very higher shutter speed, very long pose, shooting several shot from same position, post processing for special effects and so on.
Take it all!
Somehow, to get a complete overview about photography, you should take both lessons, but I would say, the essential class is the most useful one if you are a street photographer type of person, somebody who like to shoot people in documentary style, bringing back travel or family pictures, shoot landscape or products…
If you are more into design, painting, graphic work and virtual world, the advanced class will match as soon as you know how and why to set up your camera or choose a lens.
I hope all of this will be helpful ot pick up the right class for you, but if anything is not clear yet, do not hesitate to contact me!
Another “making of” of a shot for you to learn from my motivations behind my decision making in term of technical set up and creativity. This time Apolline on the Chair, in the mood for thoughts.
By Franc Peret
1 – CAMERA SETTINGS:
Shot under natural light with Panasonic Lumix GM-5 ISO100 1/250s with prime lens Panasonic 25mm f/1.4@ f/1.4
2 – LIGHT:
The source of light is a big window behind the mini model. Shot on early morning (at least for me).
Another shot, same time, another pose. Apolline is turning her face to the opposite side. You can notice that the reflected light is stronger from there.
3 – ACCESSORIES:
As I am shooting against the source of light, I set one white board on both side of the model. The board on her left side is actually bouncing light to the board on her right side which finally light up her face. This board serves my purpose as she actually try to reach it, a move that created her pose.
4 – CAMERA AND LENS:
I am using my favorite tiny camera and a great Panasonic 25mm f/1.4.
On my sensor, this lens offer the same field of view than a 50mm on a full frame camera (or 35mm on a DX/APS-C camera), which means human eyes vision.
5 – ISO:
Light was enough to keep ISO 100 as I was working with a very bright lens. Due to the quietness of the mini model 1/250s was very safe and I could work at 1/125s if I needed to close down the Aperture one stop.
Brainstorming, Apolline on the position as the first shot. ISO100 1/160s with prime Olympus 45mm f/1.8 @ f/2.2.Another mood for thoughts. Apolline is facing the main source of light this time and still receive the reflectors addition. ISO200 1/320s with zoom Lumix 12-32mm f/3.5-5.6 @ 12mm f/4.
6 – APERTURE:
I open up my Aperture maximum to reduce depth of field, as I wanted to treat this composition as a portrait with thin Depth of field.
I usually do not open that much for close up baby shots as they are always moving and therefore easily leaving the thin “in focus” zone.
For APS-C, I would suggest, at least, f/2.8 – f/4 and for Full frame camera f/4 – f/5.6 for close up and baby portrait to be sure to get both eyes in focus.
As you can see, I set up a safety belt around her body so that she would not fell down from the chair. This belt is limiting her movement, so f/1.4 was an option.
On this shot, her left eyes is not as sharp as her right eyes, where the focus is done. f/2 would have been a safer set up on my camera, but as I pull back, I thought the depth of field would be enough at f/1.4. Remember Depth of field increase with distance to subject.
My little one kept her pose just for this shot so I didn’t have another chance. I usually always do several shots with different Aperture or slight focus change as this is the most critical choice for baby shots without forgetting shutter speed.
But as I explained in the ISO chapter, with the light available and my reflectors, I had room to close down my aperture 1 stop (f/2 instead of f/1.4).
Cool Attitude: I could add a cigarette in her right hand with some smoke going out from her mouth. ISO200 1/250s with zoom Lumix 12-32mm f/3.5-5.6 @ 21mm f/4.7I called this couple of shot “Fighting Spirit, due to her attitude.Panasonic GM5 ISO200 1/200s with zoom Lumix 12-32mm f/3.5-5.6 @ 12mm f/4.5
7 – POINT OF VIEW and COMPOSITION
I wanted to be as close as possible to her level as she was turning her head and eyes down. I wanted to grab her facial expression and I lower myself as much as I could to do so.
My limit was the window behind her as I didn’t want it to enter my shot to be too disturbing or to create flares in my lens as the source of light might enter directly into my lens if I sat lower.
As a reminder I post here the original shot again. Shot with Panasonic Lumix GM-5 ISO100 1/250s with prime lens Panasonic 25mm f/1.4@ f/1.4
8 – POTENTIAL IMPROVEMENT
Does the cropped foot on the right side of the shot is important?
Not at all as this is a snap shot took before it is gone.
It is what I am used to call an emergency shot.
Also, the complete movement and point of attraction of the picture is on the right side of the image.
Apolline who just wake up was still wearing her “sleeping bag” which as not a definite shape and i am sure many viewer didn’t notice the foot on the right side of the shot.
In a word, it is not important…
Many amateur photographer think that to achieve a black and white picture they just need to get rid of the color of a regular shot. Nothing could be more wrong than this belief. Here is why…
By Franc Peret
In my teaching, I always say to my students that Black and White pictures are “dangerous”, Which means something potentially going against their progress.
Why?
THE WRONG B&W TRICK
Because many people are using that trick to make their “so so” pictures in color, suddenly look more “artistic” in Black and White, as B&W print is vastly associated, in many people’s mind, as artwork.
Shooting black and white means seeing things that might be not attractive in colors but appealing in shade of grey with lines, shape and structure.High contrast scene are the way to go to start to work in B&W, as the strong shape of the shadows are going to compensate the lack of colors.
And some easily pleased people are enjoying the trick very much, without knowing they are going against their own progress in general photography that way.
Using B&W as a cure to compensate a weak composition in color is not the best way to face the problem, finding the solution and improving framing skills.
By using a Yellow filter in my B&W post processing, I did a double action: brightening up the barrier while darkening the sky a lot. I also reinforced the contrast to give more strength to the shadows in the foreground.The diverse structures (barrier, steps, wall, stadium…) the strong shadow and the presence of the 2 opposite colors (yellow and blue) attracted my B&W vision.
Also, with that misunderstanding in mind, those photographer are certainly not going to learn how to shoot interesting Black and White pictures, as well. This is a dead end for creativity.
FILM TIME
Somehow, Black and White is too attractive.
For many people, B&W looks more “cool” than color.
Street vendors in Winter shot against the light to emphasize the separation between elements and to fill up empty space with shadows. Panasonic GM-5 ISO200 1/320s, 12-32mm f/3.5-f/5.6 @ 13mm f5.6
This is due to the fact that, back to film time, Black & White negative film was the unique post processing accessible to everyone, technically and economically, especially to independent artists.
A laboratory was easily set in the bathroom or the kitchen with few key equipment, accessories and chemicals.
On the B&W shot, human presence becomes more unique and important as the rest of the image is filled with common element, rectilinear structures which are not differentiated by their colors anymore. It is like pure life (a mother with her baby) versus a globally dehumanized environment.Another example where color and B&W are working fine but in a different way. The color shot emphasize the separation of the image in 3 layers surrounding the main subject: the black shadow, the yellow fence and the white building with the blue sky.
This was far to be the case with color film, and back to 1986, I had only one friend, a famous wedding photographer near Paris, who had his professional color lab at home.
It was a huge and very costly installation, needing bunch of preset, test, set up and maintenance to deliver the right result. And, worst of all, the chemical’s smell was constantly allover the place…
Hard light creates sharp shadows, usually a difficult combination for portrait due to too strong contrast, but it suits B&W very well.
Color lab were scaled for commercial use, not for personal expression.
BEING AN ARTIST
Therefore, for decades, many photographers expressed themselves in Black and White as they could afford its treatment and manipulation.
On the color shot, blue is dominant as everything is “paint ” in that color.On the black and white version, lines and patterns with sharp contrast from the tree branches and the palissade are taking other as color is not part of the message anymore.
Exhibiting their printed work, they were able to make the difference compare to amateur by improving a lot the quality of their shot by working precisely in the darkroom, the ancestor of Photoshop.
In Black and white, structure and metallic feel is taking over life. For example, we notice more the wet ground and the straight patterns (doors, broom…). The lady seems to be part of the surrounding (absorbed) like a cosmonaut or a cyborg at the gate of her spaceship.This picture of the old lady sleeping in a garbage container is working very well in color too as red and blue are the only two main dominant colors related to the lady’s occupation (tools and apron). The color in the center of the image reinforce the cold and lifeless feel of her surrounding.
Brightness, darkness, contrast, grain, blurriness, re-framing, cropping, erasing element were all at hand for the artist to get much more dramatic and impressive shots than average Joe.
DIGITAL TIME
Nowadays, with digital pictures, too many photographer are taking it easy and consider B&W as an easy cure to their far to be perfect color shots.
Marion on the bike. The most important common point between B&W and color shot is quality of light. Good lighting means more potential for a good shot.
Instead of working harder and more efficiently on their composition, they prefer to get rid of colors when the diverse elements in their image get too confusing: with too many tints and shape badly mixed together.
Give me five. The alternance of highlight and shadows are reinforced by the B&W treatment. Important is to get the main subject under a good lighting.Shooting against a strong light with a frame filled with reflective surfaces and dark silhouette creates powerful structure which does not need color anymore.
And they wrongly think that the job is done that way.
Somehow, this statement sounds like it is easier to achieve a successful B&W shot than a color one.
Somehow it is true, as you do not need to worry about marrying colors together, but it is not that simple.
All depends on the skill of the photographer.
BACK TO BASIC OF COMPOSITION
Hanging clothes are also great subject for both B&W or color shots.Street Life in Shanghai are offering very nice opportunities to detect B&W subject, such as those reflective windows and electric.lines.
To build an interesting shot, a photographer needs to put elements together with a certain sens of harmony or conflict.
And color is an added value to light, shadow, contrast, shape, lines, patterns and motion.
Happy mom and her kid in before the fence. Recipe is the same for portrait in color or B&W. Best is to use the sun as a kick light and to get the subject standing on a reflective surface to fill up the shadow.Kids behind the fence. I was attracted by 2 common point: 1- the round face of the kid and the round shape of the air conditioner fan on top of him. 2 – His straight and symmetric posture compare to the straight lines (tube, pipe, fence, window, shadows) surrounding him.
If the photographer knows what he is doing, he is going to play a lot with colors to accentuate his subject, his mood or his concept.
A pure amateur without much technique is going to suffer with this overdose of elements and option, and being overwhelmed by it, he might be happy to get rid of colors to reduce his amount of decision making to achieve something going well together.
Playground on grass. Black and White composition needs details with loads of things in focus which imply a rigorous placement of every element in the frame.
This is a reductive approach which is not helping personal progress.
At the opposite, the professional photographer, while switching from color shooting to black and white shooting, might feel at first that something is missing in his usual creative arsenal: colors.
Written text and reflective surface are very interesting subject in B&W as well.Lines, shadows and reflection are very powerful creative tools.
Therefore, he is going to work harder on his composition to compensate the lack of colors with more intense contrast, details, lines, shape, patterns and motion.
SEEING EVERYTHING IN B&W
As you can understand, at this stage, I make it clear that creating a Black and white shot means SEEING black and white in your head and SHOOTING as you imagine it.
This B&W portrait in subway emphasize people connection by holding the same aluminium pole.Silhouette are working very well in B&W creating a cut out effect with very sharp details (hair style).
It means being able to see the scene in front of you not in colors but in shade of grey, from black to white.
With film camera and DSLR, this vision is quit difficult to achieve, as the viewfinder is showing the scene as it is, and lots of experience is needed to be able to predict what will be the B&W result out of the colorful scene you are framing.
Fisherman in Shanghai Century Park. Path way (dam), lake shape and man posture altogether create motion in the shot even nothing much is happening.
According the post processing (filtering), red, yellow, green and blue element in the shot are going to appear completely different (huge luminescence difference) in monochrome.
COMPOSITION TOOLS
Key point in Black and White shooting are still contrast (highlight and shadow), shape, lines, patterns and motion.
First of all, higher contrast scene are helping a lot as they emphasize all those elements, taking over any notion of color.
Motion can be physical movement, another way of creating powerful lines.A surveillance camera is spot on in focus while the pattern in the background provide a feel of space and perspective. People are secondary element under this oppressive structure.
The alternate of highlight and shadow helps to cut out the image, to split the different elements and to create a hierarchy among them.
An old bed spring used as a fence is a great source of patterns.Modern city landscape are filled with lines, shape and loads of interesting element in B&W.
Contrast becomes as powerful as focus point to determinate the main subject and most of the time, it is a very good idea to close down the Aperture to get more depth of field and to grab sharper details in a B&W shot.
Pigeon House in Shanghai Century Park. Some material such as leather, rusted iron and wood are gold mine for textured pictures.
Shape, lines and pattern are the other creative tools that you are looking for in a B&W shots to render a more dramatic (emotional) feel.
Facing a strong sun, the portrait works well in B&W especially with a wool hat which offers lots of texture and details.Under soft light, I still prefer color pictures, with a pastel feel to it. Skin is so beautifully rendered that way.
Motion is not only about physical movement (walking people, running kids, passing by bicycle…), it is also a feel of dynamic you create with pattern (repeated element such as square windows on a building or branches of a tree), swirling shape (such as cloud in the sky) and lines (often present in city or natural landscape).
Shanghai Century Park. Winter landscape are among the best topic for Black and white photography.
Actually, winter is the best season of the year to learn how to shoot in B&W as the nature is lifeless and colorless (full of lines as no leaves on branches) while the lower sun is offering plenty of contrast and very long shadows.
The Panasonic allows me to see the world in B&W with its electronic view finder and I can also switch lenses. Here I mounted my lightest portrait lens: Olympus 45mm f/1.8My favorite B&W shooting companion, the tiny Panasonic GM-5 next to my working tool (Nikon D750).
ELECTRONIC VIEWFINDER
Picnic in Century Park. Depth of field is a welcome addition to most of B&W shot to reinforce texture (mother shirt, grass and trees) an important element of composition.
Thanks to new technology, mirror-less cameras using electronic viewfinders offer the possibility to frame and see any scene in Black and White through the lens.
And this is amazingly valuable to get the shot as it should be in term of framing, composition and setting.
I personally do use different mirror-less cameras such as Nikon1, Panasonic GH4 and Panasonic GM-5.
I love those cameras, as they are compact and their lens line-up is very diverse and of great quality.
It is a very interesting addition to my usual Nikon DSLR System.
Anyway, pictures are telling more than words and I think I had wrote enough here.
To complete the subject, please, get a look at some of my Black and White samples, all fully explained with caption.
Tweaking images had always been part of photography, long before the existence of digital file and Photoshop type of software. There is nothing wrong about it, as soon as you exactly know what you are doing. Thus, you need a clear vision of your concept from model, background, accessories, lighting and shooting style.
By Franc Peret
Experimenting with cameras, lenses, point of view, composition, flash, lighting, natural light, structure, model or actors always feed my interest in film making and photography.
Last but not least, post processing is the ultimate touch I can add to finalize my original concept.
I am using my 2 favorite software to do so: Photoshop (for pictures and video) and Premiere (for video).
And the tough version with more details and preservation of the background details.Two identical shot with 2 different post treatment: the smooth one with glow.
I am working with no more than 10% of their capabilities, but they already allow me to to get closer to my initial ideas, to push even further my interpretation or to create an unexpected result.
Timing is the main difficulty for shooting a kid, as she is always looking for discovery.Sometime, a cute attitude occurs for a very short time. Better to get flashes quick to recharge.
Most Important before using a post processing software is to get a concept in mind.
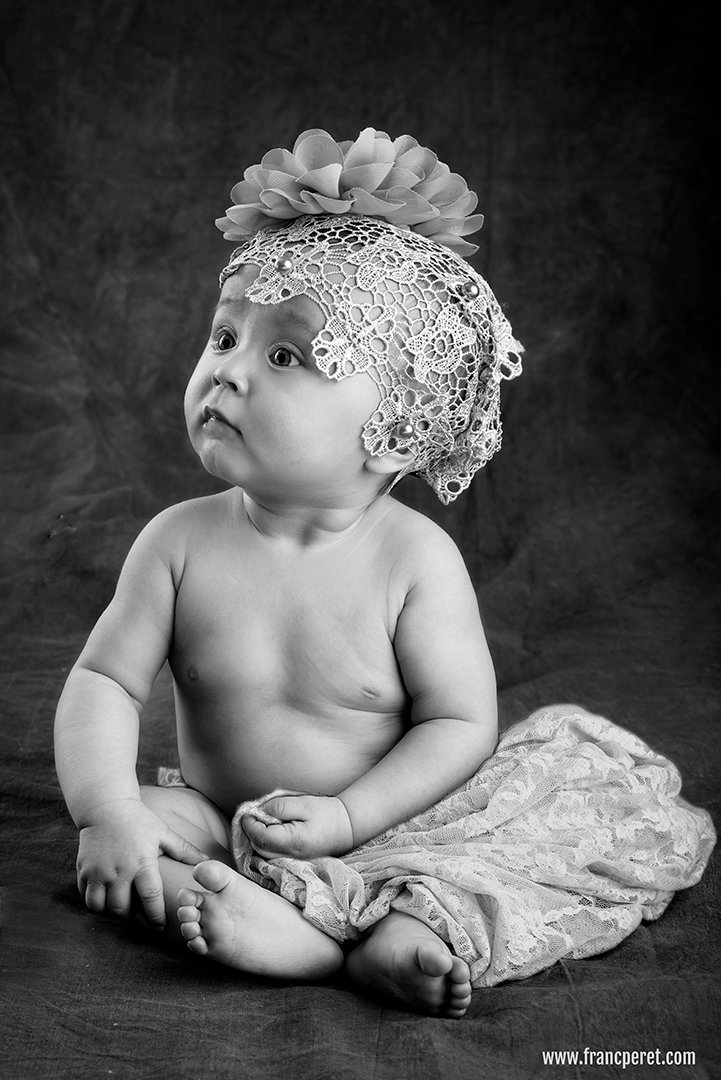
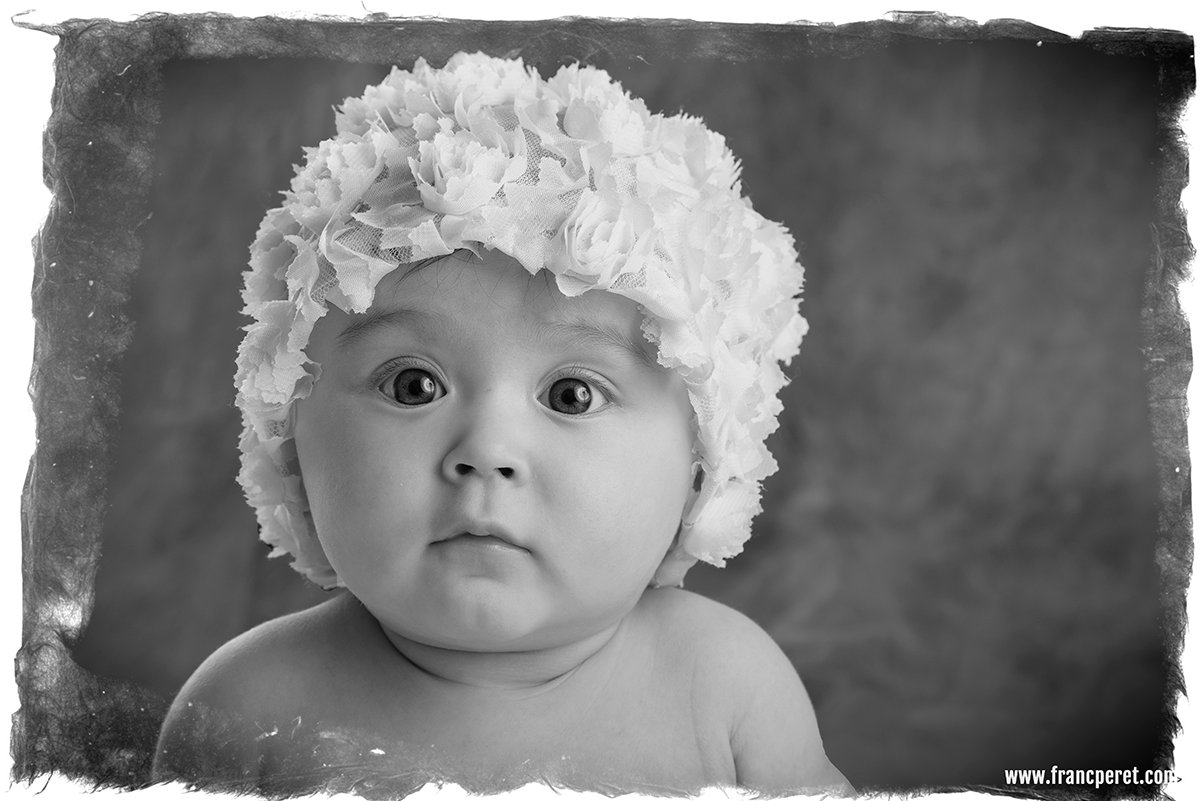
For this series of vintage shot of my little one, I had an idea in mind and this drives most of my choices: background, clothe and accessories, point of view, lens choice and lighting.
Lighting is a bit specific as shooting a little kid is not the same as shooting an adult. You have to be prepared to get her face turning around and therefore to light up the scene from both direction to get a pleasing result wherever the little model is looking.
Difficulties in post processing is options. They are endless and sometime a break is welcome to leave the creative process for a while and to come back few hours later with a fresher mind a more critic eyes.The first treatment is softer with a frame to get a “coming from the past” feel, while this one is having more details and higher contrast. Hard to decide which one is working the best…
Key light and fill light should not exceed a 1:2 contrast ratio with the kick light in the same range to detach her silhouette from the background without burning the reflected highlight on her skin.
Sometime, I prefer to keep the color version, all depends on the composition and the facial expression.Black and White is logically associated to the concept of vintage, but colors matter a lot as a starting point as they do not translate in the same shade of grey compare to the skin.
To achieve such a smooth light set up, I used 3 flashes:
The key light was bouncing inside a huge soft umbrella which behave like a 1.5 meter wide beauty dish (positioned on her left side, next to my right shoulder).
The fill light (which was also used to light up the background) was bouncing in the opposite corner of the room (facing her high, on her right side, over my shoulder).
The kick light was bouncing against the white wall behind her (high, on the right side of her back).
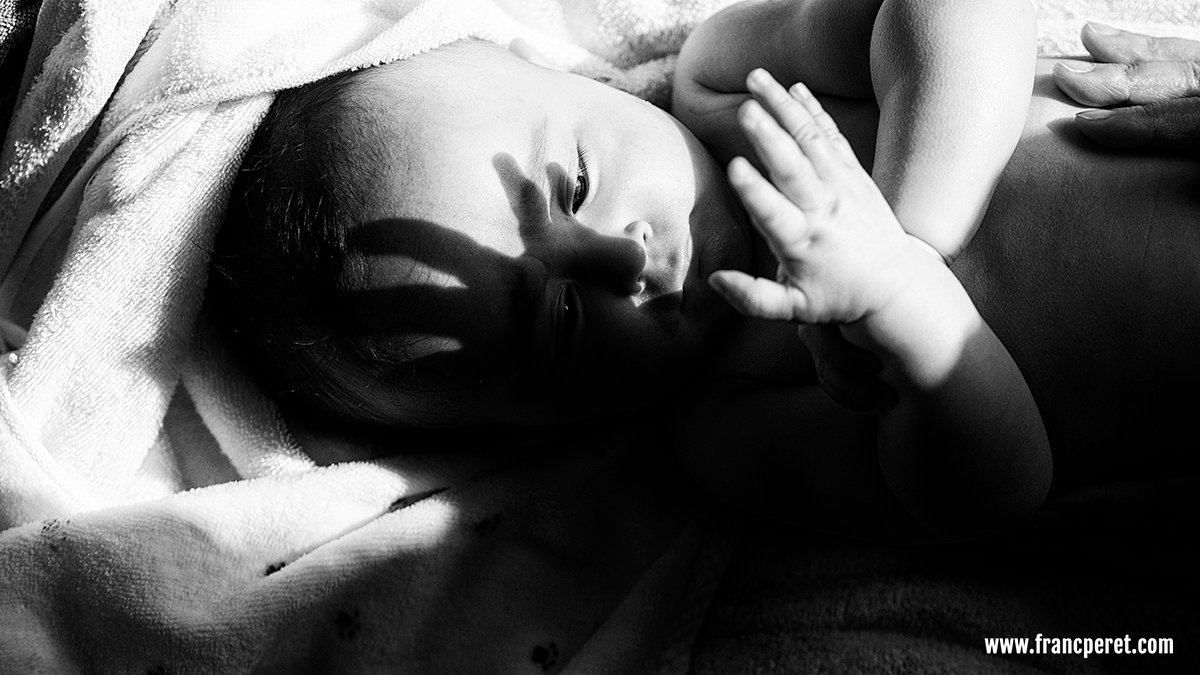
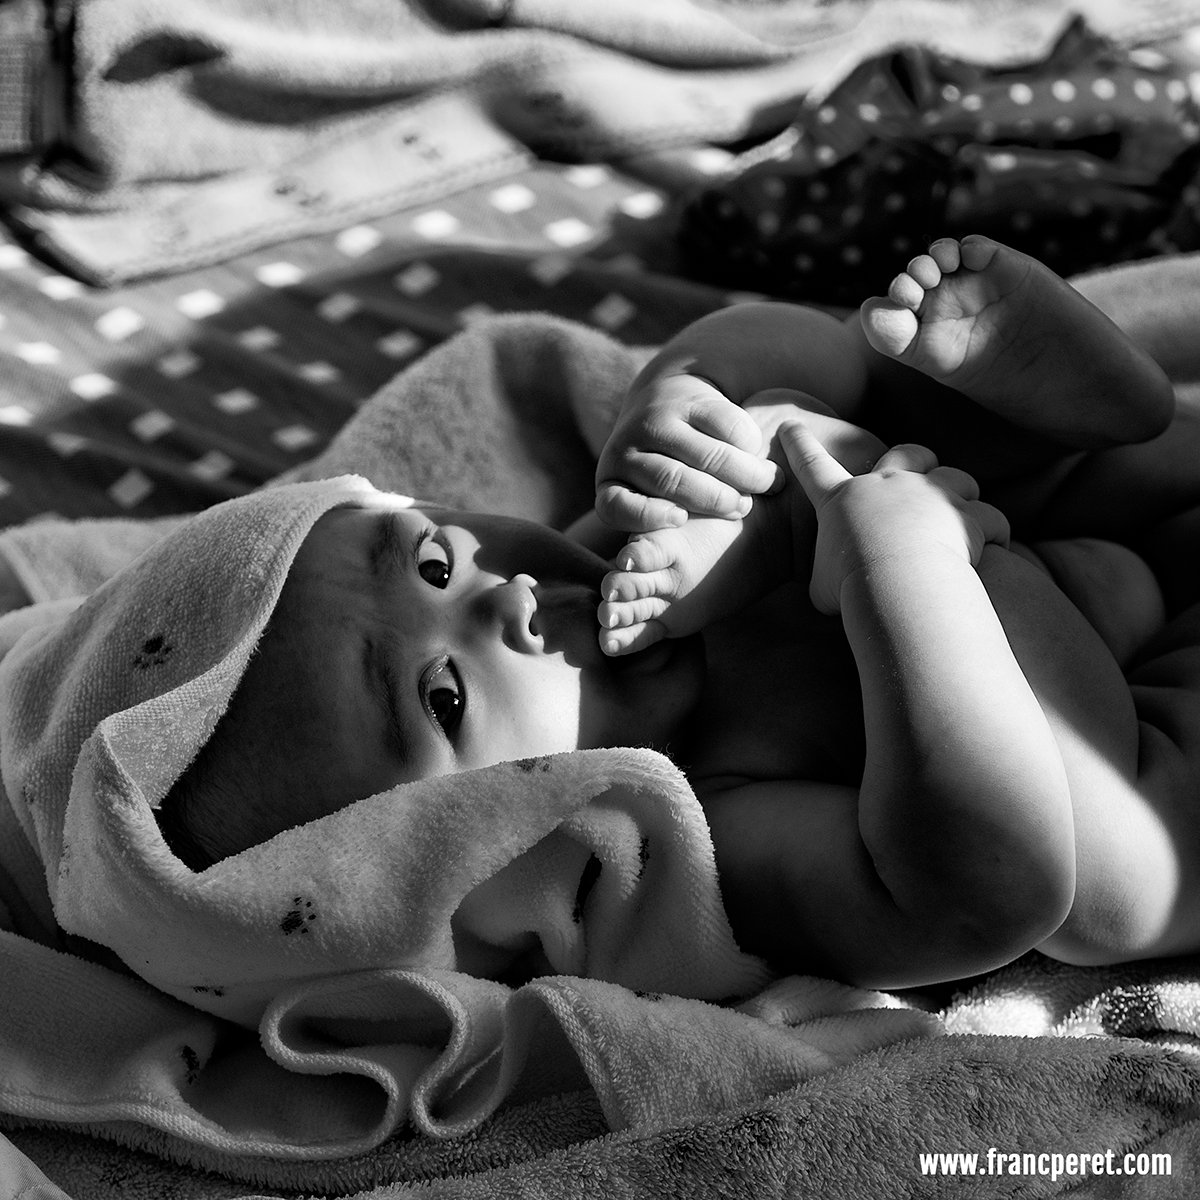
The sun is usually my best friend to shoot Apolline discovering her new world. Panasonic GM5 1/2500s ISO100 and OLYMPUS 45mm f/1.8 @ f/1.8To tell the truth, I much more used to shoot pictures of my little one in natural light, on the fly, when magic happens. I had to force myself a bit to start that “studio series”, but I finally enjoyed the experience very much and I will redo it again. Panasonic GM5 1/800s ISO100 and OLYMPUS 45mm f/1.8 @ f/2.2
Final touch, she was surrounded by white reflector panel to not get colored shadow form the wood furniture around.
I forgot to say that this set up was done in my bedroom and not a studio and my bedroom is quit small…
For that “studio session”, I used my Nikon D750 (ISO100) and a great old zoom lens (AF-S f/3.5-f/4.5 28-105mm D) set at f/8.
With such a cute model and good pictures to start with, it was very inspiring to play around with different photo treatment in post processing, to achieve the vintage look I was after.
A little girl is just an amazing subject to shoot with so many different expression waiting to be recorded. Panasonic GM5 1/500s ISO100, LEICA DG NOCTICRON 42.5mm f/1.2 @ f/1.2After shooting that studio session, I got used to treat my image different ways according the facial expression, my mood and type of lighting falling on her. Panasonic GM5 1/320s ISO100, LEICA DG NOCTICRON 42.5mm f/1.2 @ f/1.2
From start to end, I had something in my mind and I just made it come alive by adjusting every steps of the process in the same direction.