Tag Archives: Low light Photography

Shooting Fireworks

Here are the 10 most asked question for shooting fireworks, and I am answering to all of them!
By Franc Peret

During my Essential Photography course, which duration is only 25 hours, I cannot cover every aspect of photography in detail.

Light and Colors
However, anytime, I am having specific question from a student, I do take the time to explain the in and out of any special use of the camera.

Nikon D750  = Manual Mode  =  ISO400 1/3s -0.3 EV with 35 mm f/1.4 @ f/5.6
Nikon D750 = Manual Mode = ISO400 1/3s -0.3 EV with 35 mm f/1.4 @ f/5.6
Panasonic GM5 = Manual Mode = ISO200 0.6 s + 25 mm f/1.4 @ f/2.5

One of the topic that often come to the discussion is firework. And it is easy to understand its attraction to photography students.

3 Good reasons to give it a try
First, for a person dedicated to light and colors, a firework show is just magnificent to watch.
Second, This is happening at night, when most of the time people do not take their camera out and this is a very special experience to try.
Third, this subject seems very challenging to shoot as the illumination, which is hard to anticipate, does not last long.
Overall, there is plenty of reasons to give it a try for a photographer, but how to make it a successful experience?
Here are the most often asked question, answered with my tips and the way I am dealing with this subject.

Panasonic GM5 = Manual Mode = ISO200 01/4s +0.3EV + 25 mm f/1.4 @ f/1.6
Panasonic GM5 = Manual Mode = ISO200 0.8 s - 0.3EV + 25 mm f/1.4 @ f/9
Panasonic GM5 = Manual Mode = ISO200 0.8 s – 0.3EV + 25 mm f/1.4 @ f/9

1 – Do I need a tripod?
Yes and no. Tripod can be useful if you are shooting the firework AND the environment (such as a enlighten city landscape). Then, it is important to keep the camera steady as you want to get the background sharp as well.
However, if the main source of light of the location is the firework itself, you can shoot handheld, even with a long pose, as the explosion behave like a flash and the environment is going to be light up only a very short fraction of second and not during your complete shutter time.

2 – Do I need to shoot in manual mode?
If you get a bright background, It is possible to shoot in semi-auto mode (Aperture priority) with some exposure compensation to force the image to get darker(such as -2 or so), however I personally use manual mode, playing around the Aperture and the shutter speed to grab all the color of the firework and to create some special effect with long pause.

Panasonic GM5 = Manual Mode = ISO200 0.6s + 25 mm f/1.4 @ f/7.1
Panasonic GM5 = Manual Mode = ISO200 1.3s + 25 mm f/1.4 @ f/9

3 – Do I need a fast lens?
You do not need a lens with a big Aperture (such as f/1.8 or so) as you are shooting a very bright source of light and by using a wide Aperture, you will take the risk to overexpose the image and therefore, you will get no colors to see. Most of the time, my lens is set to f/4 or f/8 which is a good news as any average zoom will get that Aperture.

4 – Do I need a fast Shutter speed?
All depends what you want to achieve, Get a very sharp view of the explosion or to give time to the fire and colors to spread around to fill up more of the sky. Best is to constantly play around with shutter speed from 1/30s to more than 3s.

Nikon D750 = Manual Mode = ISO200 1/5s -0.3 EV with 35 mm f/1.4 @ f/8

5 – Do I need to increase the ISO a lot?
Best is to keep the ISO low as raising it will bring more noise to the shot, especially in the dark part of the shot (the sky). Also, a higher ISO means less details, less dynamic range and less colors. I usually try to stay as low as ISO 200 or ISO 800.

6 – Do I need to be perfectly stable?
No, as firework is a very good subject to paint with light and by combining a long shutter pause with some camera shake, you can achieve very subliminal results.

Panasonic GM5 = Manual Mode = ISO200 1/5s + 25 mm f/1.4 @ f/1.6
Panasonic GM5 = Manual Mode = ISO200 1/4s + 25 mm f/1.4 @ f/1.6

7 – What lens should I use?
Best is to start with your usual zoom as one problem with firework is to know where exactly things are going to happen. By starting with the wide side of the zoom, you get more chance to grab the show and after you are more confident to guess where the following blow of light will occur, you can zoom in more and more to get some interesting close up.

8 – Should I use manual focus or auto-focus?
You cannot rely on your auto-focus if you point your camera straight to the sky as there is nothing to focus on.
Best, is to pick up something as near as possible to the explosion (such as a tree or a building) and to preset your focus there with auto-focus. You can lock this by half-pressing the shutter button while waiting for the explosion or you can switch your camera to manual mode.

Panasonic GM5 = Manual Mode = ISO200 1/2s + 25 mm f/1.4 @ f/2

If you do so, be very sure to NOT turn the focus ring after as your focus point will not be well preset anymore.
Some camera gets a back button you can use to force your camera to focus and lock it as soon as you stop to press this button. This feature can be useful here, as you need to preset your focus and keep it as is.

9 – When should I press the shutter button?
As often as possible, even you are seeing nothing coming yet. When the sound of the firework is coming to your hear or when your eyes are seeing the light, it is almost too late to shoot. You have to be ready, and listen to the starting explosion which is launching the rocket in the sky.
Also, by using a long pause (slow shutter speed), you get much more chance to grab something as your sensor is open to the show for a longer period of time.

Nikon D750 ISO200 1/5s -0.3 EV with 35 mm f/1.4 @ f/5.6

10 – Where should I position myself?
First try to be out of the crowd to not get pushed around. Second, find a higher position to not get other people head, hands or smartphone in your framing. Sometime, it is good to insert some viewers in the shot to give a sense of scale and to create an atmosphere, but for a first experiment, better to keep it simple…

I hope all of this was useful.
If you are having more questions or if you are in need of more explanation, drop me an email.

Former photo journalist, Film maker and ELC Shanghai Photography teacher, Franc Peret is teaching Essential Photography Classes, Advanced Photography Workshop and Film Making Classes in Shanghai, for the last 11 years.
If you wish to contact Franc, just drop an email to francperet@hotmail.com

CINEMATIC PORTRAIT

The concept of this workshop is to turn students into different characters, by building a scene with a certain mood, posture, and situation. Then, we take a shot which looks like a frame extracted from a movie.
By Franc Peret and his Advanced Students

The mood is created by the location, the actor’s position, and facial expression, the props (accessories) but most importantly by the lighting which is a key feature in term of storytelling.

The Serial Killer
“The Serial Killer” / Lighting and scene set up: Franc / Concept: Dean , Franc and Fabrice / Model: Fabrice, Nils and Qiong / Shot: Franc with Sony A7M2 + Nikon AI AUTO 50 mm F/1.4 (old Manual focus lens)

Sometimes complex, sometimes simpler, the set up is dedicated to the story and often involve 4 lights: Key, Kick (or hair), Background and Ambiance (or eyes) light.

"The Serial Killer " Close up.
“The Serial Killer ” Extrem Close up and head chopped off to hide the identity of the madman.
The Serial Killer (Close Up)
“The Serial Killer” (Close Up): 5600K Key light with some red gel + kick light + ambient light + eyes light.

Accessories, if well balanced, can complete the illusion, as well as makeup, costume, and hairstyle.

Flower power... Lighting Set up: Yellow key light, Ambient light with red gel, white kick light.
“Flower power…” Lighting Set up: Yellow key light, Ambient light with red gel, white kick light.

I am used to setting challenging lighting for filmmaking and It is much more interesting to work on this type of project in an average location (Apartment Hotel) than to do modeling or beauty shot in an immaculate and dedicated (and somehow boring) photography studio.

"Nouvelle Vague"
“Nouvelle Vague” Lighting: Franc / Concept and scene set up: Nils, Qiong, Fabrice and Franc /
Model: Fabrice and Nils / Shot: Franc with Sony A7M2 + Nikon AI AUTO 50 mm F/1.4
"Nouvelle Vague" light set up: 2 opposite key lights and a bit of ambient light.
“Nouvelle Vague” light set up: 2 opposite key lights and a bit of ambient light.

None of those pictures would ever exist without the character (acting) and the lighting.
The photographer is the least important part of the equation. None of those shots belong to the person who had pressed the shutter button.

"Lonely Beauty after the party" Lighting Set up and Concept: Franc / Model: Novita / Shot: Monja with Canon 5D IV  and  50 mm f/1.4
“Lonely Beauty after the party” Lighting Set up and Concept: Franc / Model: Novita /
Shot: Monja with Canon 5D IV and 50 mm f/1.4

Forgetting to mention the teamwork in the credit of the photography would be completely dishonest from the photographer.

"Hitchcock film's character" Lighting Set up and Concept: Franc / Model: Monja / Shot: Franc with Panasonic Lumix G85 and Leica 25mm f/1.4
“Hitchcock movie’s character” Lighting Set up and Concept: Franc / Model: Monja /
Shot: Franc with Panasonic Lumix G85 and Leica 25mm f/1.4

Every shot has to be linked to a team of an Art director (concept), actor, Director of photography (light) and Photographer…

"1950's James Bond Girl from the North" Lighting Set up: Franc / Concept and Model: Magdalena / Shot: Franc with Panasonic Lumix G85 and 42.5mm f/1.7
“1950’s James Bond Girl from the North” Lighting Set up: Franc / Concept and Model: Magdalena / Shot through a curtain: Franc with Panasonic Lumix G85 and 42.5mm f/1.7

Filmmaking is a very important addition to anyone Photography experience, as working alone is not helping much personal improvement, while shooting a movie is a teamwork of added values and there is always so much to learn from others…
Franc Peret

MAKING OF SHOTS:

Novita performing in front of Monja, Magdalena and Kerstin.
Monja's concentration through her Canon 5D Mark IV viewfinder. Shot by Franc with a Panasonic G85 and Leica 25mm f/1.4
Monja’s concentration through her Canon 5D Mark IV viewfinder. Shot by Franc with a Panasonic G85 and Leica 25mm f/1.4

Shots with my advanced students: Dean, Fabrice, Nils, Qiong, Matteo, Jonathan, Monja, Kerstin, Novita and Magdalena.

Magdalena pointing her Canon 5D MarkIV  toward a 1920's character performed by Kerstin. Lighting and Concept: Franc / Model: Kerstin / Shot by Franc with a Panasonic G85 and a Leica 25mm f/1.4.
Magdalena pointing her Canon 5D MarkIV toward a 1920’s character performed by Kerstin. Lighting and Concept: Franc / Model: Kerstin / Shot by Franc with a Panasonic G85 and a Leica 25mm f/1.4.

Former photo journalist, Film maker and ELC Shanghai Photography teacher, Franc Peret is teaching Essential Photography Classes, Advanced Photography Workshop and Film Making Classes in Shanghai, for the last 11 years.
If you wish to contact Franc, just drop an email to francperet@hotmail.com

In the Mood for Thoughts

Another “making of” of a shot for you to learn from my motivations behind my decision making in term of technical set up and creativity. This time Apolline on the Chair, in the mood for thoughts.
By Franc Peret

1 – CAMERA SETTINGS:
Shot under natural light with Panasonic Lumix GM-5 ISO100 1/250s with prime lens Panasonic 25mm f/1.4@ f/1.4

2 – LIGHT:
The source of light is a big window behind the mini model. Shot on early morning (at least for me).

Another shot, same time, another pose. Apolline is turning her face to the opposite side. You can notice that the reflected light is stronger from there.

3 – ACCESSORIES:
As I am shooting against the source of light, I set one white board on both side of the model. The board on her left side is actually bouncing light to the board on her right side which finally light up her face. This board serves my purpose as she actually try to reach it, a move that created her pose.

4 – CAMERA AND LENS:
I am using my favorite tiny camera and a great Panasonic 25mm f/1.4.
On my sensor, this lens offer the same field of view than a 50mm on a full frame camera (or 35mm on a DX/APS-C camera), which means human eyes vision.

5 – ISO:
Light was enough to keep ISO 100 as I was working with a very bright lens. Due to the quietness of the mini model 1/250s was very safe and I could work at 1/125s if I needed to close down the Aperture one stop.

Brainstorming, Apolline on the position as the first shot. ISO100 1/160s with prime Olympus 45mm f/1.8 @ f/2.2.
Another mood for thoughts. Apolline is facing the main source of light this time and still receive the reflectors addition. ISO200 1/320s with zoom Lumix 12-32mm f/3.5-5.6 @ 12mm f/4.

6 – APERTURE:
I open up my Aperture maximum to reduce depth of field, as I wanted to treat this composition as a portrait with thin Depth of field.
I usually do not open that much for close up baby shots as they are always moving and therefore easily leaving the thin “in focus” zone.
For APS-C, I would suggest, at least, f/2.8 – f/4 and for Full frame camera f/4 – f/5.6 for close up and baby portrait to be sure to get both eyes in focus.
As you can see, I set up a safety belt around her body so that she would not fell down from the chair. This belt is limiting her movement, so f/1.4 was an option.
On this shot, her left eyes is not as sharp as her right eyes, where the focus is done. f/2 would have been a safer set up on my camera, but as I pull back, I thought the depth of field would be enough at f/1.4. Remember Depth of field increase with distance to subject.
My little one kept her pose just for this shot so I didn’t have another chance. I usually always do several shots with different Aperture or slight focus change as this is the most critical choice for baby shots without forgetting shutter speed.
But as I explained in the ISO chapter, with the light available and my reflectors, I had room to close down my aperture 1 stop (f/2 instead of f/1.4).

Cool Attitude: I could add a cigarette in her right hand with some smoke going out from her mouth. ISO200 1/250s with zoom Lumix 12-32mm f/3.5-5.6 @ 21mm f/4.7
I called this couple of shot "Fighting Spirit, due to her attitude.Panasonic GM5 ISO200 1/200s with zoom Lumix 12-32mm f/3.5-5.6 @ 12mm f/4.5
I called this couple of shot “Fighting Spirit, due to her attitude.Panasonic GM5 ISO200 1/200s with zoom Lumix 12-32mm f/3.5-5.6 @ 12mm f/4.5

7 – POINT OF VIEW and COMPOSITION
I wanted to be as close as possible to her level as she was turning her head and eyes down. I wanted to grab her facial expression and I lower myself as much as I could to do so.
My limit was the window behind her as I didn’t want it to enter my shot to be too disturbing or to create flares in my lens as the source of light might enter directly into my lens if I sat lower.

Shot under natural light with Panasonic Lumix GM-5 ISO100 1/250s with prime lens Panasonic 25mm f/1.4@ f/1.4
As a reminder I post here the original shot again. Shot with Panasonic Lumix GM-5 ISO100 1/250s with prime lens Panasonic 25mm f/1.4@ f/1.4

8 – POTENTIAL IMPROVEMENT
Does the cropped foot on the right side of the shot is important?
Not at all as this is a snap shot took before it is gone.
It is what I am used to call an emergency shot.
Also, the complete movement and point of attraction of the picture is on the right side of the image.
Apolline who just wake up was still wearing her “sleeping bag” which as not a definite shape and i am sure many viewer didn’t notice the foot on the right side of the shot.
In a word, it is not important…

Former photo journalist, Film maker and ELC Shanghai Photography teacher, Franc Peret is teaching Essential Photography Classes, Advanced Photography Workshop and Film Making Classes in Shanghai, for the last 11 years.
If you wish to contact Franc, just drop an email to francperet@hotmail.com

My First Pix of the Year

Here is my first shot of the year, in the bathroom mirror, while holding my no-cooperative little one with one hand and shooting with the other, using my newly purchased “vintage” digital camera.
By Franc Peret

For this shot, I am using a Nikon D90, a 2008 technology camra, bought new for 1800 RMB (= 275 USD) + a Nikkor 35mm f/2D (a vintage lens too) and a Yongnuo YN568EX Flash (Cheap and great Chinese Brand).

Why did I buy such an “outdated” camera? More about this in another post, later on…

SET UP EXPLAINED:
– Manual Mode = The only mode I can use to get my camera working with my flash at high synchro speed.
– Autofocus = AF single, multi point selection. This was the most efficient way to get in focus as our heads are in the foreground and, holding the camera that way, I am not able to perfectly set the more precise single focus point on one of our face.
– ISO200 = Base ISO for the D90, best possible quality picture with contrast, color depth and dynamic range.
– f/5.6 = to get enough Depth of field as we are close to the mirror and Apolline is moving back and forth so that she is never on the same plan as me. I could close down a bit more to be safer, but my flash batteries were not freshly charged and bouncing the flash is more demanding in term of power use and recycling time. I wanted to be able to shoot more frequently and at f/5.6 the flash was recycling much faster than at f/8.
– 1/500s (no need to be that fast, but I wanted to test the high speed synchro capability of he Yongnuo flash with the D90 and it works great!).
– Result: Soft light and no motion blur. At that set of value, 100% lighting is coming from the bounced flash directed straight to the ceiling which became the main source of light reflected by the surrounding white wall (and sink!) and the mirror itself.
– Black and White treatment: I felt that it worked very well to give more importance to the camera, as much as Apolline and myself in that shot. It is a matter of visual balance to communicate my feeling: My mind is split in 2 opposite directions that are, sometime, getting along very well:
My daughter VS Photography (and film making!)…

FP

Former photo journalist, Film maker and ELC Shanghai Photography teacher, Franc Peret is teaching Essential Photography Classes, Advanced Photography Workshop and Film Making Classes in Shanghai, for the last 11 years.
If you wish to contact Franc, just drop an email to francperet@hotmail.com

Shanghai by Night II (Handheld)

This is another Night shooting session in Shanghai, with 6 of my students in the same area as the previous Night Walk. However, each time, it is a different experience due to the personality of the participant, the mood of the moment and the direction we are taking. Another great session with great people.
By Franc Peret

Last but not least, I am often changing my gear.
This time, instead of the Nikon D750 I used for previous session, I picked my 2 smallest cameras: The Nikon 1 V1 (1 inch sensor) and my Panasonic GM5.

The participant to the class: Nathalie, Vivian, Veronique, Rebecca, Alex and Priscilla.
The participant to the class: Nathalie, Vivian, Veronique, Rebecca, Alex and Priscilla. Nikon1 V1 ISO200 1/15s and Cine Nikkor 25mm f/1.4 @ f/1.4.

I fixed a Cine Nikkor 25mm f/1.4 (full metal and full manual) on the Nikon and a Lumix 20mm f/1.7 on the GM5.

Getting the phone hanging was a way to capture the interesting metallic link holding it in front of the breaking cars in the background.
Getting the phone hanging in space was a way to capture the interesting metallic link holding it in front of the breaking cars in the background. Nikon1 V1 ISO200 1/30s and Cine Nikkor 25mm f/1.4 @ f/1.4.

SMALL SENSOR vs BIG SENSOR

The big advantage of this type of camera (smaller sensors with great lenses) at night is to provide much more depth of field even at maximum Aperture (f/1.4 and f/1.7 in that case).

Vivian working to achieve the same effect while struggling to keep her balance.  Photography is a physical activity. anNikon1 V1 ISO200 1/8s and Cine Nikkor 25mm f/1.4 @ f/1.4.
Vivian working to achieve the same effect while struggling to keep her balance. Photography is a physical activity. Nikon1 V1 ISO200 1/8s and Cine Nikkor 25mm f/1.4 @ f/1.4.

Full frame camera are offering less noise, but to get enough things in focus, you can rarely use your lens fully open and being forced to close down the Aperture sometime, you need to increase the ISO to compensate.

To summarize, I would say that Full Frame camera at night are best used with subject at a longer distance, while cropped sensors works very well on close-up shots.
Somehow, APS-C (or DX) Sensors offer a great balance between the 2 options.

HUNTING REFLECTION

Alex collecting light on his face from Sony Showroom  display.  Nikon1 V1 ISO200 1/50s and Cine Nikkor 25mm f/1.4 @ f/1.4.
Alex collecting light on his face from Sony Showroom display. Nikon1 V1 ISO200 1/50s and Cine Nikkor 25mm f/1.4 @ f/1.4.

Here are some of shots I achieved that Night while walking in the heart of Shanghai, teaching to my students how to find a subject, compose their frame, set the camera according lighting condition and being as stable as possible to not need to increase the ISO.

Alex's camera at rest.
Alex’s camera at rest. Nikon1 V1 ISO200 1/8s and Cine Nikkor 25mm f/1.4 @ f/1.4.

This is an easy task to achieve in Shanghai, as source of lights are coming from everywhere and our only duty is to fill up the frame with colors, reflective surfaces and bright spots.

Lonely Tour Eiffel in a store. Light source direction are unusual at night bringing some magic to anything.
Lonely Tour Eiffel in a store. Light source direction are unusual at night bringing some magic to anything. Panasonic GM5 ISO100 1/160s and 20mm f/1.7 @ f/2.5
All black, white and red. Waiting to cross the street.
All black, white and red. Waiting to cross the street.Panasonic GM5 ISO200 1/6s and 20mm f/1.7 @ f/2

Most importantly, is to not try to reproduce the kind of shots you usually do daytime.
It would be meaningless as nighttime is offering such a different look and challenge.

Yellow Bike build to last according the Brand name: "Yong jiou" (Use Longtime). Nikon1 V1 ISO100 1/6s and Cine Nikkor 25mm f/1.4 @ f/1.4
Yellow Bike build to last according the Brand name: “Yong jiou” (Use Longtime). Nikon1 V1 ISO100 1/6s and Cine Nikkor 25mm f/1.4 @ f/1.4
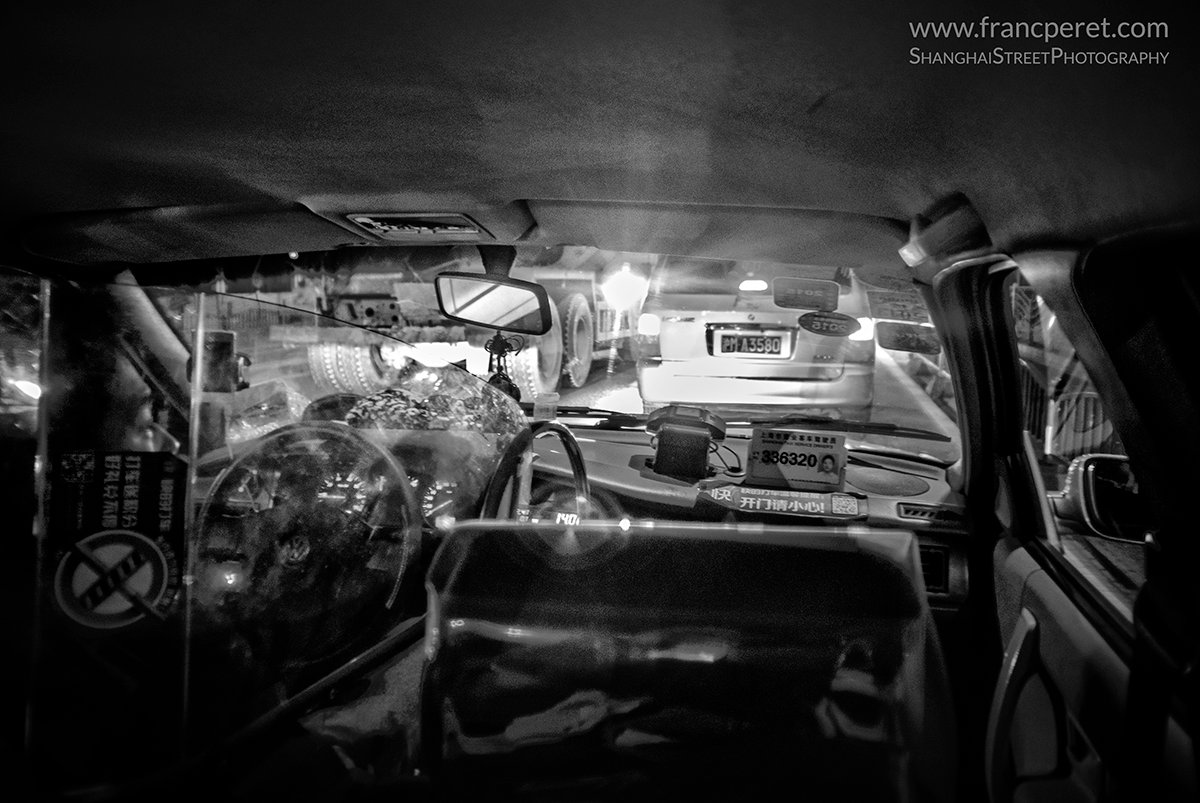
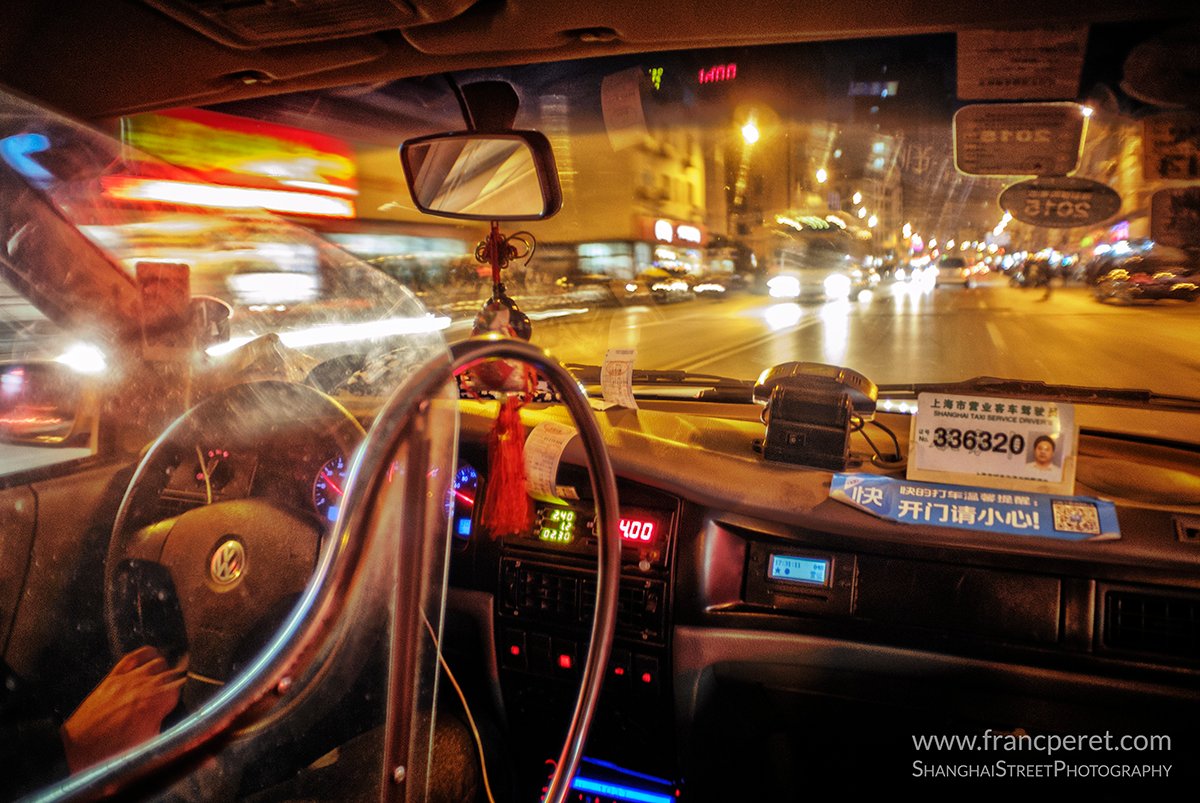
No smoking. In the taxi bringing me to the meeting point. Nikon1 V1 ISO200 1/25s and Cine Nikkor 25mm f/1.4 @ f/1.4
No smoking. In the taxi bringing me to the meeting point. Nikon1 V1 ISO200 1/25s and Cine Nikkor 25mm f/1.4 @ f/1.4.

Best to be stable is to find something solid to hold your back, your shoulder or even your camera from the position you want to build up your composition.

Luminous landscape. Panasonic GM5 ISO200 1/15s and 20mm f/1.7 @ f/2.
Nathalie framing a fire hydrant against the bright city landscape. Nikon1 V1 ISO200 1/15s and Cine Nikkor 25mm f/1.4 @ f/1.4

I usually advice wall, handrail, tree or ground.
Unfortunately, you are not always finding a friendly support for every subject.

Alex in a corner for a great color match.
Alex in a corner for a great color match. Panasonic GM5 ISO100 1/50s and 20mm f/1.7 @ f/2

In that case, the way you are positioning your body and holding your camera are going to matter even more to not get a blurry shot at low shutter speed.

AN HIDDEN WORLD

One of my favorite night shooting subject in such a developing city is background or details that could be used for the shooting of a 1950’s science fiction movie.

Science Fiction background 1.
Science Fiction background 1. Panasonic GM5 ISO200 1/2s and 20mm f/1.7 @ f/2.2

I am not sure you are going to understand this sentence, but lets check out the surrounding shots to get an idea of my feeling and inspiration.

Another inspiring Sci Fi background
Another inspiring Sci Fi background.Panasonic GM5 ISO200 1/10s and 20mm f/1.7 @ f/2
A Science fiction set coming from the past.
A Science fiction set coming from the past. Panasonic GM5 ISO400 1/5s and 20mm f/1.7 @ f/1.8

In this kind of set or with those type of details I can imagine parts of an abandoned space ship or high tech factory.
Sometime people are telling me that I am having too much imagination…

Space Station.
Space Station. Panasonic GM5 ISO200 1/2s and 12mm f/1.6 @ f/4

I am very clear about that.
Imagination will be NEVER too much.

Back to reality (almost).
Back to reality (almost). Panasonic GM5 ISO200 1/25s and 20mm f/1.7 @ f/2

For me, imagination is the only way to never get bored of something I am doing since 1986: professional photography.

An individual space ship?
An individual space ship? Panasonic GM5 ISO400 1/10s and 20mm f/1.7 @ f/2

And after 15 years shooting film, digital photography helped me to cross all my previous boundaries, and Photoshop, Video, film making, editing are added value to the experience.
And as I often say to my students, I am learning something new about photography and film making, almost everyday.
It is an endless process.
My life will never be long enough to learn as much as I would like to…

If you liked this post, you can discover the previous night shooting session in Shanghai Here

Former photo journalist, Film maker and ELC Shanghai Photography teacher, Franc Peret is teaching Essential Photography Classes, Advanced Photography Workshop and Film Making Classes in Shanghai, for the last 11 years.
If you wish to contact Franc, just drop an email to francperet@hotmail.com

Shanghai by Night (Handheld)

Since I am living in Asian big cities, I deeply enjoy shooting at night as there is so much going on with so many light sources, potential silhouette and reflective surfaces. Best of all, it is always a pleasure to share my knowledge and experience about such a very specific topic with some of my favorite students.
By Franc Peret

Here is what I achieved while running this Fall 2015 Night shooting class in the heart of Shanghai.
This is the first of a series of night shooting with and without tripod.
You can discover the second hand held night walk session here.

In search of interesting reflective surfaces and bright dots in background
In search of interesting reflective surfaces and bright dots in background. Nikon D750 ISO100 1/20s 50mm f/1.8 @ f/1.8
Audi bright lines.
Audi bright lines. Nikon D750 ISO200 1/6s 50mm f/1.8 @ f/2

I worked with a Nikon D750 and three cheap and bright lenses: Nikon AF-S 50mm f/1.8G, Nikon AF-S 35mm DX f/1.8G and Sigma 28mm f/1.8.

Wide night world in marble.
Wide night world in marble. Nikon D750 ISO100 1/20s 50mm f/1.8 @ f/1.8

Surprisingly, the 35mm DX (designed for crop sensor camera, such as Nikon D7200) is working very well on my Full Frame camera.

Abstract car's breaking light on aluminium panel
Abstract car’s light on aluminium panel. Nikon D750 ISO100 1/6s 50mm f/1.8 @ f/2.8
Double Rey and his Sony A7.
Double Rey and his Sony A7. Nikon D750 ISO100 1/8s 50mm f/1.8 @ f/1.8

Set on some Aperture and focusing closer, a strong vignetting appears, but I am avoiding this quit easily. It is a great little lens, sharp and light.

Dream Team of students with (from left to right) Rey, Natacha, Charlie, Isabelle, Monja, Klaus, Gwen, Liam and Jana
Dream Team of students with (from left to right) Rey, Natacha, Charlie, Isabelle, Monja, Klaus, Gwen, Liam and Jana. Nikon D750 ISO800 1/20s 35mm f/2 @ f/2.2

To Compare, I brought along an old prime lens: Nikon AF-D 35mm f/2 which is still a good performer as you can see on the group shots.

An emergency shot done just before the parked car with the red lights is going away. Hard to be quick, to compose and to be stable. Nikon D750 ISO200 1/10s 35mm f/2 @ f/2

The 28mm f/1.8 Sigma is an old Manual focus lens that I bought second hand more than 10 years ago in Japan for less than 300 RMB (50 USD). It is bright, light and a joy to use.

Kerstin at work: stability and concentration
Kerstin at work: stability and concentration. Nikon D750 ISO400 1/8s 35mm f/2 @ f/2

For many years, Nikon Camera are having a great and helpful feature for focusing, especially at night with a fully open bright lens.

Orange and Blue
Orange and Blue. Nikon D750 ISO400 1/5s 35mm f/2 @ f/2.2
Red and Blue
Red and Blue. Nikon D750 ISO400 1/15s 35mm f/2 @ f/2.5

A green dot is lighting up in the left corner of the view finder, as soon as any lens fixed on the camera is getting in focus. It is very accurate and a time saver sometime.

Wood Men in Suits. Red and Blue. Nikon D750 ISO200 1/15s 35mm f/2 @ f/4

TO come back to the night shooting Class, our group didn’t have to cover a long distance as there is so many things to see, with trained eyes, in what supposed to be darkness.

Game of Lines, Silhouette, Light and Shadow. Nikon D750 ISO200 1/4s Sigma 28mm f/1.8 @ f/2.8

3 hours class between 6:30 to 9:30 pm were sufficient to collect hundred of shots.
Here is a short selection of that inspiriting time.

Sakura Hotel, a difficult High Contrast Scene that would deserve a tripod and a HDR treatment with a series of bracketed shots. Nikon D750 ISO400 1/20s Sigma 28mm f/1.8 @ f/2.0

When my Students start to find aesthetic interest in garbage can, I know that my teaching was efficient and meaningful to them. I am having a joke about this in my essential photography program.

When my Students start to find aesthetic interest in garbage can, I know that my teaching was efficient and meaningful to them. Klaus at work with his Fujifilm Camera. Nikon D750 ISO400 1/10s 50mm f/1.8 @ f/2.0

I am teaching that the most dangerous topics for photographer and kids and pets (especially kitty).
In the world, the biggest calendar sell are still cats.
Nothing can beat cats in term of visual attraction to most middle age house wife who are buying those calendars.

Handling the Handle bar. Nikon D750 ISO100 1/6s 50mm f/1.8 @ f/2.0
Painted words and side light. Nikon D750 ISO100 1/6s 50mm f/1.8 @ f/2.0

Problem with pets and kids is that they are attractive on their own. Show a picture of a little kid or a baby cat and viewers are going to love your pictures.

Handling the Handle bar, version 2. Nikon D750 ISO100 1/10s 50mm f/1.8 @ f/2.0
Handrail. Nikon D750 ISO100 1/30s 50mm f/1.8 @ f/1.8

Frustration comes on the fact that, viewer do not specifically like your picture, they like the subject instead.
And here comes the garbage can parabola.

Zebra and couple. Nikon D750 ISO100 1/10s 50mm f/1.8 @ f/1.8
Zebra II. Nikon D750 ISO100 1/10s 50mm f/1.8 @ f/1.8
Zebra. Nikon D750 ISO100 1/10s 50mm f/1.8 @ f/1.8

I am teaching to my students that if they are able to bring positive emotion to viewers while showing them their garbage can picture, they would have achieve something genuinely good as photographer…

Success will not belong to the subject itself, but to the photographer only.
And night shooting, with all its magic, is the best place to give it a try…

If you liked this post, you can discover the second hand held night session in Shanghai here.

Former photo journalist, Film maker and ELC Shanghai Photography teacher, Franc Peret is teaching Essential Photography Classes, Advanced Photography Workshop and Film Making Classes in Shanghai, for the last 10 years.

Special Effects

Here are some sample of works done with my students during the Advanced Photography Workshop I am organizing in Shanghai. This time, Fun Special Effects was the main topic

By Franc Peret

Franc’s Advanced Photography Course is also designed for students to discover how to use set up, choreography lighting and Photoshop for imagining and creating specific effects, with different students staging as imaginary characters in strange situations.

Alexandra: Wlalking too fast
Regino: Impossible to sit, I lost my bottom.
Eugenio: Stretching time Tea time.

Lighting set up was done in “The Apartment”, Yong fu lu, Shanghai. A day and night creative space.

Liam: The Magic Broom

Here is a series of shots of different students in unusual posture.
With Eugenio Sandroni, Sarah Dashfield, Raimondo Pro, Alexandra, Jana, Liam, Regino and Harald. Dirk is missing again!

Harald and Ray: That was a big caliber.
Harald and Ray: Fighting scene.

Former ELC Photography teacher, Franc Peret is teaching Essential Photography Classes, Advanced Photography Workshop and Film Making Classes in Shanghai, for the last 10 years.

Painting With Light

Here are some sample of works done with my students during the Advanced Photography Workshop I am organizing in Shanghai. This time, Painting with light was the main topic

By Franc Peret

Franc’s Advanced Photography Course is designed for student to discover how to use their camera at the extreme: long pause, high speed shot, special effects and other things like this.

No reason to feel scary, colorful ghosts are friendly ghosts!

Painting with light is one of the most interesting workshop as your camera can record things you cannot see with your eyes and brain.

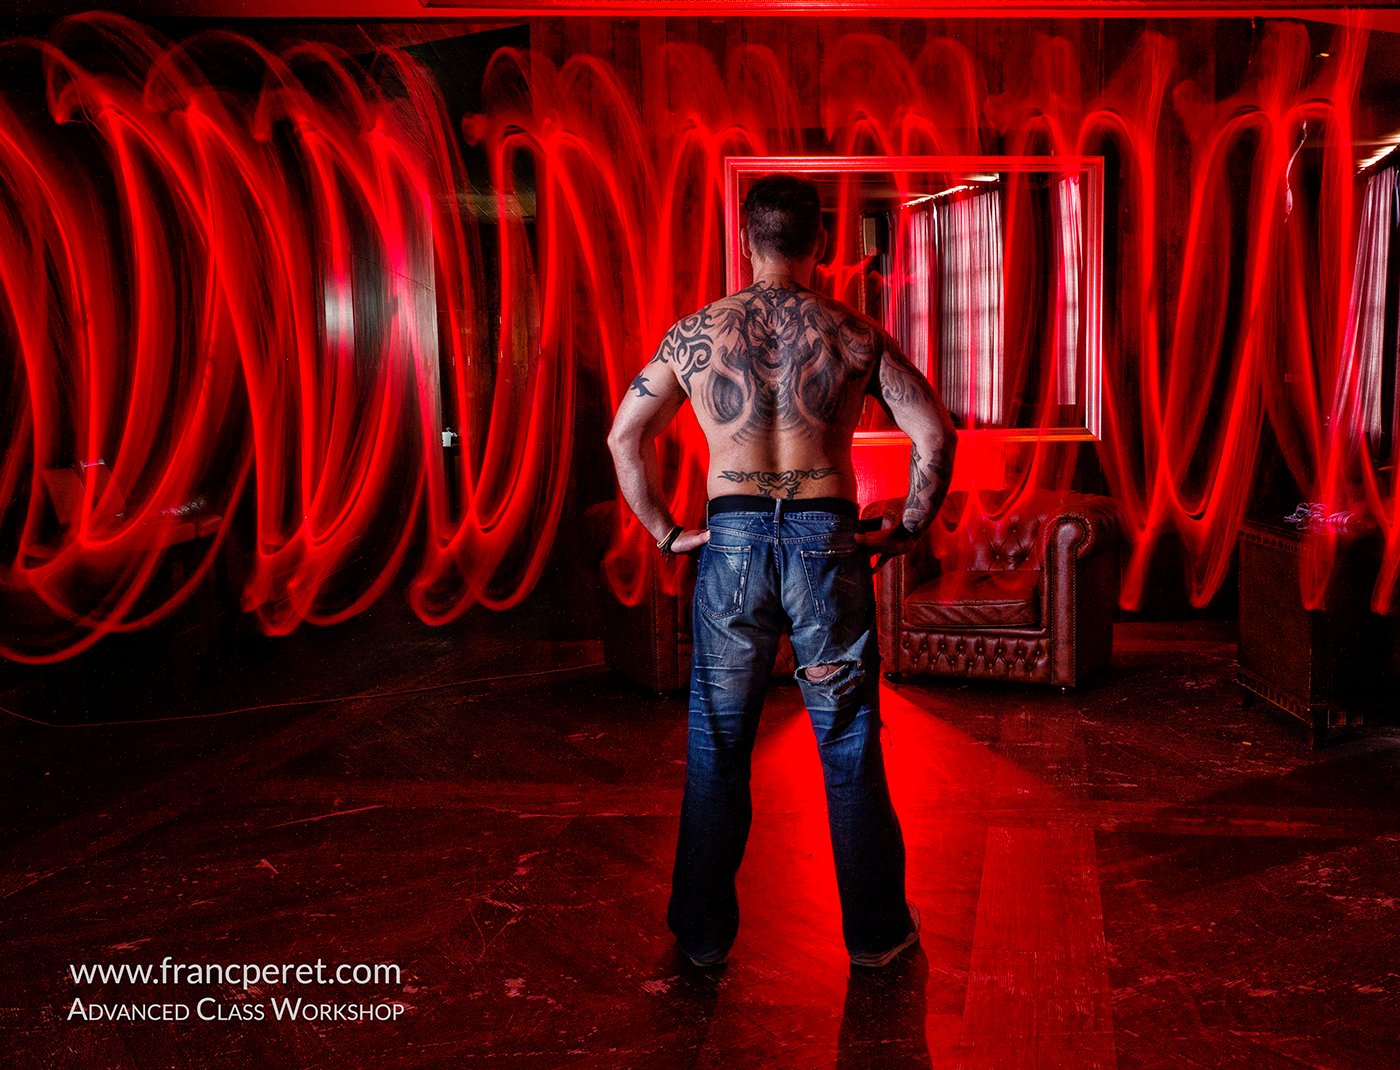
Using red for creating a mood for those tattoos (Liam's back)
Using red for creating a mood for those tattoos (Liam’s back)

Trick is simple and affordable as you just need a camera, an average lens (as you work with regular aperture f5.6 – f8), a tripod (a chair or a table work perfectly too), a long exposure, some cheap flash, a partner, some torch or lights, a dark room and your imagination.

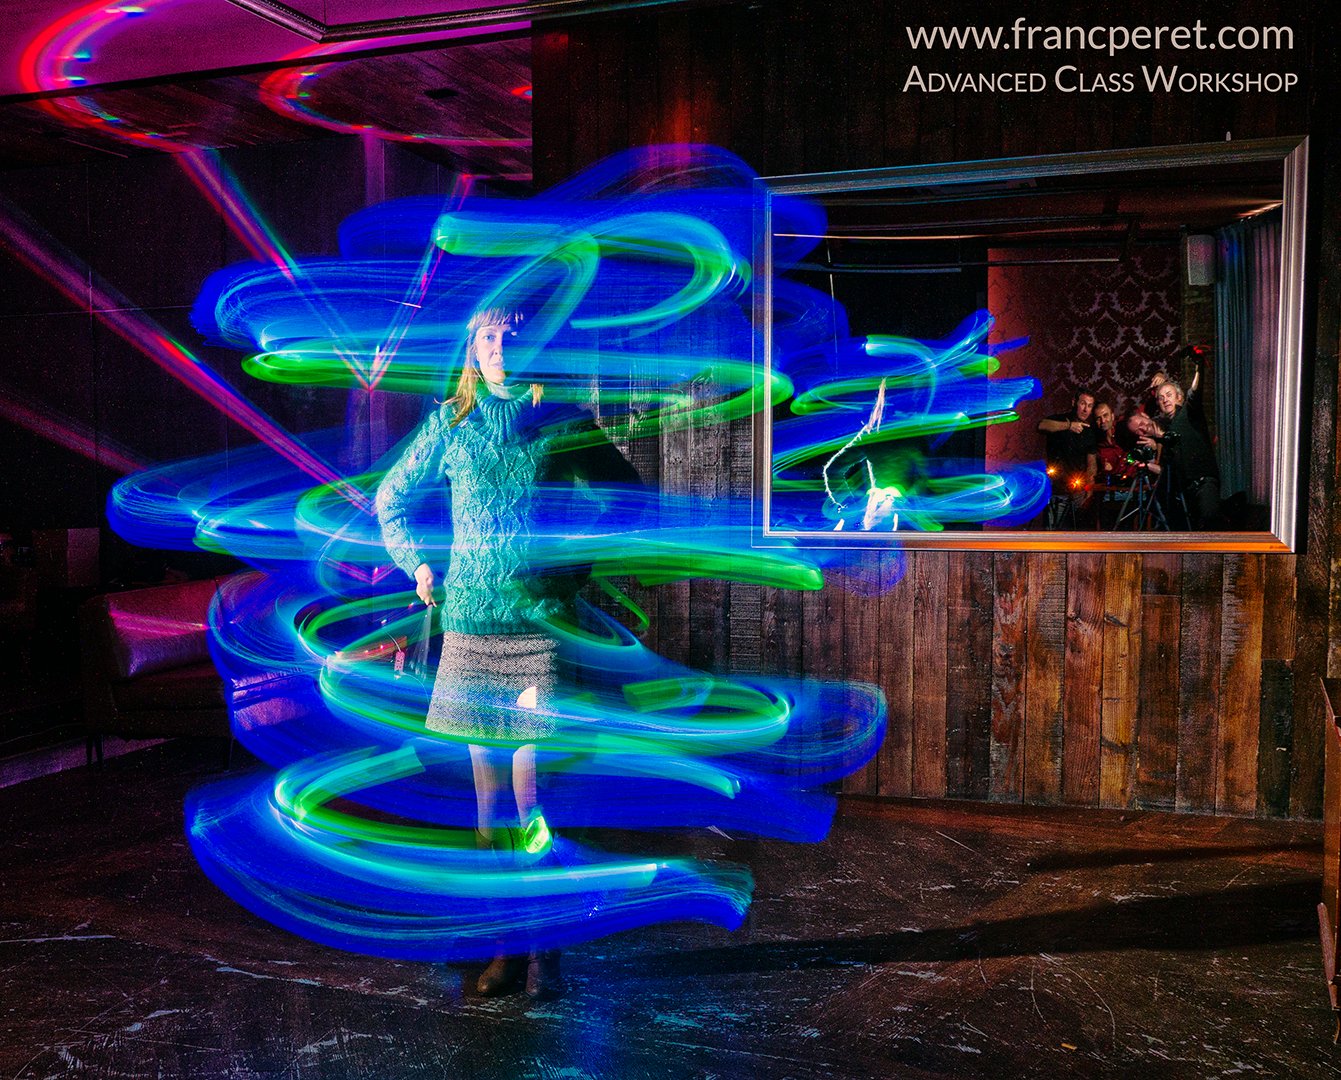
Traveling in time in a bubble of light.

This is a more advanced step in photography as the camera becomes completely secondary to the process.

Guess how Eugenio did this light move.

As soon as you set up well the camera with the right setting, you don’t think about it anymore and your focus you mind and imagination on the choreography you are going to organize in front of the lens.

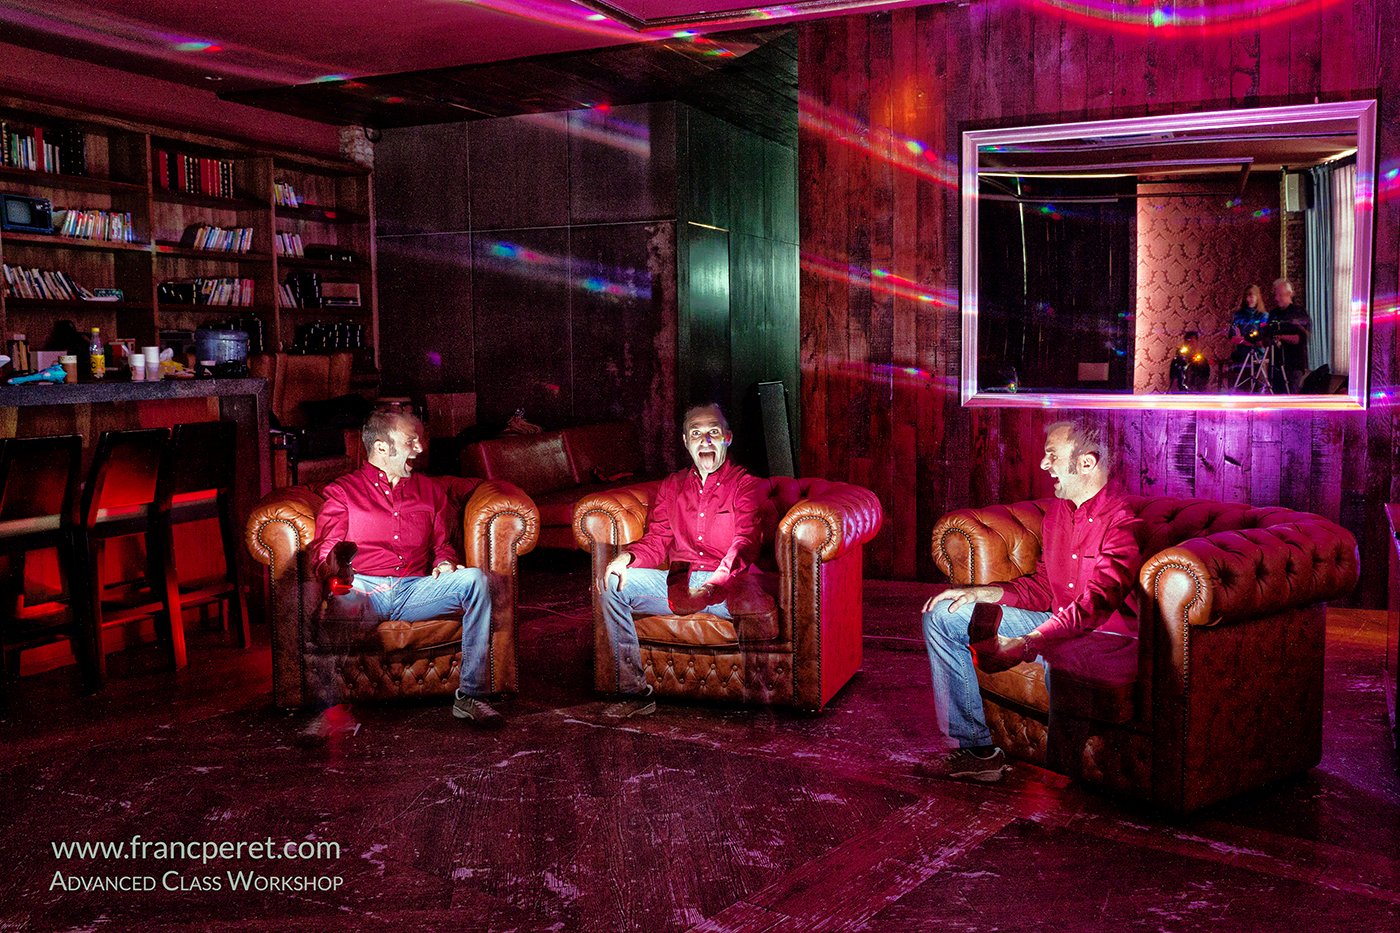
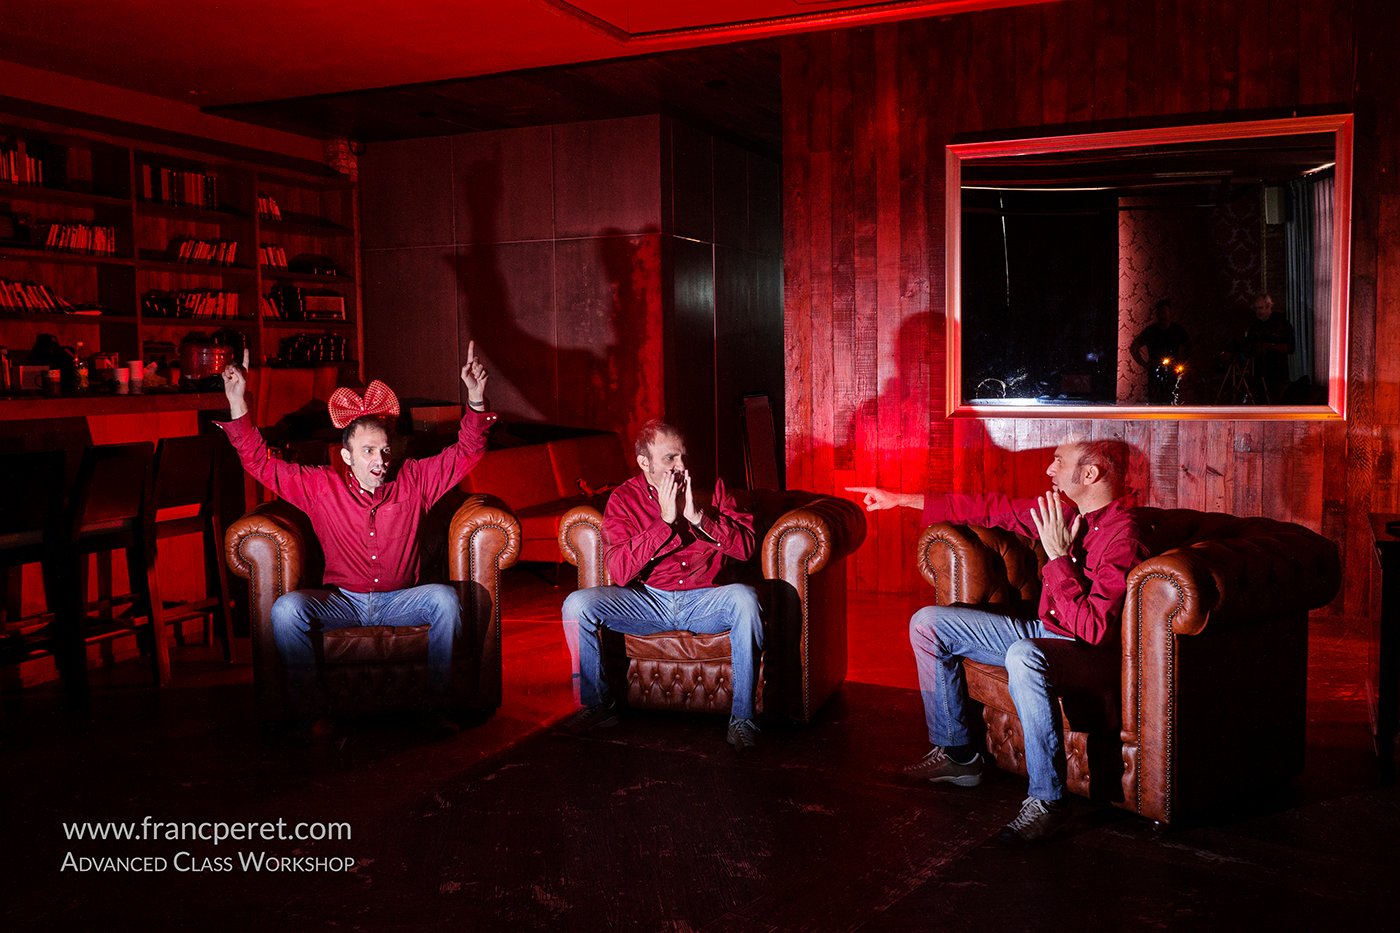
For triple exposure of the same person, we used 2 different techniques. Here Eugenio is holding a speed-light (narrow zoom position) he will flash 3 times.

It is a great exercise of anticipation, as with experience, you are able to imagine exactly what is going to happen and how it will look like.

For triple exposure of the same person, we used 2 different techniques. Here Eugenio is receiving the light form an external speed-light (narrow zoom position) that will be flashed 3 times, each time in a different direction.

Most of the time, I am still having good surprises and this make the overall process always interesting as you are challenging both your imagination and your technical ability to make it happen.

In real life, Ray looks even more weird! Light is helping him here!

This type of shooting session helps a lot my student to detach their attention to the camera and to the real life, to get more involved into the pure origin of photography which is “Painting with light”!

The idea of having the huge mirror in the background was to get some interesting reflection of the surrounding light, but we finally use it as a signature by flashing ourselves in the reflection.

And I am sure this workshop is useful to really understand what “exposure” means.

Franc Teacher: Franc Peret
Students on that session: Eugenio, Liam, Alexandra, Ray and Regino
Special guest: China Mei.

TECHNICAL CONSIDERATION
On a technical point of view, I always take benefit of my classes to test my newest cameras to see if they can answer to any type of my professional commitment.
All those pictures had been shot during my teaching session with Panasonic GH4 and 12-35 mm f2.8 lens set at f5.6 or f8 depending light work. Manual focus. Manual Exposure. ISO200 (Which is the base ISO on this camera).

Hot spots

Despite the base ISO, I noticed lots of hot pixels and color noise. I usually don’t have those parasites with my other camera (Nikon D800) when doing long pose (10 to 15 seconds).

Monitoring

Second problem I met with the GH4 is the lack of accuracy of the LCD screen. Image looks perfectly exposed on the screen, but histogram is telling the truth and I discovered that image could be under exposed 2 stops without having this result on my screen.
It seems that despite my screen luminosity NOT being set to auto, the GH4 is still compensating to render an acceptable image on screen, even the picture taken is truly underexposed.

Ergonomic

Out of those 2 points the GH4 is a joy to use with its fully articulated screen and its manual focus assistance features. Raw file are easy to work with, but exposure compensation often create noise in shadow area.

Franc Peret is teaching Essential Photography Classes, Advanced Photography Workshop and Film Making Classes in Shanghai

Full Manual Survival

I do not advise my Essential Photography Class students to use the Manual setting in an uncontrolled environment, but sometimes I am personally forced to do so and I am explaining here how to handle such situation.

By Franc Peret

I am teaching to my Essential Photography Class students how to precisely and quickly control their camera in semi-automatic Aperture priority mode as it is the most efficient way to get it right, in real life photography.

Nikon1 V1 and Cine Nikkor 10mm f1.8. With Sign and Shadows. Using a wide lens imposes to fill up the frame with interesting things (textures, Shape and Lines).
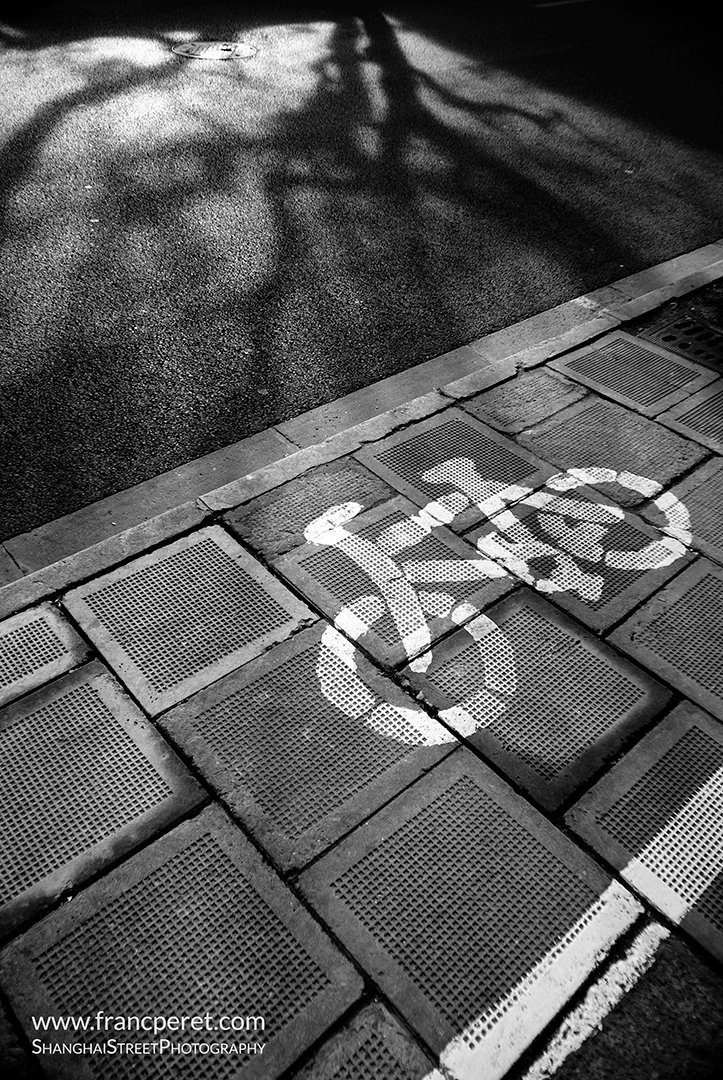
Nikon1 V1 and Cine Nikkor 10mm f1.8. With Bicycle.

On my own, as I like to experiment a lot, I am often working with a strange combination of cameras and lenses linked by an adapter. And sometimes the 2 entities refuse to communicate with each other as they were not supposed to be connected.

Public Phone in the street. Soon to disappear... Nikon1 with 10mm f1.8 (equivalent to 27mm on a FX camera or 18mm on a DX)
Public Phone in the street. Soon to disappear… Nikon1 with 10mm f1.8 (equivalent to 27mm on a FX camera or 18mm on a DX)

Then, I am on my own, forced to use a full manual set up for both focus and exposure.

Last summer, I spent 2 months with such a strange combination. I adapted a collection of very old Cine-Nikkor C-mount lenses on my Nikon1 V1.

You can see my original post here

Guessing game

Therefore, for every shot, I had to guess the exposure and getting confirmation after the shot by checking the histogram to know if I were right or wrong.

One tip I am teaching to my students is this:
If you can see blue sky over your head and you are shooting someone under sunlight, the exposure value is matching (@ISO100 – f8 – 1/250s) or (@ISO100 – f5.6 – 1/500s) or any other combination at the same EV14.

For example, I might use (@ISO100 – f2 – 1/4000s) for portrait or for freezing high-speed action.

Having a base line to start with

EV14 is there in an average situation and in an average location.

In Australia Outback (no air pollution and lots of reflection from the sand), in The Alps, Himalaya, Tibet or Xinjiang high altitude (closer to the source of light) this value can be double (EV15) or even more.
That means the combination will be (@ISO100 – f8 – 1/500s)

In average situation, like in French Burgundy, I preset my camera to the EV14 value under a blue sky (@ISO100 – f5.6 – 1/500s) for a common subject.

If my subject is under the shadow, I know the EV is dropping at least by 2 stops so I will reduce my speed by 4 (@ISO100, f5.6, 1/125s) or open up my aperture by 2 stops (@ISO100 f2.8 1/500s) to compensate.

Taking care of parameters

My decision will depend on the fact I need or not speed to freeze motion or depth of field to get more things in focus.

This is a Quick and approximate decision without taking my eye out of the viewfinder. Shadow will be darker if the subject is not surrounded by reflective surfaces (such as a white wall).
And I will adapt my decision according to this parameter.

With the Nikon1 and my C-mount lenses, the Aperture ring is on the lens, and the shutter speed is controlled by a button next to my thumb.
Very handy.

Experience helps indoor 

Now let’s imagine my subject is moving into a house with windows and white wall.
Outside is sunny and I know that the EV will be around 8 to 16 times slower (3 or 4 stops) indoor…

This is an approximation but if you are used to your environment, you should be able to guess quite accurately after few test shots. This will help you later on to get closer to the truth in few steps.

Most of the time, I got it right at first shot.

Variation will depend on reflection around (white wall or trees) the subject.

Working with human brain

Of course, during an overcast day, I have to do more test and try as I am having no reference anymore. Not every grey curtain or clouds in the sky deliver the same exposure on earth! It can be dramatically different from one day to another, one hour to another.

Step by step, knowing my environment, and having my eyes and brain used to communicate each other in this “guess what is the exposure here” game, I became more and more accurate in guessing the exposure of the place I were shooting my subject.

Nikon1 V1 with an Angenieux 25mm f0.95 lens. Manual Focus and Manual exposure as this is a 30 years old lens without any "smart" contact with the camera body. Nikon1 V1 @ ISO100, f0.95, 1/13s. I just stabilized myself with a tree, and waited my subject to be steady.
Nikon1 V1 @ ISO100, f0.95, 1/13s. I just stabilized myself with a tree, and waited my subject to be steady. My advice: Always immediately check the result you get to see if you really need to increase the ISO or not.
I could increase the ISO a bit, but among the 10 shots I had done half of them are sharp enough so I had no reason to lose quality to raise the speed. My advice: When you are shooting something lasting (not happening once) always check the result you get to see if you really need to increase the ISO or not.
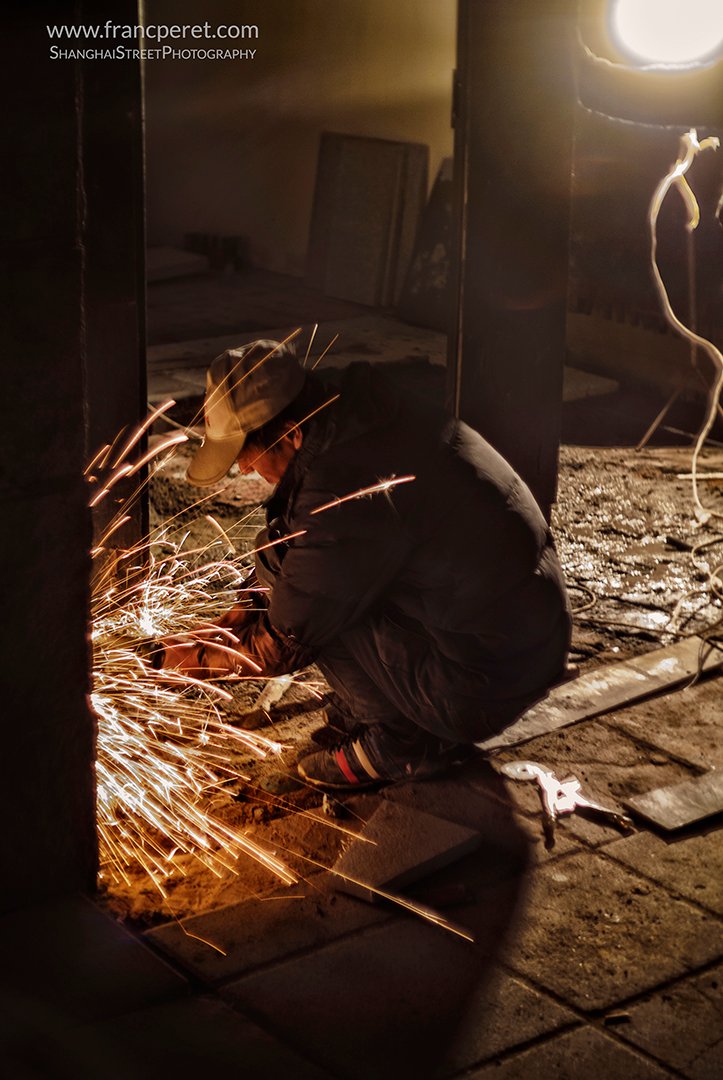
Nikon1 V1 with an Angenieux 25mm f0.95 lens. Manual Focus and Manual exposure as this is a 30 years old lens without any “smart” contact with the camera body. I could increase the ISO a bit, but among the 10 shots I had done half of them are sharp enough so I had no reason to lose quality to raise the speed. Also, keeping a slow speed helped to get longer sparks.

Concerning focus set up, I was used to manual focus when I started my photography career back in 1986, so this didn’t bother me much since the viewfinder of the Nikon 1 is sharp enough for me to hit the focus right even using the f0.95 lens.

Finding the right balance

Manual focusing is like finding the right balance between too far and too close.

Actually, the best way to hit the right focus point is to turn the focus ring until you get your subject sharp in your view finder and then you just turn the focus a bit more until you lose the sharpness.

10mm f1.8 @ f2, Nikon1 @ ISO400, 1/10s

Then you turn your focus ring in the opposite direction until the subject appears perfectly sharp, again.

Cine-Nikkor 10mm f1.8. Shot done at ISO400, f1.8, 1/10s. Harder to shoot when the car is moving but still workable. Camera is still the Nikon1 V1. Manual Exposure, Manual focus, hand held.

To be more precise you can turn a bit more and see if it is better or worst, and then go backward again.

It is long to explain, but very quick to do

Overall, I was so seduced by the result (color, mood, character…) I got with the combination of the Nikon1 and my old lenses, that I left my GH4 and the Lumix lenses at home, despite the lack of any exposure and focus assistance from the Nikon1.

10mm f1.8 @f2. Advantage of small sensor camera is to get enough depth of field even wide open. Nikon1 V1 ISO100, 1/60s.
10mm f1.8 @ f8 on Nikon1 @ ISO100. 1/160s

Of course, I would be very happy to get a firmware update or a hack to get the Nikon1 able to work on semi-auto Aperture priority with a dumb adapter.

That would make it even more enjoyable to use.

Just remember that in Photography, nothing is impossible and all is a matter of logic. And, if it is time-consuming and brain tiring to shoot fully manual, it is quite rewarding to be able to achieve the exact shots I had predicted without any assistance.

However, if I were using the exact same combination in the same location with a camera able to work in semi-auto Aperture priority, I might have many more interesting shots, especially of people and things on the move and I would be able to concentrate more on the composition and subject placement by freeing my brain from technical consideration dedicated to the exposure only.

Franc (Essential Photography Class Teacher)

Former ELC Photography teacher, Franc Peret is teaching Essential Photography Classes, Advanced Photography Workshop and Film Making Classes in Shanghai, for the last 10 years.

1987 ARCHAOS in France

Long before any other Circus (such as world famous “Le Cirque du Soleil”), Archaos was the very first contemporary, alternative, theatrical circus of its time.

Photos by Franc Peret (ISO400 Slide Film)

Fighting Clowns with chainsaws

Created in 1986 by Pierrot Bidon, this circus without animals (except a pig), was featuring dangerous stunts like chainsaw juggling, fire breathing, wall of death and so on.

The performance under the huge tent was a mix of action, aestheticism, destruction, derision, poetry, theater play and live music with “The Thunderdogs” an independent alternative rock band playing during all the show, with masterpieces such as “Beautiful Destruction” or “Underworld” (I still have their CD they were selling at the end of the show).

Dreaming to be a clown with a chainsaw

Archaos got international success during a World tour starting in 1989, especially in England where it won « The best name », Oscar of the most creative artistic proposition of the year.

Car Crashes, smoke and Alternative Rock, welcome to Archaos

One of my best friend, Stephane, was part of the show doing motorcycle stunts and he gave me the opportunity to assist to the performance to take some pictures in the dark, to do some mind-blowing interviews and to write a story about it in a magazine (I have to find it back and do a scan).

Gym on a London Cab
Gym on a London Cab
Magician: The candle is burning a finger, the smoke is coming out from the mouth.

I was so shocked and seduced by the global “Madmaxian” atmosphere of this anti-conformist Universe that I was considering to leave my journalistic work and my (almost) sedentary life to join the Archaos experimental group.

Full metal Jacket clown

Unfortunately, I had no talent for it, despite my kid’s dream to become a clown one day…
I partly succeeded. though, as I am making my photography Students laughing a lot during my classes.

Following erratic movement in the dark

Here are some of the shots I took back in 1987 and 1988.

Finding the balance  in colonial gears
Finding the balance in colonial gears
Grace and muscles
Grace and muscles

The very dramatic lighting and random movement represented tough conditions, especially with slide film, which didn’t offer any latitude in exposure mistakes, compare to negative for film or (even much more correctable) digital raw file.

Car destruction workshop

I was using a Nikon FE2 in full manual mode (exposure and focus) with some bright prime lenses such as 50mmf1.4 and 85mm f2.

Construction Machine on the scene were part of the sound and smoke mix to create a contrast between flesh and steel.
Jumping out the table, I underestimated how high Stephane, the stuntman, was going to be
Jumping out the table, I underestimated how high the acrobat was going to be

By experience and observation, I had to guess and adjust according subject movement and pursuit light strength to get both focus, exposure and composition right.

Controlling Emotion for good

Most difficult thing, actually, was to not get too emotional because of the exciting live music and the thrilling performance in front of my eyes.
I had to concentrate on my shooting without enjoying the show as deep as I would like.
Being a photo journalist, I was not an usual spectator anymore, but a magic moments collector.

A last move on the roof

You don’t need to search on Google or Youtube “CIRQUE PIERROT BIDON”, “PIERROT LE FOU BIDON” or “CIRCUS ARCHAOS”, to find interesting stuff about it, anymore.

Thanks to Mischa (Bouinax), the best place to find everything collected to keep alive Archaos memories is here: http://archaos.info/index.aspx

Archaos was a start of a new trend of choreographic shows, but as everything creative getting mainstream, the original "borderline" concept got sweeten a lot and lost its soul to fit the "acceptable" for the mass.
Archaos was a start of a new trend of choreographic shows, but as everything creative getting mainstream (like this show organized by French Lottery, La française des jeux), the original “borderline” concept got sweeten a lot and lost its soul to fit the “acceptable” for the mass.

You must have a look at this amazing collection of videos, pictures and stories, even it will never replace the feeling of being there. You are going to miss the exhaust pipe’s smoke, the steel sparks and the burning smell!

Former photo journalist, Film maker and ELC Shanghai Photography teacher, Franc Peret is teaching Essential Photography Classes, Advanced Photography Workshop and Film Making Classes in Shanghai, for the last 10 years.