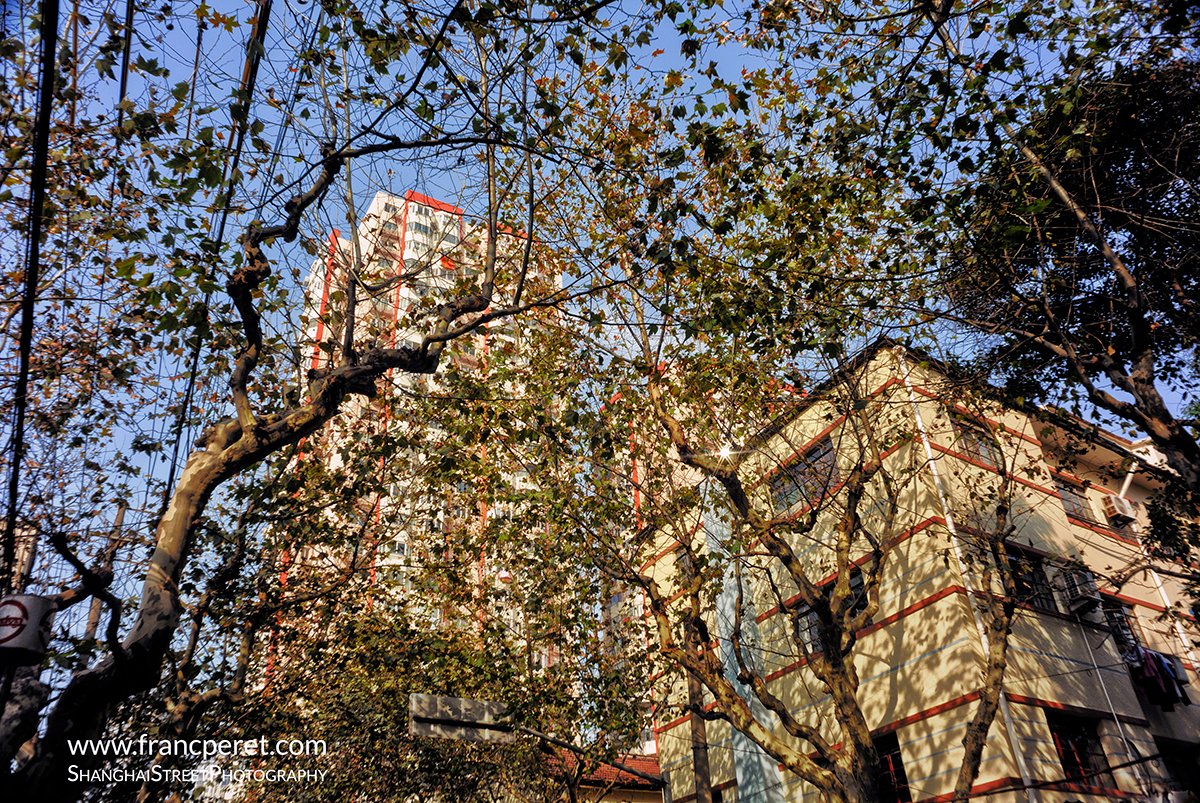
For beginners, a good photography starts with a good subject. While progressing, the quality of light becomes a priority over subject, as any of them can deliver a great result as soon a moody lighting is falling on it.
Franc Peret
In my Essential Photography Classes, I very quickly emphasize the importance of light to my students who solely focus on camera settings and the subject itself.
Commercial photo shoot are done in studio to get the best result out of the subject.TV commercial lighting set up involves much more equipment, time and budget than the shooting part.
I am always repeating this back to basic motto: “without good light, there is no good picture”
The word “Photography” literally (from its Greek origin) means: “painting with light”.
Working with light means also working with shadow and everything in between. Nikon D750 ISO100 1/60s with 24-120 mm f/4 @ 90 mm f/11.My little one looking at the main door bathed by soft natural light shaping her face with a bright line. Lumix GM5 ISO200 1/160s with 45 mm f/1.8 @ f/1.8
It is the reason why, big budget advertisement, movies and important visual production are spending most of the money on lighting equipment, specialist and crew.
It is also the reason why studio shooting are making a difference compare to natural light session (for portrait, products and fashion).
Reflective tools under sunlight. Nikon D750 ISO100 1/1000s with 24 mm f/2 @ f/2Graphical Shanghai airport. Nikon D90 ISO 200 1/60s with 18-140 mmf/3.5-5.6 @ 18 mm f/8
Also, memorable landscape photography are always shot at the best time of the year and the best hours of the day.
ISOgraphy
Of course, with newer camera able to shoot at very high ISO (higher than ISO 6400), this original idea seems outdated.
Meeting new friends. Lumix GM5 ISO1250 1/30s with 25 mm f/1.4 @ f/1.4Marc the gardener in winter light. Lumix GM5 ISO400 1/15s with 25 mm f/1.4 @ f/1.4
And some geeks are spending their time to challenge their vision and their equipment capacity by shooting subjects in “no light” situation such as a jumping black dog in a tunnel at night.
Apolline, her mother and a stray cat. Lumix GM5 ISO100 1/640s with 25 mm f/1.4 @ f/2Summer in France. Lumix GM5 ISO100 1/160s with 20 mm f/1.7 @ f/4
With this search of camera efficiency in low light, subject is not important anymore, only pixel peeping and noise hunting on screen seems to bring satisfaction.
Cinemascope framing for this outdoor portrait: During a sunny day, keeping the subject face under shadow deliver a softer and more pleasing look. Nikon D750 ISO100 1/640s with 85 mm f/1.4 @ f/1.4
However, this kind of practice is not related to photography anymore and I am calling it “ISOgraphy”.
Light is all you need
Therefore, whatever camera you are using, a better lighting will always bring the best improvement in your photography.
An old bed frame became a art piece in my garage, before It goes away in a garbage truck. Nikon D750 ISO140 1/160s with 24-120 mm f/4 @ 92 mm f/5A plastic bottle on a table in my home.Thanks to the light, anything can become attractive. Lumix G85 ISO 200 (to preseve details) 1/8s (G85 has a great internal stabilizer) with 100-300 mm f/4-5.6 @ 125mm f/9 (to get enough depth of field)
I am so used to search for light (or building up lighting for film making and studio work) that my emotional response to any subject (even my little daughter) is linked to the quality of light falling on them.
My little one is cute, and even cuter under great lighting, her eyes turned to the sky. Nikon D750 ISO100 1/320s with 90 mm f/2.8 @ f/2.8
Somehow, anything under good lighting is a subject to me and my feeling and creativity is building up the shot.
Quality of light?
When I am speaking about lighting, there is sometime a misunderstanding among my students.
While I am considering quality, they are considering brightness only.
Blowing dandelion seeds… Mid day under blue sky is not offering the best lighting, better to avoid strong shadows on face by choosing your point of view according sun’s position. Nikon D5500 ISO100 1/3200s with 50 mm f/1.8 @ f/2
A good quality of light is shaping the subject (3D feel), bringing a mood (hard or soft), displaying vivid or pastel colors, offering a strong B&W type of contrast or a smooth transition between bright and dark area.
Vintage Suitcase in market. Direct sunlight emphasize colors. details and texture. Nikon D750 ISO200 1/125s with 24-120 mm f/4 @ f/11On action shot, best is to wait for your subject to cross the light you had detected. Nikon D5500 ISO400 1/1000s with 18-140 mm f/5.6 @ 140 mm f/5.6
As soon as you are starting to be sensitive to light, it is a never ending experience as it is spreading such a wide panel of beauty and there is nothing more enjoyable in life than to see beauty everyday.
Hard light with sharp shadows under winter sunlight. Nikon D750 ISO100 1/3200s with 85 mm f/1.4 @ f/1.8
No need to be trained to find good lighting, it can be anywhere, anytime (for close up shots) and you just need to open your eyes and to concentrate on the way light is falling on things and people around you.
And whatever is bath under a great light will become your subject…
When you are used to see a landscape, it changes drastically according the sky scenario. Nikon D5500 ISO100 1/2000s with 18-140 mm f/3.5-5.6 @ 18 mm f/5.6Even in a darker area, you need different sources of light for shaping the scenery. Lumix GM5 ISO400 1/25s with 20 mm f/1.7 @ f/2.8
Here are the 10 most asked question for shooting fireworks, and I am answering to all of them!
By Franc Peret
During my Essential Photography course, which duration is only 25 hours, I cannot cover every aspect of photography in detail.
Light and Colors
However, anytime, I am having specific question from a student, I do take the time to explain the in and out of any special use of the camera.
Nikon D750 = Manual Mode = ISO400 1/3s -0.3 EV with 35 mm f/1.4 @ f/5.6Panasonic GM5 = Manual Mode = ISO200 0.6 s + 25 mm f/1.4 @ f/2.5
One of the topic that often come to the discussion is firework. And it is easy to understand its attraction to photography students.
3 Good reasons to give it a try
First, for a person dedicated to light and colors, a firework show is just magnificent to watch.
Second, This is happening at night, when most of the time people do not take their camera out and this is a very special experience to try.
Third, this subject seems very challenging to shoot as the illumination, which is hard to anticipate, does not last long.
Overall, there is plenty of reasons to give it a try for a photographer, but how to make it a successful experience?
Here are the most often asked question, answered with my tips and the way I am dealing with this subject.
1 – Do I need a tripod?
Yes and no. Tripod can be useful if you are shooting the firework AND the environment (such as a enlighten city landscape). Then, it is important to keep the camera steady as you want to get the background sharp as well.
However, if the main source of light of the location is the firework itself, you can shoot handheld, even with a long pose, as the explosion behave like a flash and the environment is going to be light up only a very short fraction of second and not during your complete shutter time.
2 – Do I need to shoot in manual mode?
If you get a bright background, It is possible to shoot in semi-auto mode (Aperture priority) with some exposure compensation to force the image to get darker(such as -2 or so), however I personally use manual mode, playing around the Aperture and the shutter speed to grab all the color of the firework and to create some special effect with long pause.
3 – Do I need a fast lens?
You do not need a lens with a big Aperture (such as f/1.8 or so) as you are shooting a very bright source of light and by using a wide Aperture, you will take the risk to overexpose the image and therefore, you will get no colors to see. Most of the time, my lens is set to f/4 or f/8 which is a good news as any average zoom will get that Aperture.
4 – Do I need a fast Shutter speed?
All depends what you want to achieve, Get a very sharp view of the explosion or to give time to the fire and colors to spread around to fill up more of the sky. Best is to constantly play around with shutter speed from 1/30s to more than 3s.
Nikon D750 = Manual Mode = ISO200 1/5s -0.3 EV with 35 mm f/1.4 @ f/8
5 – Do I need to increase the ISO a lot?
Best is to keep the ISO low as raising it will bring more noise to the shot, especially in the dark part of the shot (the sky). Also, a higher ISO means less details, less dynamic range and less colors. I usually try to stay as low as ISO 200 or ISO 800.
6 – Do I need to be perfectly stable?
No, as firework is a very good subject to paint with light and by combining a long shutter pause with some camera shake, you can achieve very subliminal results.
7 – What lens should I use?
Best is to start with your usual zoom as one problem with firework is to know where exactly things are going to happen. By starting with the wide side of the zoom, you get more chance to grab the show and after you are more confident to guess where the following blow of light will occur, you can zoom in more and more to get some interesting close up.
8 – Should I use manual focus or auto-focus?
You cannot rely on your auto-focus if you point your camera straight to the sky as there is nothing to focus on.
Best, is to pick up something as near as possible to the explosion (such as a tree or a building) and to preset your focus there with auto-focus. You can lock this by half-pressing the shutter button while waiting for the explosion or you can switch your camera to manual mode.
If you do so, be very sure to NOT turn the focus ring after as your focus point will not be well preset anymore.
Some camera gets a back button you can use to force your camera to focus and lock it as soon as you stop to press this button. This feature can be useful here, as you need to preset your focus and keep it as is.
9 – When should I press the shutter button?
As often as possible, even you are seeing nothing coming yet. When the sound of the firework is coming to your hear or when your eyes are seeing the light, it is almost too late to shoot. You have to be ready, and listen to the starting explosion which is launching the rocket in the sky.
Also, by using a long pause (slow shutter speed), you get much more chance to grab something as your sensor is open to the show for a longer period of time.
Nikon D750 ISO200 1/5s -0.3 EV with 35 mm f/1.4 @ f/5.6
10 – Where should I position myself?
First try to be out of the crowd to not get pushed around. Second, find a higher position to not get other people head, hands or smartphone in your framing. Sometime, it is good to insert some viewers in the shot to give a sense of scale and to create an atmosphere, but for a first experiment, better to keep it simple…
I hope all of this was useful.
If you are having more questions or if you are in need of more explanation, drop me an email.
I am used to divide my Essential Photography course in three steps. First, providing essential technical knowledge. Second, explaining essential composition rules. Last but not least, developing student’s conceptual mind. Here is how it works. By Franc Peret
Taking successful pictures is both a simple task and a complicated one.
Simple, because the process involved is almost always the same and quit easy to explain and remember, step by step:
1 – Set the right exposure
2 – Focus on the subject.
3 – Be ready to grab the right moment (positioning or facial expression for example)
4 – Concentrate on your personal creative decision in term of framing, assembling elements (composition), and depth of field.
“Yammi” (Lumix G85 ISO 100 1/100s + 14-140 mm f/3.5-5.6 @ 17 mm f/4.5) Being patient and steady while waiting for the right moment to shoot help to become discreet and out of sight of the subject, even you are next to her.“Ice on lips” (Lumix G85 ISO 400 1/40s + 25mm f/1.4 @ f/1.4) Once the essential set up of the camera is done right, most important is to not miss the moment!
Not that simple
The fact that you often have to solve those 4 steps in less than a second is the complicated part of photography.
Getting the picture right, as often as possible, is possible with training…
More you are going to shoot, better the chance to make the right decision on time.
“Reflective street” (Lumix G85 ISO 100 1/80s -0.7 + 14-140 mm f/3.5-5.6 @ 14 mm f/8) Searching for interesting lighting and reflective surface is a good start to get out of routine.“Square everywhere” (Nikon D750 ISO 800 1/180s + 24-120 mm f/4 @ 120 mm f/4.8) Step by step you should switch from funny street snapshot to more personal subject and sophisticated composition
Developing a vision
Once you are used to get good results, you have to challenge yourself a little more to add meanings, drama, sparks or personality to your shots.
How to get this?
While pressing the shutter button, you should already get a clear concept in mind, a vision or a directive line to be able to bring together a meaningful series of shots to tell a complete story (journalistic approach) or to express a specific mood (“artistic” approach).
“Quiet Butterfly” (Lumix G85 ISO 200 1/400s + 14-140 mm f/3.5-5.6 @ 140 mm f/5.6) … While others needs quicker reaction before they are gone…“Lion Cloud”. (Nikon D750 ISO 100 1/80s +28 mm f/3.5 @ f/8) Some subjects allow several minutes to be detected and shot…
Fine tuning
This conceptual mind will also, later on, help you to process your image on computer in the right direction , the one you had initially chosen.
“Followed by her shadow” (Lumix G85 ISO 100 1/200s + 14-140 mm f/3.5-5.6 @ 14 mm f/6.7) Under such a hard source of light, he choice was obvious here, composing the shot with the subject and her shadow for a more 3D visual.“Like a mirror” (Lumix G85 ISO 100 1/200s + 14-140 mm f/3.5-5.6 @ 30 mm f/5.6) My little girl is already a little lady, looking at herself in any reflective surface. I was ready for this one!
Some camera brand (such as Olympus or Fujifilm), with great color science, are better than others to delivery very satisfying results out of the box (jpg file), but most of the time, you will be able to improve the result by working on raw files.
All depends on the final use of the picture, such as quick share on social network (jpg are enough) or print for exhibition (better to go raw).
“Electric Birds 2” (Lumix G85 ISO 200 1/1320s + 14-140 mm f/3.5-5.6 @ 14 mm f/6.7). This approach brings in more options and feed imagination but also challenge the original concept behind any creative choice. It is important to never go “too far” and the limit is a personal choice.“Electric Birds” (Lumix G85 ISO 200 1/160s + 14-140 mm f/3.5-5.6 @ 102 mm f/6.3). The exact same subject can be shot with so many different point of view and post treatment, such as vintage look or dramatic B&W.
No faking here!
“Electric Birds 3” (Lumix G85 ISO 200 1/400s + 14-140 mm f/3.5-5.6 @ 140 mm f/6.3) Later in the day, when the sky is all blue and the source of light is not behind the subject anymore, best is to keep it in color.
The aim of Post production (“Photoshoping”) is indispensable to extract the optimum “juice” out of your work:
To get back the details you had seen with your eyes that seems gone on the jpg, to reproduce the right colors, to emphasize some parts of the shot or to improve the visibility of important elements by fine tuning the exposure of your raw image.
Post processing extra value
Of course, processing on computer is time consuming, and a potential painful experience for novices, but it is a very useful way to progress and to keep progressing forever.
Processing the image is a way to think of and judge what you had done with each subject, to discover some mistakes or imprecision, some stuff you should had done better or different to get a better result or more options out of the box.
“Cat rest” (Lumix G85 ISO 200 1/1500s + 14-140 mm f/3.5-5.6 @ 177 mm f/6.3) When, the light is great and an interesting subject is there waiting for you to shoot, there is not much things to think about prior to press the trigger.
Lasting passion
It also helps to emphasize a conceptual approach of photography, the best way to never get bored of it.
I am shooting for a living since 1986 and I am still not tired of it.
“Pollen Hunt” (Lumix GM5 ISO200 1/1600s + 150mm f/2.8 @ f/4) Lens choice matters on some specific subject needing both speed and short minimal focus distance.“From the Past” (Lumix G85 ISO 100 1/800s + 14-140 mm f/3.5-5.6 @ 140 mm f/8) Longer lenses compress the perspective, extract details from the environment and keep lines straights.
More I know about photography, more I am excited about it, as I can measure the progress I still have to do to reach fulfillment.
Visual Samples
To illustrate my words, find here a series of personal shots (no job assignment here) with detailed captions on the three parts: essential settings, composition choices and conceptualization.
” Too young for her first ride” (Lumix G85 ISO 200 1/1000s + 14-140 mm f/3.5-5.6 @ 21 mm f/5.6) For most of the lively shots of kids, it is important to quickly find a point of view with the less disturbing background to keep viewer attention to the main action.“Blue Crown″ (Lumix G85 ISO 200 1/1640s + 14-140 mm f/3.5-5.6 @ 24 mm f/5.6) Color combination is a basic of composition to associate a subject to an interesting background.
I hope that all of this will be useful to my readers.
If you are having questions or if you are in need of explanation, do not hesitate to drop me an email!
“Ice on lips” (Lumix G85 ISO 400 1/40s + 25mm f/1.4 @ f/1.4) Once the essential set up of the camera is done right, most important is to not miss the moment!“Lion Cloud”. (Nikon D750 ISO 100 1/80s +28 mm f/3.5 @ f/8) Some subjects allow several minutes to be detected and shot…“Followed by her shadow” (Lumix G85 ISO 100 1/200s + 14-140 mm f/3.5-5.6 @ 14 mm f/6.7) Under such a hard source of light, he choice was obvious here, composing the shot with the subject and her shadow for a more 3D visual.“Electric Birds 2” (Lumix G85 ISO 200 1/1320s + 14-140 mm f/3.5-5.6 @ 14 mm f/6.7). This approach brings in more options and feed imagination but also challenge the original concept behind any creative choice. It is important to never go “too far” and the limit is a personal choice.“Electric Birds” (Lumix G85 ISO 200 1/160s + 14-140 mm f/3.5-5.6 @ 102 mm f/6.3). The exact same subject can be shot with so many different point of view and post treatment, such as vintage look or dramatic B&W.“From the Past” (Lumix G85 ISO 100 1/800s + 14-140 mm f/3.5-5.6 @ 140 mm f/8) Longer lenses compress the perspective, extract details from the environment and keep lines straights.“Reflective street” (Lumix G85 ISO 100 1/80s -0.7 + 14-140 mm f/3.5-5.6 @ 14 mm f/8) Searching for interesting lighting and reflective surface is a good start to get out of routine.
Many amateur photographer think that to achieve a black and white picture they just need to get rid of the color of a regular shot. Nothing could be more wrong than this belief. Here is why…
By Franc Peret
In my teaching, I always say to my students that Black and White pictures are “dangerous”, Which means something potentially going against their progress.
Why?
THE WRONG B&W TRICK
Because many people are using that trick to make their “so so” pictures in color, suddenly look more “artistic” in Black and White, as B&W print is vastly associated, in many people’s mind, as artwork.
Shooting black and white means seeing things that might be not attractive in colors but appealing in shade of grey with lines, shape and structure.High contrast scene are the way to go to start to work in B&W, as the strong shape of the shadows are going to compensate the lack of colors.
And some easily pleased people are enjoying the trick very much, without knowing they are going against their own progress in general photography that way.
Using B&W as a cure to compensate a weak composition in color is not the best way to face the problem, finding the solution and improving framing skills.
By using a Yellow filter in my B&W post processing, I did a double action: brightening up the barrier while darkening the sky a lot. I also reinforced the contrast to give more strength to the shadows in the foreground.The diverse structures (barrier, steps, wall, stadium…) the strong shadow and the presence of the 2 opposite colors (yellow and blue) attracted my B&W vision.
Also, with that misunderstanding in mind, those photographer are certainly not going to learn how to shoot interesting Black and White pictures, as well. This is a dead end for creativity.
FILM TIME
Somehow, Black and White is too attractive.
For many people, B&W looks more “cool” than color.
Street vendors in Winter shot against the light to emphasize the separation between elements and to fill up empty space with shadows. Panasonic GM-5 ISO200 1/320s, 12-32mm f/3.5-f/5.6 @ 13mm f5.6
This is due to the fact that, back to film time, Black & White negative film was the unique post processing accessible to everyone, technically and economically, especially to independent artists.
A laboratory was easily set in the bathroom or the kitchen with few key equipment, accessories and chemicals.
On the B&W shot, human presence becomes more unique and important as the rest of the image is filled with common element, rectilinear structures which are not differentiated by their colors anymore. It is like pure life (a mother with her baby) versus a globally dehumanized environment.Another example where color and B&W are working fine but in a different way. The color shot emphasize the separation of the image in 3 layers surrounding the main subject: the black shadow, the yellow fence and the white building with the blue sky.
This was far to be the case with color film, and back to 1986, I had only one friend, a famous wedding photographer near Paris, who had his professional color lab at home.
It was a huge and very costly installation, needing bunch of preset, test, set up and maintenance to deliver the right result. And, worst of all, the chemical’s smell was constantly allover the place…
Hard light creates sharp shadows, usually a difficult combination for portrait due to too strong contrast, but it suits B&W very well.
Color lab were scaled for commercial use, not for personal expression.
BEING AN ARTIST
Therefore, for decades, many photographers expressed themselves in Black and White as they could afford its treatment and manipulation.
On the color shot, blue is dominant as everything is “paint ” in that color.On the black and white version, lines and patterns with sharp contrast from the tree branches and the palissade are taking other as color is not part of the message anymore.
Exhibiting their printed work, they were able to make the difference compare to amateur by improving a lot the quality of their shot by working precisely in the darkroom, the ancestor of Photoshop.
In Black and white, structure and metallic feel is taking over life. For example, we notice more the wet ground and the straight patterns (doors, broom…). The lady seems to be part of the surrounding (absorbed) like a cosmonaut or a cyborg at the gate of her spaceship.This picture of the old lady sleeping in a garbage container is working very well in color too as red and blue are the only two main dominant colors related to the lady’s occupation (tools and apron). The color in the center of the image reinforce the cold and lifeless feel of her surrounding.
Brightness, darkness, contrast, grain, blurriness, re-framing, cropping, erasing element were all at hand for the artist to get much more dramatic and impressive shots than average Joe.
DIGITAL TIME
Nowadays, with digital pictures, too many photographer are taking it easy and consider B&W as an easy cure to their far to be perfect color shots.
Marion on the bike. The most important common point between B&W and color shot is quality of light. Good lighting means more potential for a good shot.
Instead of working harder and more efficiently on their composition, they prefer to get rid of colors when the diverse elements in their image get too confusing: with too many tints and shape badly mixed together.
Give me five. The alternance of highlight and shadows are reinforced by the B&W treatment. Important is to get the main subject under a good lighting.Shooting against a strong light with a frame filled with reflective surfaces and dark silhouette creates powerful structure which does not need color anymore.
And they wrongly think that the job is done that way.
Somehow, this statement sounds like it is easier to achieve a successful B&W shot than a color one.
Somehow it is true, as you do not need to worry about marrying colors together, but it is not that simple.
All depends on the skill of the photographer.
BACK TO BASIC OF COMPOSITION
Hanging clothes are also great subject for both B&W or color shots.Street Life in Shanghai are offering very nice opportunities to detect B&W subject, such as those reflective windows and electric.lines.
To build an interesting shot, a photographer needs to put elements together with a certain sens of harmony or conflict.
And color is an added value to light, shadow, contrast, shape, lines, patterns and motion.
Happy mom and her kid in before the fence. Recipe is the same for portrait in color or B&W. Best is to use the sun as a kick light and to get the subject standing on a reflective surface to fill up the shadow.Kids behind the fence. I was attracted by 2 common point: 1- the round face of the kid and the round shape of the air conditioner fan on top of him. 2 – His straight and symmetric posture compare to the straight lines (tube, pipe, fence, window, shadows) surrounding him.
If the photographer knows what he is doing, he is going to play a lot with colors to accentuate his subject, his mood or his concept.
A pure amateur without much technique is going to suffer with this overdose of elements and option, and being overwhelmed by it, he might be happy to get rid of colors to reduce his amount of decision making to achieve something going well together.
Playground on grass. Black and White composition needs details with loads of things in focus which imply a rigorous placement of every element in the frame.
This is a reductive approach which is not helping personal progress.
At the opposite, the professional photographer, while switching from color shooting to black and white shooting, might feel at first that something is missing in his usual creative arsenal: colors.
Written text and reflective surface are very interesting subject in B&W as well.Lines, shadows and reflection are very powerful creative tools.
Therefore, he is going to work harder on his composition to compensate the lack of colors with more intense contrast, details, lines, shape, patterns and motion.
SEEING EVERYTHING IN B&W
As you can understand, at this stage, I make it clear that creating a Black and white shot means SEEING black and white in your head and SHOOTING as you imagine it.
This B&W portrait in subway emphasize people connection by holding the same aluminium pole.Silhouette are working very well in B&W creating a cut out effect with very sharp details (hair style).
It means being able to see the scene in front of you not in colors but in shade of grey, from black to white.
With film camera and DSLR, this vision is quit difficult to achieve, as the viewfinder is showing the scene as it is, and lots of experience is needed to be able to predict what will be the B&W result out of the colorful scene you are framing.
Fisherman in Shanghai Century Park. Path way (dam), lake shape and man posture altogether create motion in the shot even nothing much is happening.
According the post processing (filtering), red, yellow, green and blue element in the shot are going to appear completely different (huge luminescence difference) in monochrome.
COMPOSITION TOOLS
Key point in Black and White shooting are still contrast (highlight and shadow), shape, lines, patterns and motion.
First of all, higher contrast scene are helping a lot as they emphasize all those elements, taking over any notion of color.
Motion can be physical movement, another way of creating powerful lines.A surveillance camera is spot on in focus while the pattern in the background provide a feel of space and perspective. People are secondary element under this oppressive structure.
The alternate of highlight and shadow helps to cut out the image, to split the different elements and to create a hierarchy among them.
An old bed spring used as a fence is a great source of patterns.Modern city landscape are filled with lines, shape and loads of interesting element in B&W.
Contrast becomes as powerful as focus point to determinate the main subject and most of the time, it is a very good idea to close down the Aperture to get more depth of field and to grab sharper details in a B&W shot.
Pigeon House in Shanghai Century Park. Some material such as leather, rusted iron and wood are gold mine for textured pictures.
Shape, lines and pattern are the other creative tools that you are looking for in a B&W shots to render a more dramatic (emotional) feel.
Facing a strong sun, the portrait works well in B&W especially with a wool hat which offers lots of texture and details.Under soft light, I still prefer color pictures, with a pastel feel to it. Skin is so beautifully rendered that way.
Motion is not only about physical movement (walking people, running kids, passing by bicycle…), it is also a feel of dynamic you create with pattern (repeated element such as square windows on a building or branches of a tree), swirling shape (such as cloud in the sky) and lines (often present in city or natural landscape).
Shanghai Century Park. Winter landscape are among the best topic for Black and white photography.
Actually, winter is the best season of the year to learn how to shoot in B&W as the nature is lifeless and colorless (full of lines as no leaves on branches) while the lower sun is offering plenty of contrast and very long shadows.
The Panasonic allows me to see the world in B&W with its electronic view finder and I can also switch lenses. Here I mounted my lightest portrait lens: Olympus 45mm f/1.8My favorite B&W shooting companion, the tiny Panasonic GM-5 next to my working tool (Nikon D750).
ELECTRONIC VIEWFINDER
Picnic in Century Park. Depth of field is a welcome addition to most of B&W shot to reinforce texture (mother shirt, grass and trees) an important element of composition.
Thanks to new technology, mirror-less cameras using electronic viewfinders offer the possibility to frame and see any scene in Black and White through the lens.
And this is amazingly valuable to get the shot as it should be in term of framing, composition and setting.
I personally do use different mirror-less cameras such as Nikon1, Panasonic GH4 and Panasonic GM-5.
I love those cameras, as they are compact and their lens line-up is very diverse and of great quality.
It is a very interesting addition to my usual Nikon DSLR System.
Anyway, pictures are telling more than words and I think I had wrote enough here.
To complete the subject, please, get a look at some of my Black and White samples, all fully explained with caption.
V-Log and LUT offer new solution for video recording with a flat image at start which can be tweak in post processing to match the look you are after.
By Franc Peret
Shooting Video without an external recorder is like shooting jpg only in photography.
No raw file are available for post processing to extract all the recorded information by the sensor.
The shooting set up with multi cameras. GH4 is on the foreground.
Therefore, I avoid to record a saturated and contrasted image straight out of the camera while filming.
Having a flatter and almost lifeless image allows much more manipulation of the video in post production.
Same frame after post treatment.Original Frame out of the camera
Many photographer are not aware about this and it is true that the original image in V-log looks so bad on the camera screen that it is hard to believe that anything good can be extracted from it.
Another shot of singer Dantes after post treatment.
Here is a good example from my latest Music Video, with the original frame recorded with the flattest color profile from my Panasonic Lumix GH4 and the final result after 1 layer applied in Photoshop.
LUT and post processing are there to achieve a certain look, a certain mood and this has to be well thought form the early stage of writing a script and lighting the scene.
I can then export that treatment as a LUT file to correct the whole video in my edit line (Premiere Pro CC).
Impressive?
You can watch the final result (The Music Video) here: Shooting at Home
I do not advise my Essential Photography Class students to use the Manual setting in an uncontrolled environment, but sometimes I am personally forced to do so and I am explaining here how to handle such situation.
By Franc Peret
I am teaching to my Essential Photography Class students how to precisely and quickly control their camera in semi-automatic Aperture priority mode as it is the most efficient way to get it right, in real life photography.
Nikon1 V1 and Cine Nikkor 10mm f1.8. With Sign and Shadows. Using a wide lens imposes to fill up the frame with interesting things (textures, Shape and Lines).Nikon1 V1 and Cine Nikkor 10mm f1.8. With Bicycle.
On my own, as I like to experiment a lot, I am often working with a strange combination of cameras and lenses linked by an adapter. And sometimes the 2 entities refuse to communicate with each other as they were not supposed to be connected.
Public Phone in the street. Soon to disappear… Nikon1 with 10mm f1.8 (equivalent to 27mm on a FX camera or 18mm on a DX)
Then, I am on my own, forced to use a full manual set up for both focus and exposure.
Last summer, I spent 2 months with such a strange combination. I adapted a collection of very old Cine-Nikkor C-mount lenses on my Nikon1 V1.
Therefore, for every shot, I had to guess the exposure and getting confirmation after the shot by checking the histogram to know if I were right or wrong.
One tip I am teaching to my students is this:
If you can see blue sky over your head and you are shooting someone under sunlight, the exposure value is matching (@ISO100 – f8 – 1/250s) or (@ISO100 – f5.6 – 1/500s) or any other combination at the same EV14.
For example, I might use (@ISO100 – f2 – 1/4000s) for portrait or for freezing high-speed action.
Having a base line to start with
EV14 is there in an average situation and in an average location.
In Australia Outback (no air pollution and lots of reflection from the sand), in The Alps, Himalaya, Tibet or Xinjiang high altitude (closer to the source of light) this value can be double (EV15) or even more.
That means the combination will be (@ISO100 – f8 – 1/500s)
In average situation, like in French Burgundy, I preset my camera to the EV14 value under a blue sky (@ISO100 – f5.6 – 1/500s) for a common subject.
If my subject is under the shadow, I know the EV is dropping at least by 2 stops so I will reduce my speed by 4 (@ISO100, f5.6, 1/125s) or open up my aperture by 2 stops (@ISO100 f2.8 1/500s) to compensate.
Taking care of parameters
My decision will depend on the fact I need or not speed to freeze motion or depth of field to get more things in focus.
This is a Quick and approximate decision without taking my eye out of the viewfinder. Shadow will be darker if the subject is not surrounded by reflective surfaces (such as a white wall).
And I will adapt my decision according to this parameter.
With the Nikon1 and my C-mount lenses, the Aperture ring is on the lens, and the shutter speed is controlled by a button next to my thumb.
Very handy.
Experience helps indoor
Now let’s imagine my subject is moving into a house with windows and white wall.
Outside is sunny and I know that the EV will be around 8 to 16 times slower (3 or 4 stops) indoor…
This is an approximation but if you are used to your environment, you should be able to guess quite accurately after few test shots. This will help you later on to get closer to the truth in few steps.
Most of the time, I got it right at first shot.
Variation will depend on reflection around (white wall or trees) the subject.
Working with human brain
Of course, during an overcast day, I have to do more test and try as I am having no reference anymore. Not every grey curtain or clouds in the sky deliver the same exposure on earth! It can be dramatically different from one day to another, one hour to another.
Step by step, knowing my environment, and having my eyes and brain used to communicate each other in this “guess what is the exposure here” game, I became more and more accurate in guessing the exposure of the place I were shooting my subject.
Nikon1 V1 @ ISO100, f0.95, 1/13s. I just stabilized myself with a tree, and waited my subject to be steady. My advice: Always immediately check the result you get to see if you really need to increase the ISO or not.Nikon1 V1 with an Angenieux 25mm f0.95 lens. Manual Focus and Manual exposure as this is a 30 years old lens without any “smart” contact with the camera body. I could increase the ISO a bit, but among the 10 shots I had done half of them are sharp enough so I had no reason to lose quality to raise the speed. Also, keeping a slow speed helped to get longer sparks.
Concerning focus set up, I was used to manual focus when I started my photography career back in 1986, so this didn’t bother me much since the viewfinder of the Nikon 1 is sharp enough for me to hit the focus right even using the f0.95 lens.
Finding the right balance
Manual focusing is like finding the right balance between too far and too close.
Actually, the best way to hit the right focus point is to turn the focus ring until you get your subject sharp in your view finder and then you just turn the focus a bit more until you lose the sharpness.
10mm f1.8 @ f2, Nikon1 @ ISO400, 1/10s
Then you turn your focus ring in the opposite direction until the subject appears perfectly sharp, again.
Cine-Nikkor 10mm f1.8. Shot done at ISO400, f1.8, 1/10s. Harder to shoot when the car is moving but still workable. Camera is still the Nikon1 V1. Manual Exposure, Manual focus, hand held.
To be more precise you can turn a bit more and see if it is better or worst, and then go backward again.
It is long to explain, but very quick to do
Overall, I was so seduced by the result (color, mood, character…) I got with the combination of the Nikon1 and my old lenses, that I left my GH4 and the Lumix lenses at home, despite the lack of any exposure and focus assistance from the Nikon1.
10mm f1.8 @f2. Advantage of small sensor camera is to get enough depth of field even wide open. Nikon1 V1 ISO100, 1/60s.10mm f1.8 @ f8 on Nikon1 @ ISO100. 1/160s
Of course, I would be very happy to get a firmware update or a hack to get the Nikon1 able to work on semi-auto Aperture priority with a dumb adapter.
That would make it even more enjoyable to use.
Just remember that in Photography, nothing is impossible and all is a matter of logic. And, if it is time-consuming and brain tiring to shoot fully manual, it is quite rewarding to be able to achieve the exact shots I had predicted without any assistance.
However, if I were using the exact same combination in the same location with a camera able to work in semi-auto Aperture priority, I might have many more interesting shots, especially of people and things on the move and I would be able to concentrate more on the composition and subject placement by freeing my brain from technical consideration dedicated to the exposure only.