Full Manual Survival
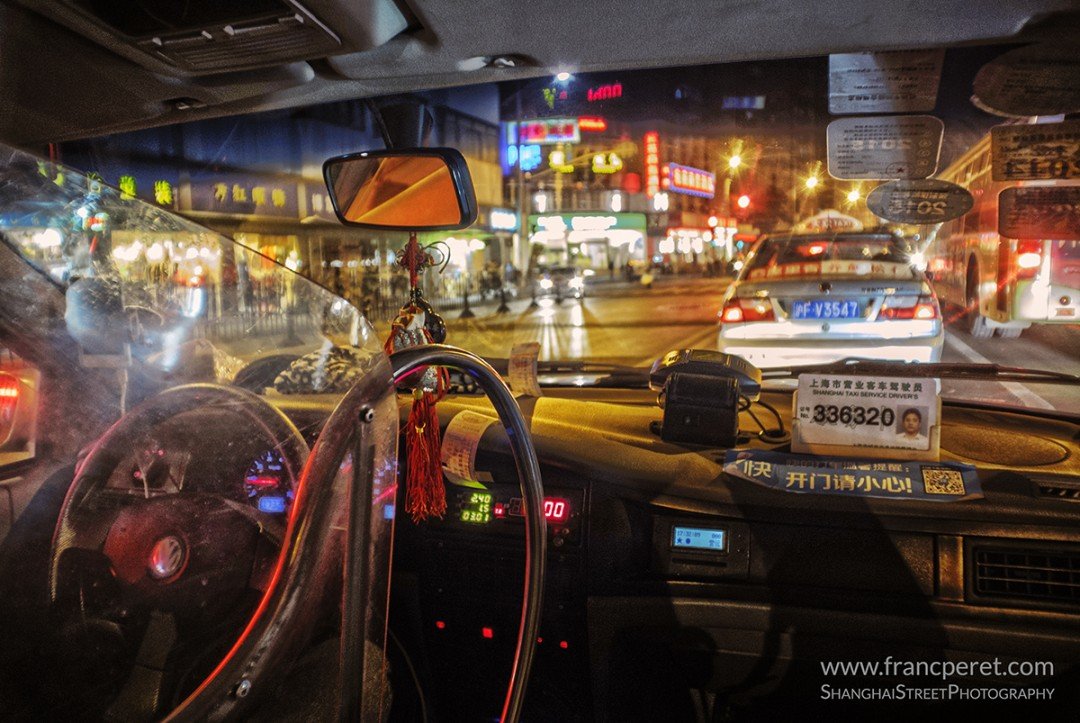
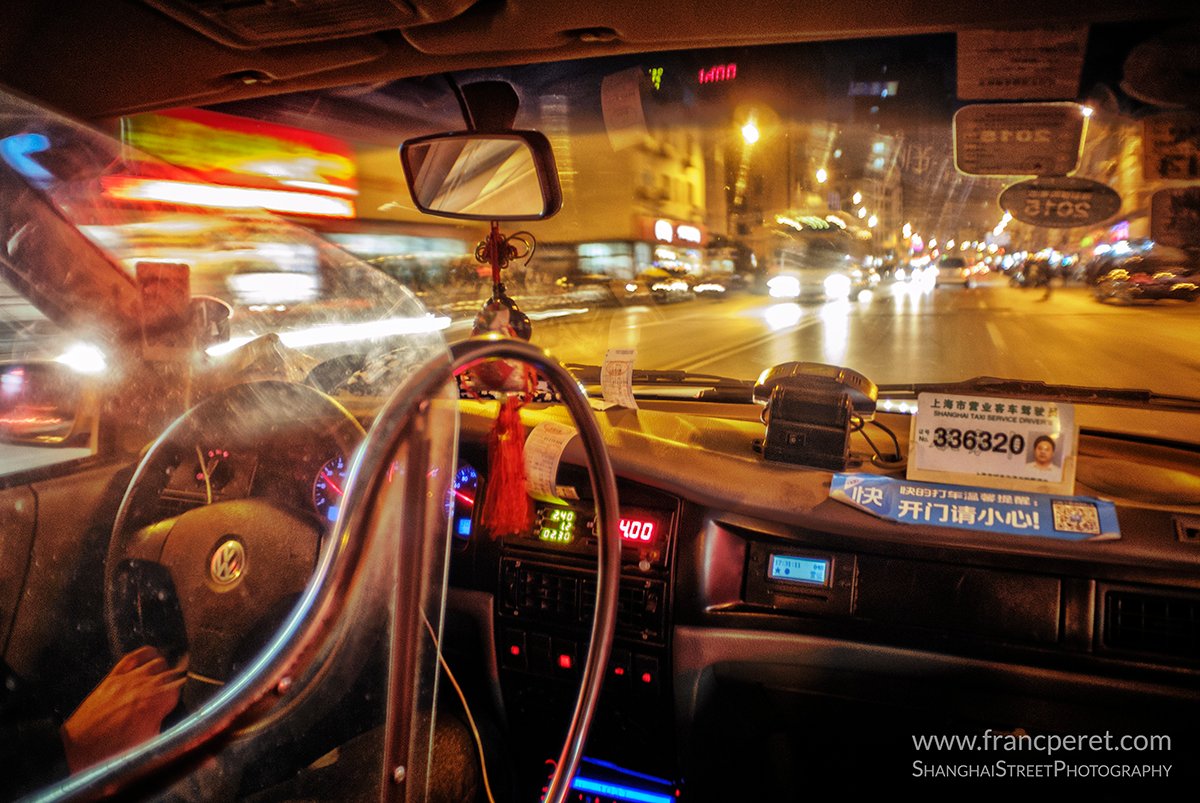
Cine-Nikkor 10mm f1.8. Shot done at ISO400, f1.8, 1/10s. Harder to shoot when the car is moving but still workable. Camera is still the Nikon1 V1. Manual Exposure, Manual focus, hand held.
I do not advise my Essential Photography Class students to use the Manual setting in an uncontrolled environment, but sometimes I am personally forced to do so and I am explaining here how to handle such situation.
By Franc Peret
I am teaching to my Essential Photography Class students how to precisely and quickly control their camera in semi-automatic Aperture priority mode as it is the most efficient way to get it right, in real life photography.

On my own, as I like to experiment a lot, I am often working with a strange combination of cameras and lenses linked by an adapter. And sometimes the 2 entities refuse to communicate with each other as they were not supposed to be connected.

Then, I am on my own, forced to use a full manual set up for both focus and exposure.
Last summer, I spent 2 months with such a strange combination. I adapted a collection of very old Cine-Nikkor C-mount lenses on my Nikon1 V1.
You can see my original post here
Guessing game
Therefore, for every shot, I had to guess the exposure and getting confirmation after the shot by checking the histogram to know if I were right or wrong.
One tip I am teaching to my students is this:
If you can see blue sky over your head and you are shooting someone under sunlight, the exposure value is matching (@ISO100 – f8 – 1/250s) or (@ISO100 – f5.6 – 1/500s) or any other combination at the same EV14.
For example, I might use (@ISO100 – f2 – 1/4000s) for portrait or for freezing high-speed action.
Having a base line to start with
EV14 is there in an average situation and in an average location.
In Australia Outback (no air pollution and lots of reflection from the sand), in The Alps, Himalaya, Tibet or Xinjiang high altitude (closer to the source of light) this value can be double (EV15) or even more.
That means the combination will be (@ISO100 – f8 – 1/500s)
In average situation, like in French Burgundy, I preset my camera to the EV14 value under a blue sky (@ISO100 – f5.6 – 1/500s) for a common subject.
If my subject is under the shadow, I know the EV is dropping at least by 2 stops so I will reduce my speed by 4 (@ISO100, f5.6, 1/125s) or open up my aperture by 2 stops (@ISO100 f2.8 1/500s) to compensate.
Taking care of parameters
My decision will depend on the fact I need or not speed to freeze motion or depth of field to get more things in focus.
This is a Quick and approximate decision without taking my eye out of the viewfinder. Shadow will be darker if the subject is not surrounded by reflective surfaces (such as a white wall).
And I will adapt my decision according to this parameter.
With the Nikon1 and my C-mount lenses, the Aperture ring is on the lens, and the shutter speed is controlled by a button next to my thumb.
Very handy.
Experience helps indoor
Now let’s imagine my subject is moving into a house with windows and white wall.
Outside is sunny and I know that the EV will be around 8 to 16 times slower (3 or 4 stops) indoor…
This is an approximation but if you are used to your environment, you should be able to guess quite accurately after few test shots. This will help you later on to get closer to the truth in few steps.
Most of the time, I got it right at first shot.
Variation will depend on reflection around (white wall or trees) the subject.
Working with human brain
Of course, during an overcast day, I have to do more test and try as I am having no reference anymore. Not every grey curtain or clouds in the sky deliver the same exposure on earth! It can be dramatically different from one day to another, one hour to another.
Step by step, knowing my environment, and having my eyes and brain used to communicate each other in this “guess what is the exposure here” game, I became more and more accurate in guessing the exposure of the place I were shooting my subject.

Concerning focus set up, I was used to manual focus when I started my photography career back in 1986, so this didn’t bother me much since the viewfinder of the Nikon 1 is sharp enough for me to hit the focus right even using the f0.95 lens.
Finding the right balance
Manual focusing is like finding the right balance between too far and too close.
Actually, the best way to hit the right focus point is to turn the focus ring until you get your subject sharp in your view finder and then you just turn the focus a bit more until you lose the sharpness.
Then you turn your focus ring in the opposite direction until the subject appears perfectly sharp, again.
To be more precise you can turn a bit more and see if it is better or worst, and then go backward again.
It is long to explain, but very quick to do
Overall, I was so seduced by the result (color, mood, character…) I got with the combination of the Nikon1 and my old lenses, that I left my GH4 and the Lumix lenses at home, despite the lack of any exposure and focus assistance from the Nikon1.


Of course, I would be very happy to get a firmware update or a hack to get the Nikon1 able to work on semi-auto Aperture priority with a dumb adapter.
That would make it even more enjoyable to use.
Just remember that in Photography, nothing is impossible and all is a matter of logic. And, if it is time-consuming and brain tiring to shoot fully manual, it is quite rewarding to be able to achieve the exact shots I had predicted without any assistance.
However, if I were using the exact same combination in the same location with a camera able to work in semi-auto Aperture priority, I might have many more interesting shots, especially of people and things on the move and I would be able to concentrate more on the composition and subject placement by freeing my brain from technical consideration dedicated to the exposure only.
Franc (Essential Photography Class Teacher)
Former ELC Photography teacher, Franc Peret is teaching Essential Photography Classes, Advanced Photography Workshop and Film Making Classes in Shanghai, for the last 10 years.